Jeremy that is slick
![[:Y:]](./images/smilies/smiley20.gif "Thumbs Up")
| Official Luthiers Forum! http://luthiersforum.com/forum/ |
|
| Shop made jigs http://luthiersforum.com/forum/viewtopic.php?f=10101&t=18766 |
Page 1 of 2 |
| Author: | BobK [ Fri Sep 12, 2008 12:56 pm ] |
| Post subject: | Shop made jigs |
Any one have any shop jigs they would care to share. Me, I'm almost finished with my router table. Just need to put some faces on the drawers and add some mdf panels to my fence. The fence pivots in a hole on the table and the "almost micro" adjustment turnbuckle works very well. It's based on something I saw on Woodweb, although his design had the turnbuckle wedged between the legs of the fence like we use them for spreaders in molds. I thought there would be a lot of slop in the adjustment so I epoxied the turnbuckle to some 1/2" dowel rod. Very little backlash and a full turn of the turnbuckle works out to ~.100" at the router bit, so the resolution is decent. Thinking about making one for my drill press now. Attachment: table (Small).jpg Attachment: fence (Small).jpg Also working on the LINT binding jig that Wes McMillian showed off a few weeks ago http://www.luthiersforum.com/forum/viewtopic.php?f=10101&t=18515&p=262051&hilit=lint#p262051. Everything is from HD or lowes, including the bushings and nylon washers. Very economical to build although I think I went a little overboard and put two bushings at each joint. Attachment: binding (Small).jpg
|
|
| Author: | Jim Mitchell [ Fri Sep 12, 2008 3:42 pm ] |
| Post subject: | Re: Shop made jigs |
Hey Bob, I am one of the new guys and I really don't have anything that I have designed myself. However, I have made quite a few guitar building jigs in the past few months. Most of them are on a blog I have been doing http://www.jimsguitarbuilding.blogspot.com There are links to some and if you need any additional information just let me know.... Hope it helps, Jim |
|
| Author: | BobK [ Sat Sep 13, 2008 7:49 am ] |
| Post subject: | Re: Shop made jigs |
Nice blog Jim. That sinker redwood cutaway is going to be a knockout. |
|
| Author: | Dave Anderson [ Sat Sep 13, 2008 9:43 am ] |
| Post subject: | Re: Shop made jigs |
Nice looking router table Bob. And nice to see you here Jim !! great blog ! Here's an easy to make jig for sanding the volute on the neck.It's good for a lot of other things too, like bridge wings and brace ends... Attachment: SJ-walnut 055 (572 x 428).jpg Attachment: SJ-walnut 054 (572 x 428).jpg
|
|
| Author: | Dave Stewart [ Sat Sep 13, 2008 11:46 am ] |
| Post subject: | Re: Shop made jigs |
...not sure if this is relevant, Attachment: leg vise.jpg but the troji handles thread reminded me.I've used a leg vise on my bench for 20+ years. Not having room to spare in my shop for a free-standing troji, I just use this. A couple of thick foam pads, and a pipe-insulated dowel plugged into the bench allows the body to be clamped as required. The clamp is just a pipe clamp. The leg "gimbles" somewhat, which is good for archtops. Also, I've posted this before, but since we're talking about it. Attachment: body jig 2.jpg I use this jig (my version of Benedettos body-clamping jig) quite a bit. It's fully adjustable for height & through 360 dgrees. Anyway, hope this helps somebody. |
|
| Author: | Jeremy Knight [ Sat Sep 13, 2008 12:11 pm ] |
| Post subject: | Re: Shop made jigs |
Here's a small jig I enjoy. It's a "Double-Layered Tape Dispenser". It takes two rolls of 3/4" masking tape (average 3M tape), and produces a nice and clean strip of double thick tape for binding. I've tried other binding tape from LMI which works good, but I still prefer this a little better. Plus, I can get decent 3M tape on sale for $.99 for a total of $1.98 for the 2 rolls instead of the higher price for binding tape. |
|
| Author: | Rod True [ Sat Sep 13, 2008 12:19 pm ] |
| Post subject: | Re: Shop made jigs |
Jeremy that is slick
|
|
| Author: | peterm [ Sat Sep 13, 2008 12:23 pm ] |
| Post subject: | Re: Shop made jigs |
Jeremy Knight wrote: Here's a small jig I enjoy. It's a "Double-Layered Tape Dispenser". It takes two rolls of 3/4" masking tape (average 3M tape), and produces a nice and clean strip of double thick tape for binding. I've tried other binding tape from LMI which works good, but I still prefer this a little better. Plus, I can get decent 3M tape on sale for $.99 for a total of $1.98 for the 2 rolls instead of the higher price for binding tape. That's indeed a winner! ![[clap]](./images/smilies/smiley32.gif "adulations")
|
|
| Author: | Chris Paulick [ Sat Sep 13, 2008 3:45 pm ] |
| Post subject: | Re: Shop made jigs |
Here's my router table. Not totally finished yet. There is built in dust collection as there is a 4" section that runs down the back of the cabinet that connects to the dust collector with a built in gate. I still have to make a dust collector attachment to the back of the fence that will tie into the built in system. |
|
| Author: | Chris Paulick [ Sat Sep 13, 2008 3:52 pm ] |
| Post subject: | Re: Shop made jigs |
Here is my sanding station that I added a thickness sanding table too. And my gobar deck. The dishes and gobars store on the shelf above . Bob, how's that binding machine working out for you? I'm thinking about one for above my router table. |
|
| Author: | BobK [ Sat Sep 13, 2008 5:42 pm ] |
| Post subject: | Re: Shop made jigs |
Chris, how do you like that Milwaukee router? If that's the 5625, that's what I'm using too. It's a beast, well compared to my old PC 690 anyway. |
|
| Author: | BobK [ Sat Sep 13, 2008 5:42 pm ] |
| Post subject: | Re: Shop made jigs |
Chris, how do you like that Milwaukee router? If that's the 5625, that's what I'm using too. It's a beast, well compared to my old PC 690 anyway. |
|
| Author: | Chris Paulick [ Sat Sep 13, 2008 6:09 pm ] |
| Post subject: | Re: Shop made jigs |
I like it a lot Bob. It sure is a beast. I like the lift also. I read a review where someone said they stripped the threads on the lift screw and gave it a bad review. So I was a bit leary when I got it as the savings of not needing to purchase a lift was one reason I bought it. But from what I can tell is that the guy must have forgotten to unlock the router before trying to use the lift. I have mine running through a foot switch too which I always like to do. I think I made a good choice with the router and would recommend the 5626. |
|
| Author: | WaddyThomson [ Sat Sep 13, 2008 9:14 pm ] |
| Post subject: | Re: Shop made jigs |
You have all seen this, but for gluing braces and backs, I added a top to my solera so I don't have to have a separate deck. No room. Attachment: P1000279 (Large).JPG
|
|
| Author: | Mike OMelia [ Sat Sep 13, 2008 9:34 pm ] |
| Post subject: | Re: Shop made jigs |
Still wondering where you put the luthier. Mike |
|
| Author: | John How [ Sat Sep 13, 2008 10:11 pm ] |
| Post subject: | Re: Shop made jigs |
I use this little laminate router to trim the bindings after installing them. What used to take me an hour or so to scrape, now cleans up in 5 minutes. It is a Ryobi and the router base has been highly modified starting with cutting a good par pf it away and then glueing on a thin piece of plastic sheet to get it up off the top a little. The bit is lower a little at a time until it just skims the top. This requires a steady hand and is probably not for the squeemish but it makes quick work of this job. Here are some pics of the tool and the completed job. Plus a quick sanding with the RO.    
|
|
| Author: | Rod True [ Sat Sep 13, 2008 11:52 pm ] |
| Post subject: | Re: Shop made jigs |
Cool John, Now if you can figure out a way to make that work on the sides I'd buy two of em! |
|
| Author: | Wes McMillian [ Sun Sep 14, 2008 5:36 am ] |
| Post subject: | Re: Shop made jigs |
Hey, good looking binding jig! Here's a couple more. Nothin' fancy, I'm more of a function over form kinda guy. Fretboard taper sled. Just does one taper, but works well and will be the main taper I use. I can always do custom tapers the old-fashioned way or throw together a new taper sled in just a few minutes. 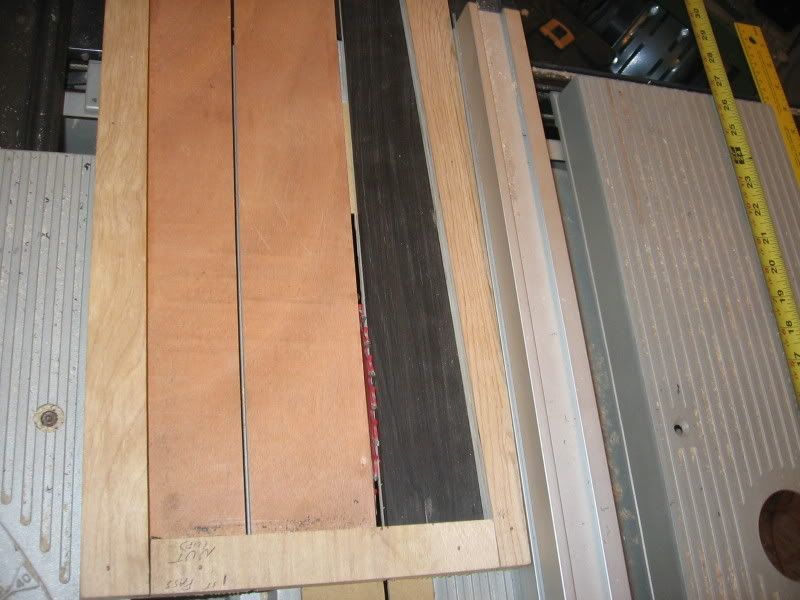 My version of the mini thickness sander. Had to study out the adjustment mechanism. Wound up using two screen door hinges to keep tension on the mess, still need to cut the allthread off and countersink and epoxy the nut. Yes, that's dust and a lot of it. The DC is currently just dedicated to my thickness sander. Once I get a couple of guitars out of the way I intend to properly route my DC system and upgrade the electrical. 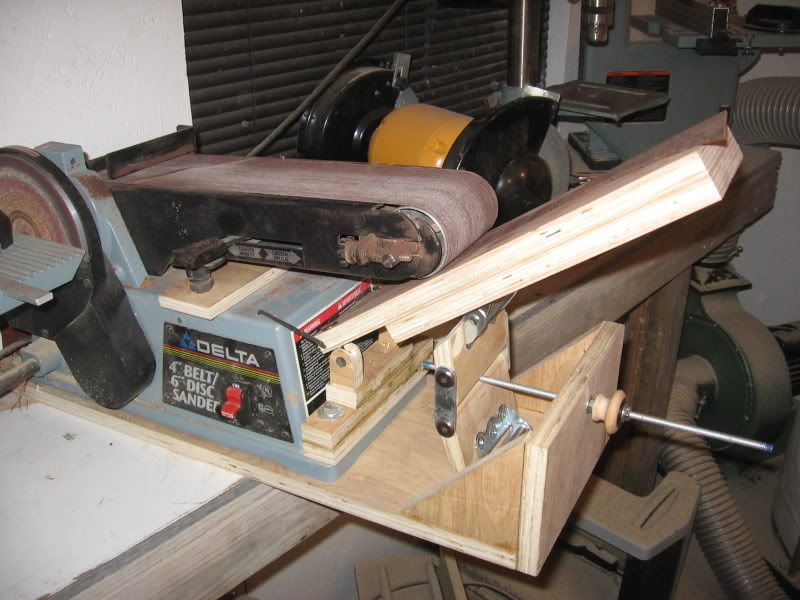 My body holding fixture. I wanted a way to add more tension to the sides of the body once it's locked down, so I added these to the uprights. 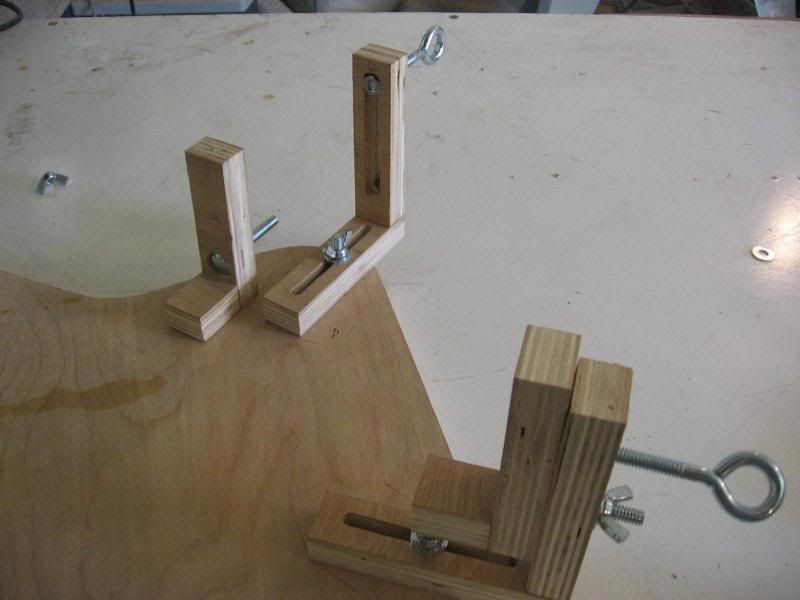 Pretty stable! You can pick up the fixture by the body and it doesn't move. 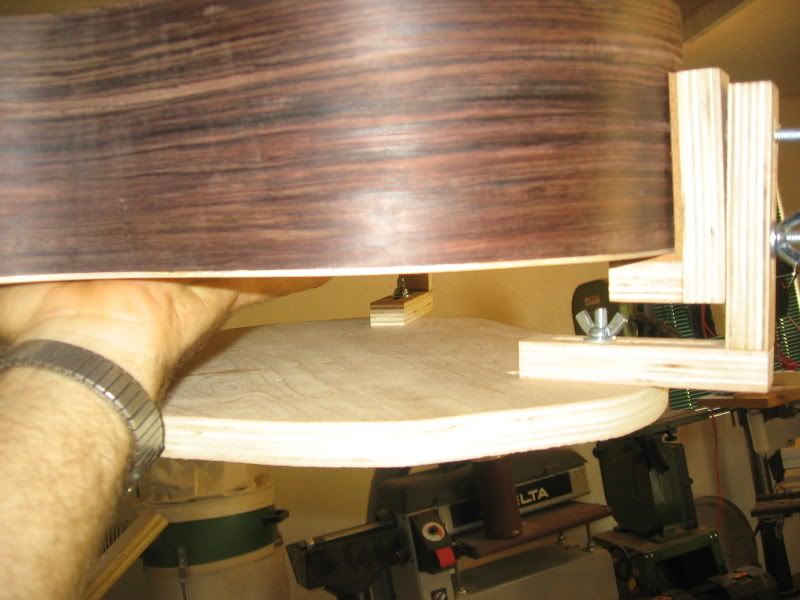 Keeping with the KISS philosophy, here's my fingerboard slotting rig on a dedicated tablesaw. The 2-sided template was cut on a digital endmill, so it's dead-on accurate. 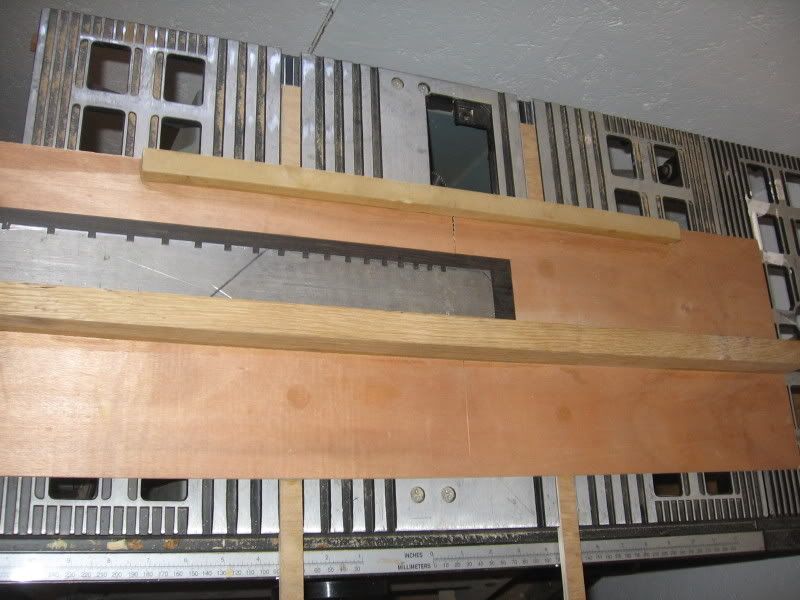 Built my compound radius jig with an extra-long bed. Radius starts at 10" on one end to 20" at the other, allowing you to change the radius simply by where you place the nut on the jig. Here I'm doing a 14"-20" radius. Go to the other extreme and you get a 10"-16" radius. The bed didn't have enough support for the extra length and sagged just a little on it's maiden run, wrecking a fretboard, so I knocked the fence off and flipped it upside down on my router table, which worked fine. I intend to stiffen it up before I use it again... 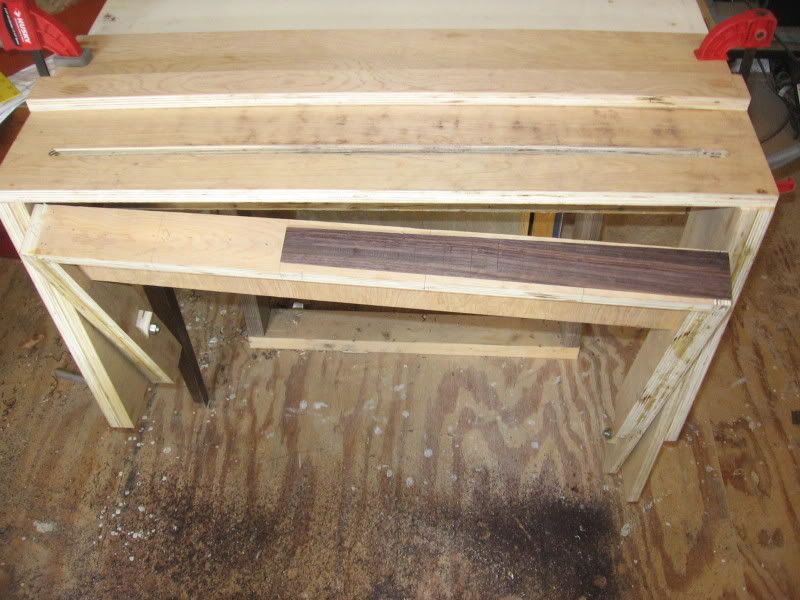 My router is recessed into one end of my 2 1/2" thick melamine-coated laminated work bench, so I have up to 8" of working area on one end. You know, in case I ever need it.  No fancy fence setup, just clamp a straight piece of stock to the bench when I need it. Maybe some day. No fancy fence setup, just clamp a straight piece of stock to the bench when I need it. Maybe some day.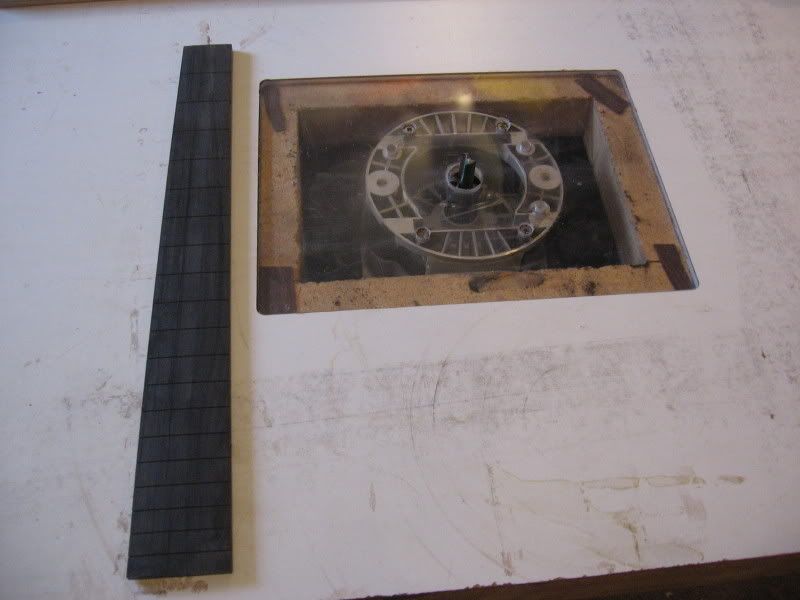 You wanted jigs? Be careful what you ask for! |
|
| Author: | Wes McMillian [ Sun Sep 14, 2008 5:42 am ] |
| Post subject: | Re: Shop made jigs |
Guess I can add one mold version I built that some have shown some interest in. Really stable, but I would cut the rib way down if I were to build another. Keep meaning to cut this one down. Was built on Dave Skowron's design from several years ago on the 13th fret. 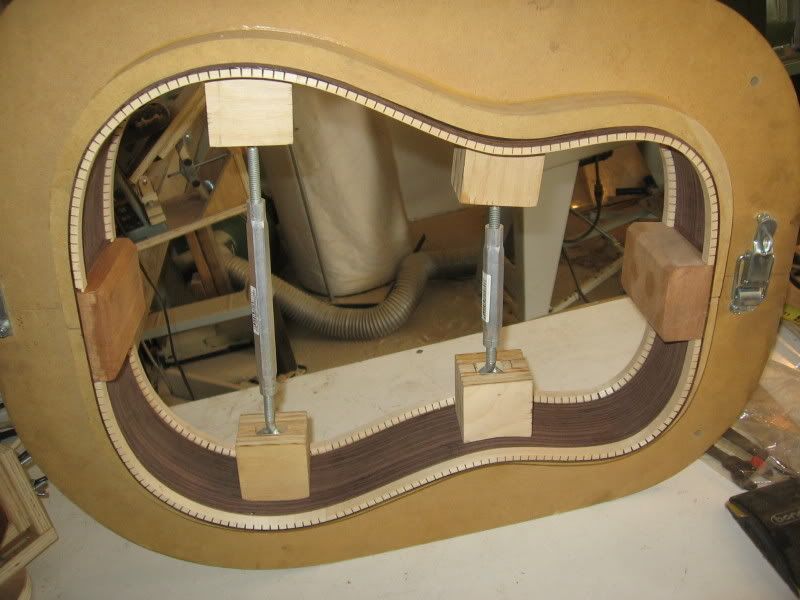 And how I glue wood bindings on. Set up the taper, set the board and bindings in place, and tap in for a tight fit. 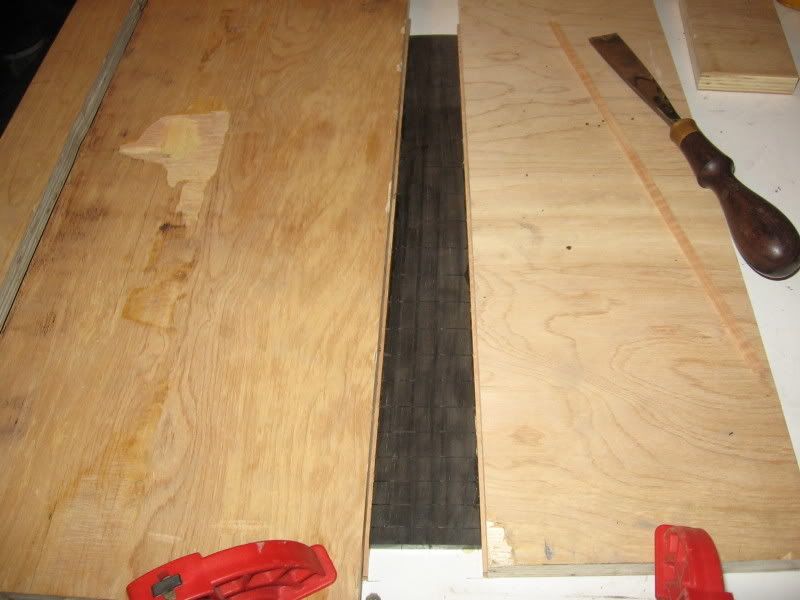 And a shot of my g-bar peninsula, giving access on both sides (or three if you're working on the end). I built a storage cabinet overhead to brace off of. 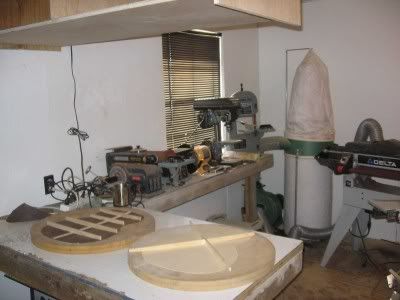
|
|
| Author: | Terence Kennedy [ Tue Sep 16, 2008 5:01 pm ] |
| Post subject: | Re: Shop made jigs |
Probably the most useful thing I've made in the last two years is a copy of Sylvan Wells' instrument vise. It's a million times better than the one I made myself. Holds very well and makes truing up the sides and binding scraping almost fun. Instructions are on his website. Terry 
|
|
| Author: | Arnt Rian [ Tue Sep 16, 2008 5:30 pm ] |
| Post subject: | Re: Shop made jigs |
Terence, I made one too. Thanks, Sylvan! Although you can't really see it in my picture, I didn't use flanges to attach the bar clamps to the bench. Instead I used some long bar clamps (5' or so), drilled holes in two 2"x4"s (that are part of the frame under the bench top, spaced about 24" apart), and let the long bar clamps extend from there. Sorry if the explanation is not terribly clear... Anyways, this allows me to pull the guitar vise out quite a bit, and not be restricted by the bench on one side, should I feel the need to do so. Usually I don't bother as the access is good enough even when the guitar is close to the bench. 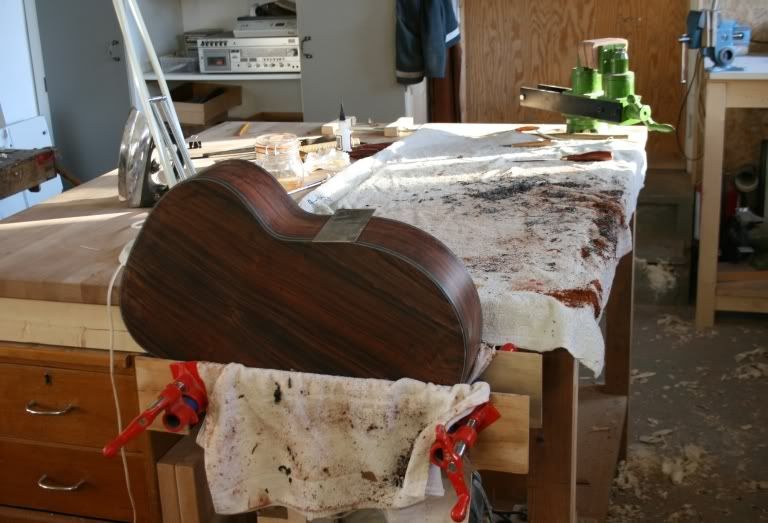
|
|
| Author: | Chris Paulick [ Sun Sep 21, 2008 7:33 am ] |
| Post subject: | Re: Shop made jigs |
This ones just out. viewtopic.php?f=10117&t=18878 |
|
| Author: | Dave Stewart [ Tue Sep 23, 2008 3:33 pm ] |
| Post subject: | Re: Shop made jigs |
Here's another simple jig that I find really handy.....easy to make & to use. Attachment: caliper jig.jpg Route a slot in a piece of scrap, sized for your caliper, then cut out a horseshoe shape symetrically around it. Screw on a "pad" to hold the caliper in place & you're done. To use, place on a flat surface, bottom out the caliper then ZERO IT. Now place over your cutter (router, tablesaw, whatever) & read the depth of cut off the caliper! |
|
| Author: | Chris Paulick [ Tue Sep 23, 2008 3:47 pm ] |
| Post subject: | Re: Shop made jigs |
I've been trying to get around to making one of those. |
|
| Author: | John Hale [ Tue Sep 23, 2008 6:36 pm ] |
| Post subject: | Re: Shop made jigs |
westex93 wrote: My version of the mini thickness sander. Had to study out the adjustment mechanism. Wound up using two screen door hinges to keep tension on the mess, still need to cut the allthread off and countersink and epoxy the nut. Yes, that's dust and a lot of it. The DC is currently just dedicated to my thickness sander. Once I get a couple of guitars out of the way I intend to properly route my DC system and upgrade the electrical. Need to make one of your mini thickness sanders I was just gonna use studding front and back of the hinge how do others do theirs? |
|
| Page 1 of 2 | All times are UTC - 5 hours |
| Powered by phpBB® Forum Software © phpBB Group http://www.phpbb.com/ |
|