Official Luthiers Forum!
http://luthiersforum.com/forum/

Tail Wedge Miter
http://luthiersforum.com/forum/viewtopic.php?f=10101&t=40547
Page 1 of 1

Author:  LarryH [ Sun Jun 02, 2013 8:25 pm ]
Post subject:  Tail Wedge Miter

I had posted a finished guitars and a couple people had said they'd never seen this type of miter for a tail wedge and I was doing a couple today so I thought I'd post a Tutorial on one way to do it.

I'm not under the illusion that I created this design or method but thought I'd try and share a couple ideas with the forum as I've received so much.

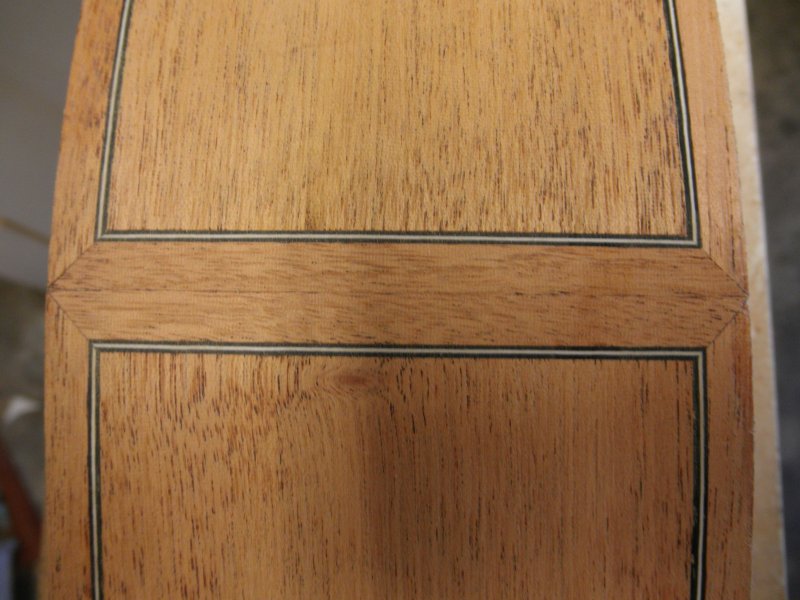
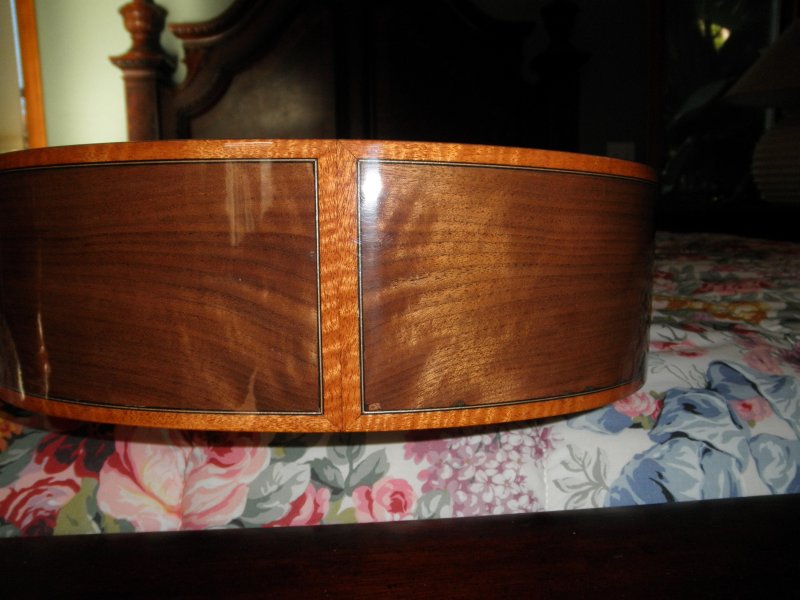
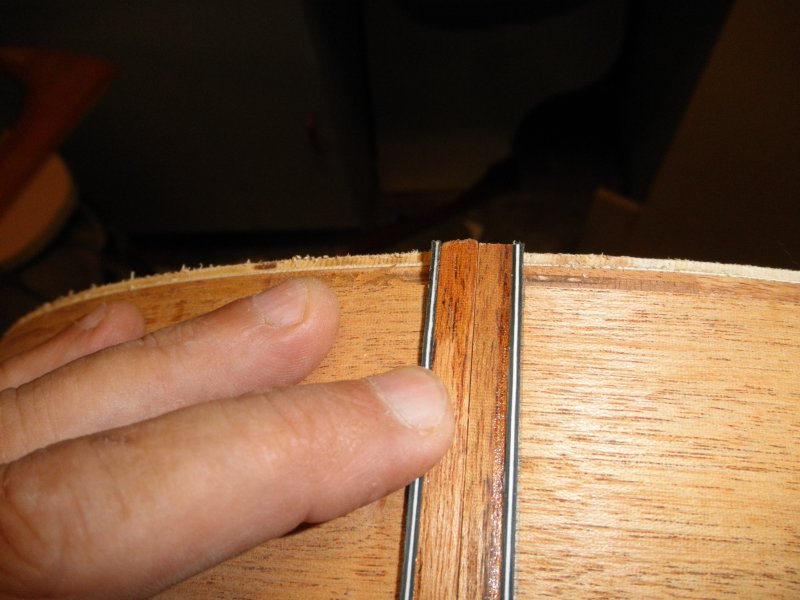
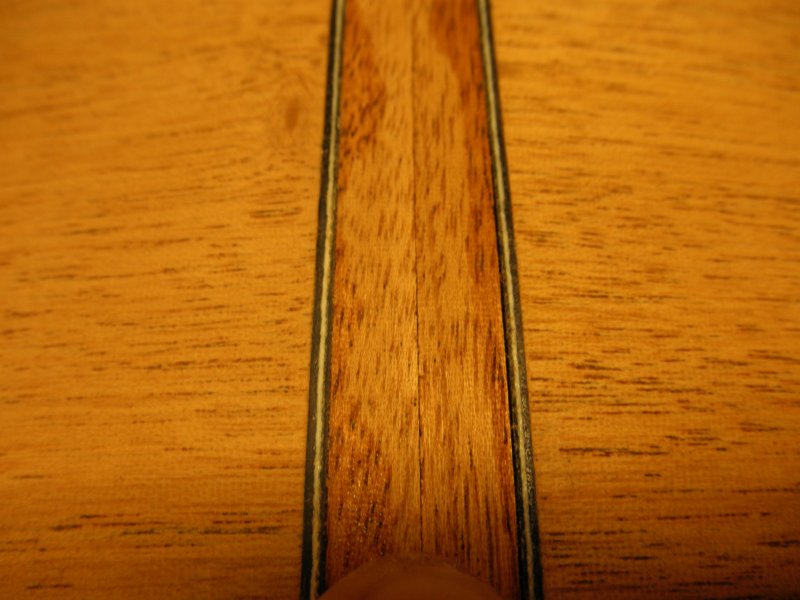
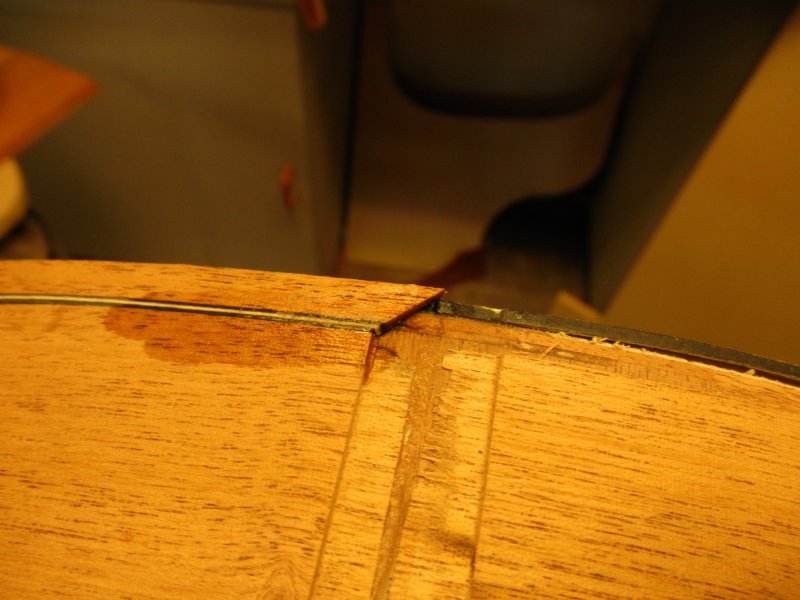
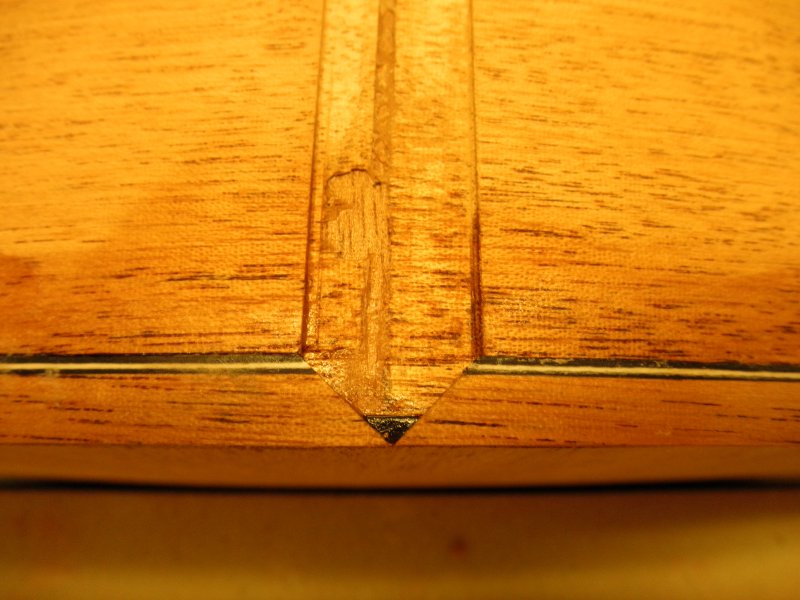
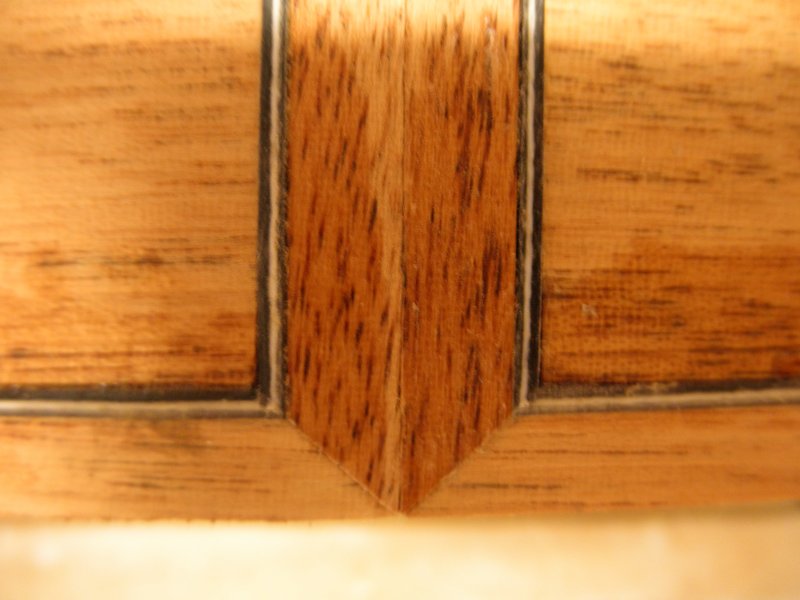
First off here's pic of the finished miter.

Image

This tut assumes the binding and purfling ledges are already cut (wedge is not cut yet) and that you have a couple of off cuts of the binding that will be used on the guitar, that the binding is pre-bent and the bottom purfling is already glued to the binding edge. I use CA for everything.

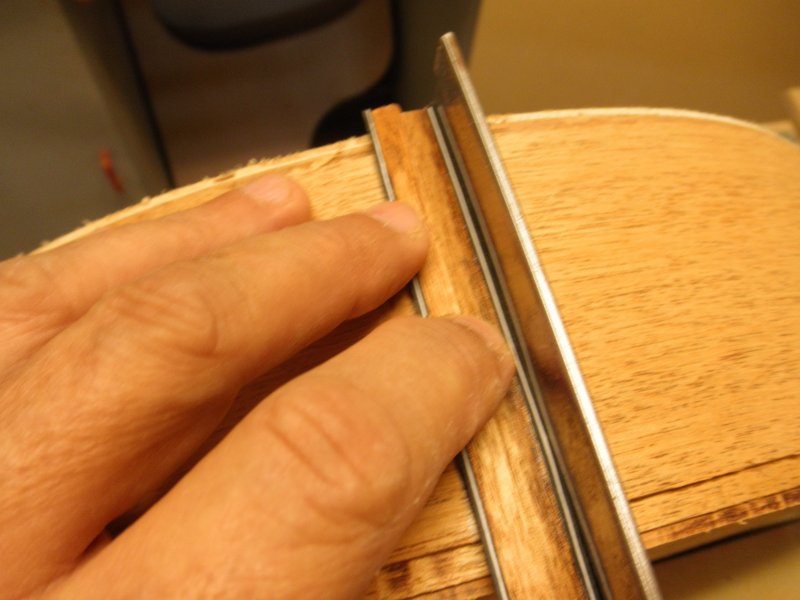
I also use a jig to hold the guitar upright, makes things really easy to locate the pieces.

Image

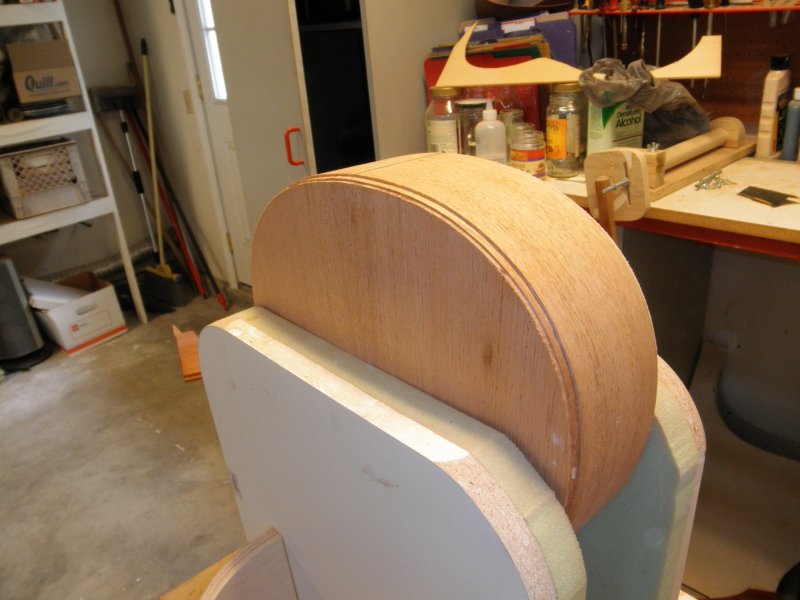
With the guitar in the jig, line up the waist bend so when you cut the binding at the wedge the waist will still line up.

Image

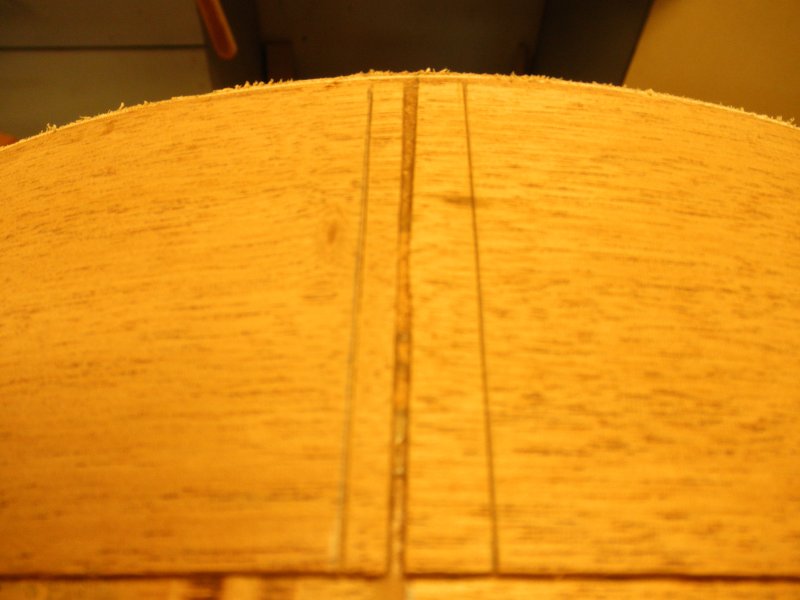
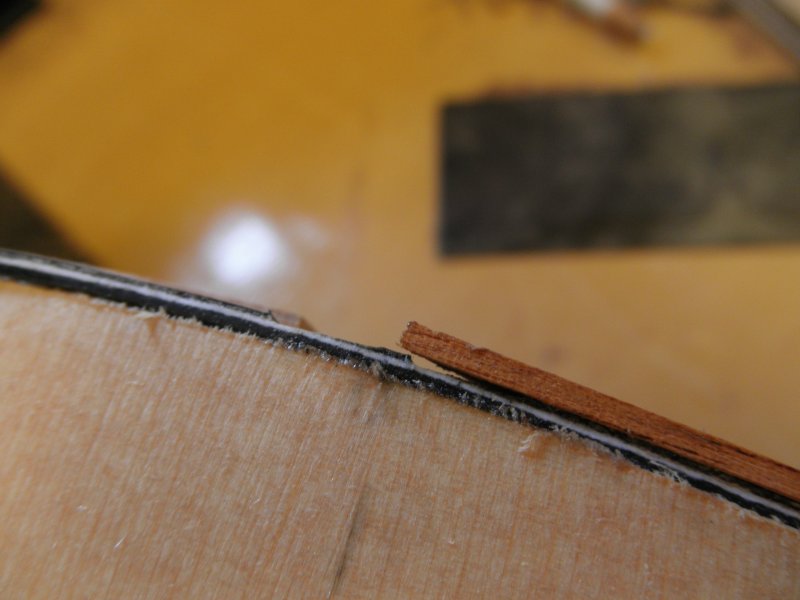
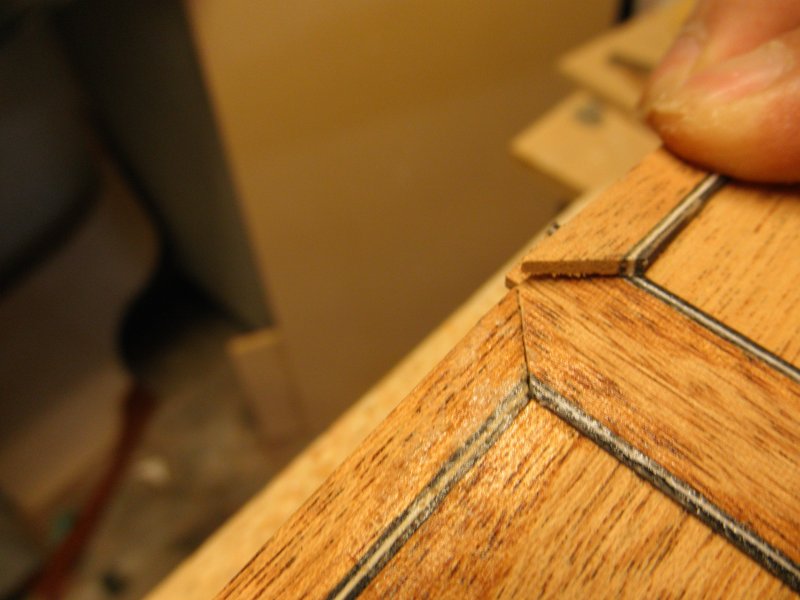
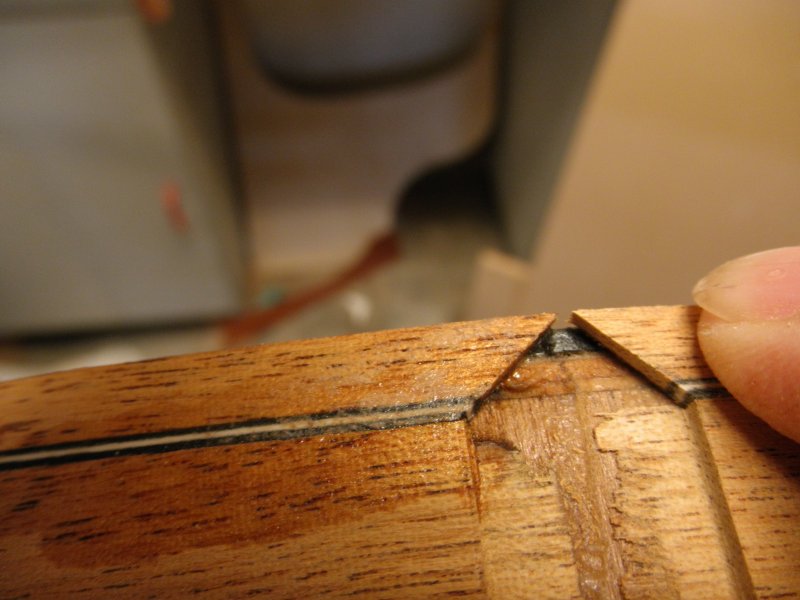
Next sand the edges of the wedge strips lightly and position two cut offs that are long enough to reach just past the binding edge. I'm just holding them and marking them in this pic.

Image

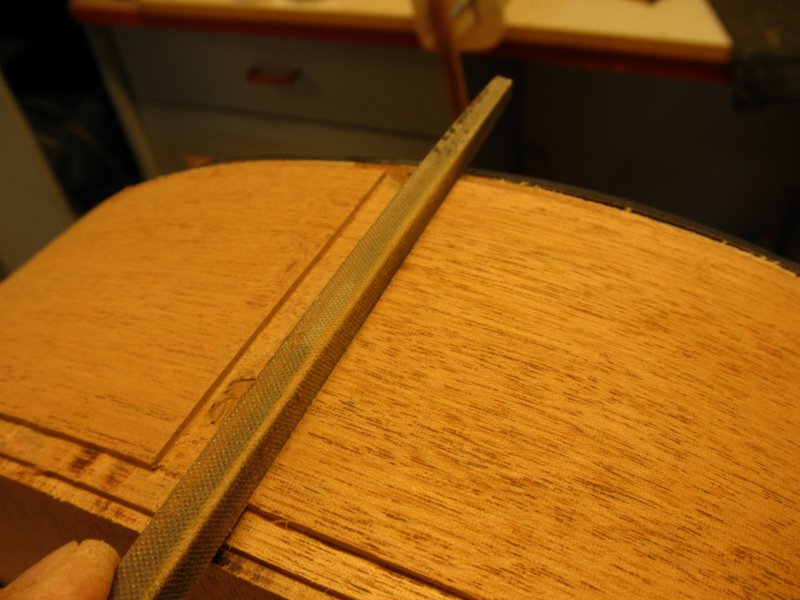
Mark and cut the wedge area. I use a razor saw for everything.

Image

Image

Image

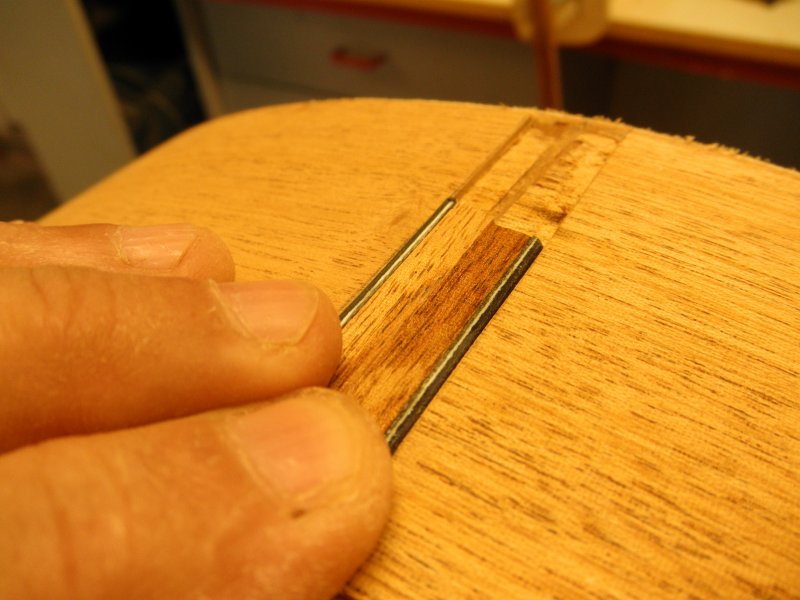
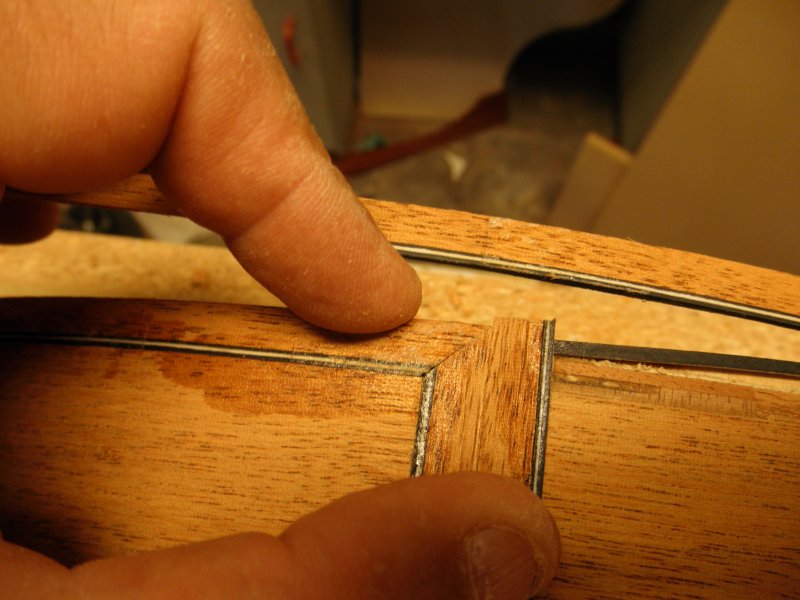
Tune up the cut to get a really tight fit.

Image

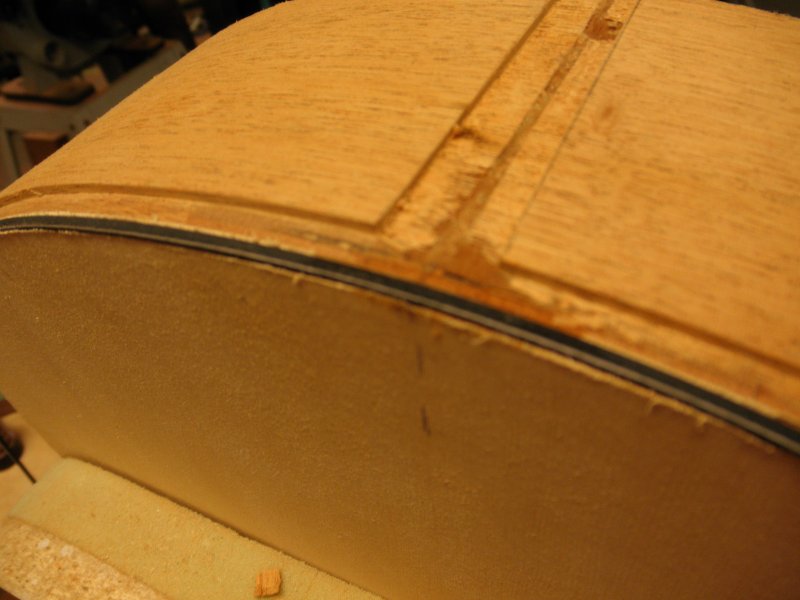
These pieces had be 'snapped into place.

Image

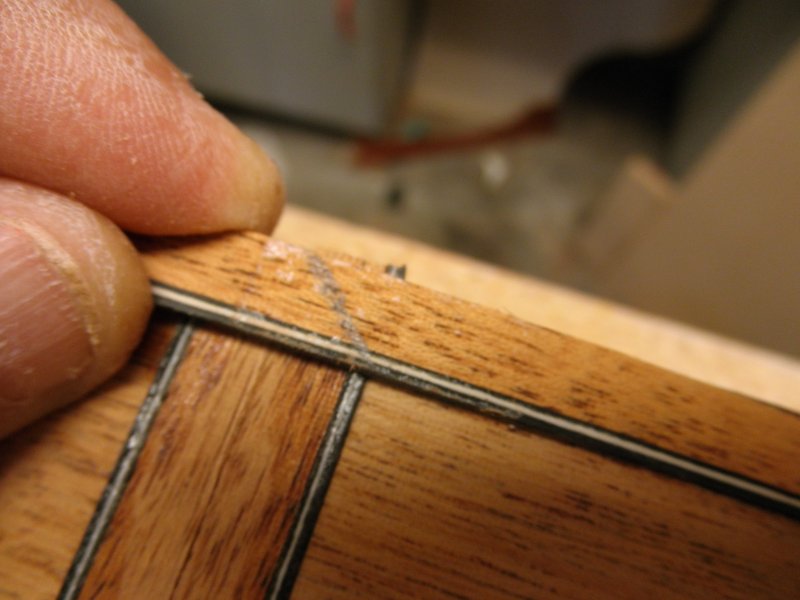
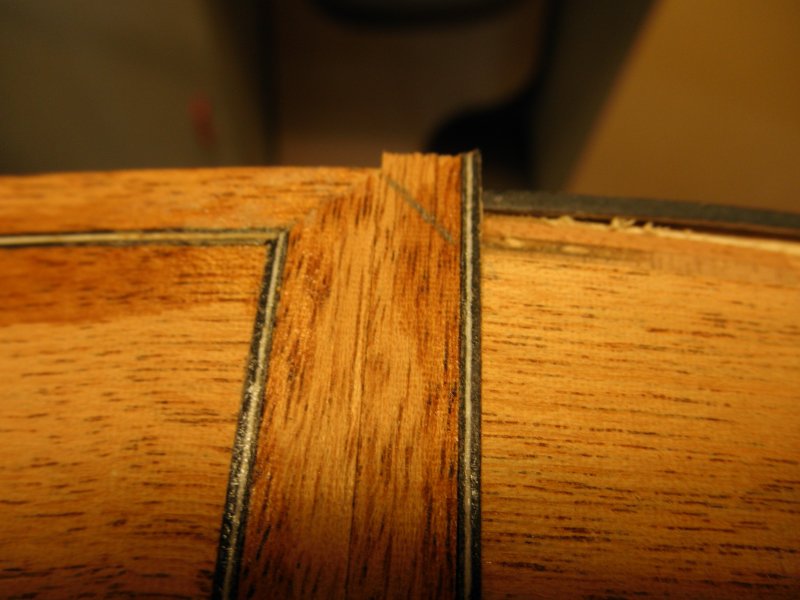
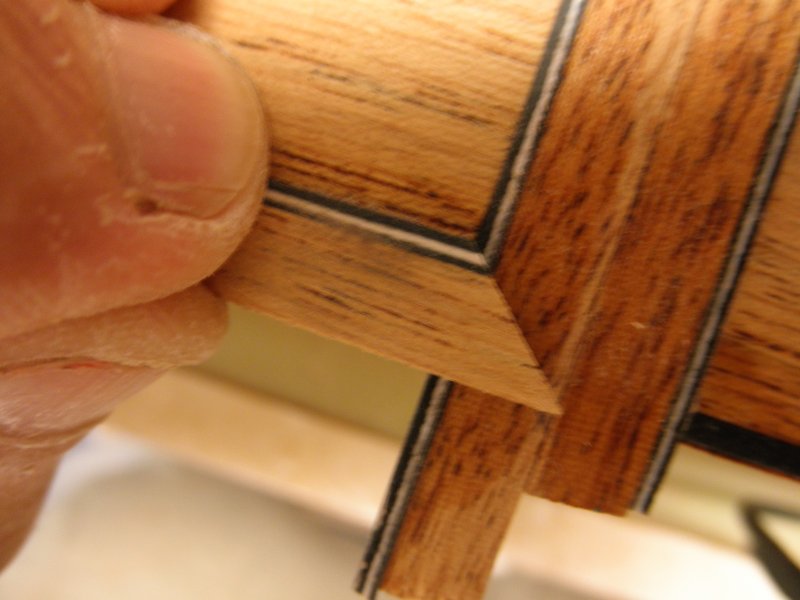
After the wedge pieces are fit tack the purfling in with a little CA.

Image

Then, with the binding held at the waist run the binding past the wedge pieces and mark.

Image

Cut the binding then mark and cut the matching wedge piece.

Image

Cut the wedge piece and trim/sand/tune to fit.

Image

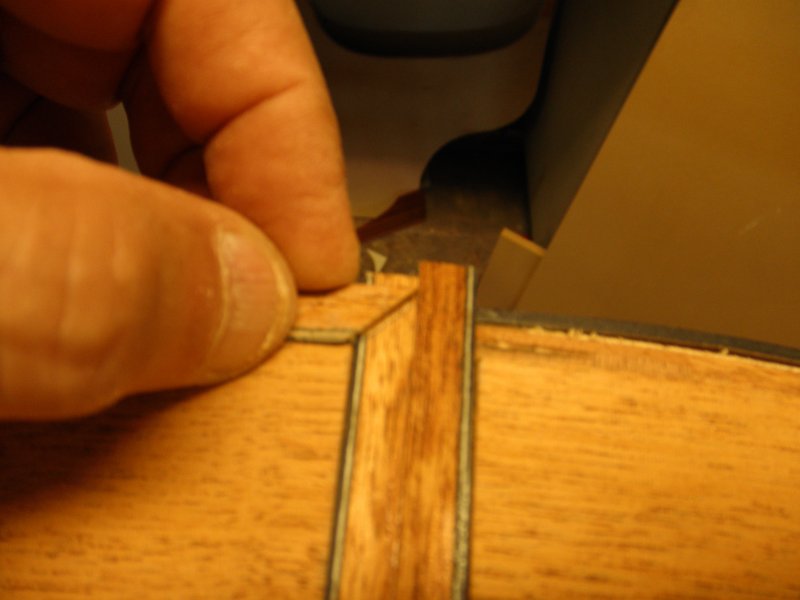
Then holding the binding piece in position, remove the wedge and tack the end of the binding.

Image

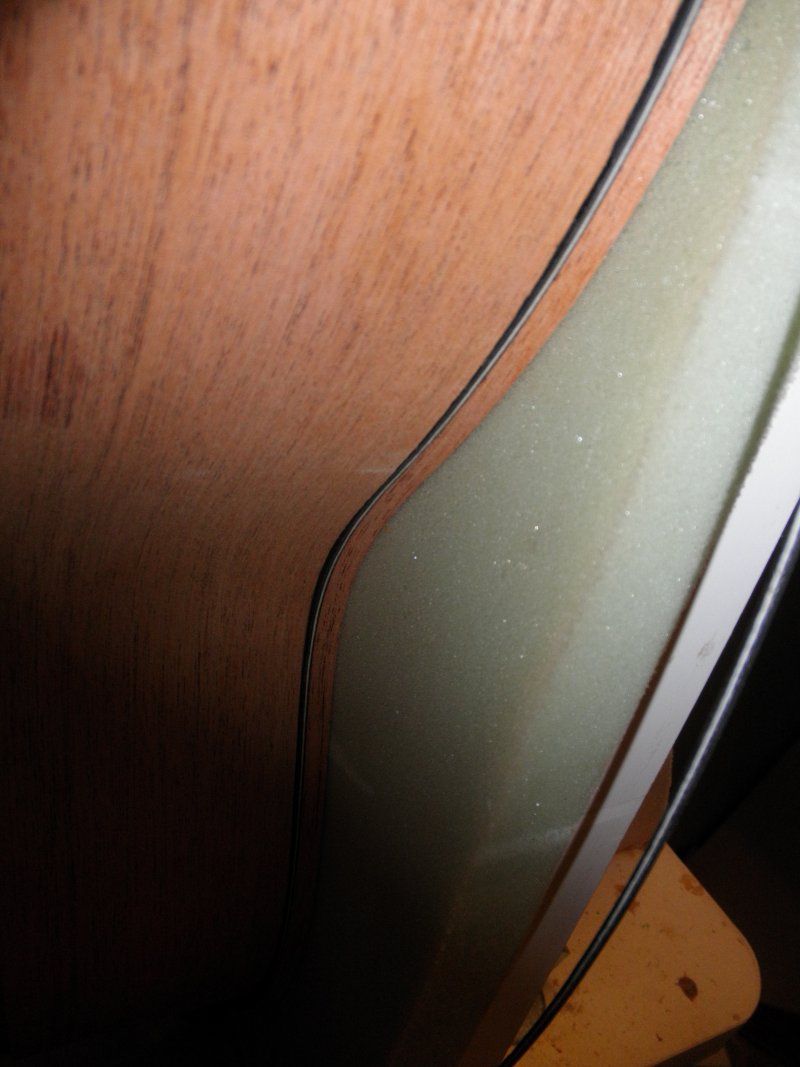
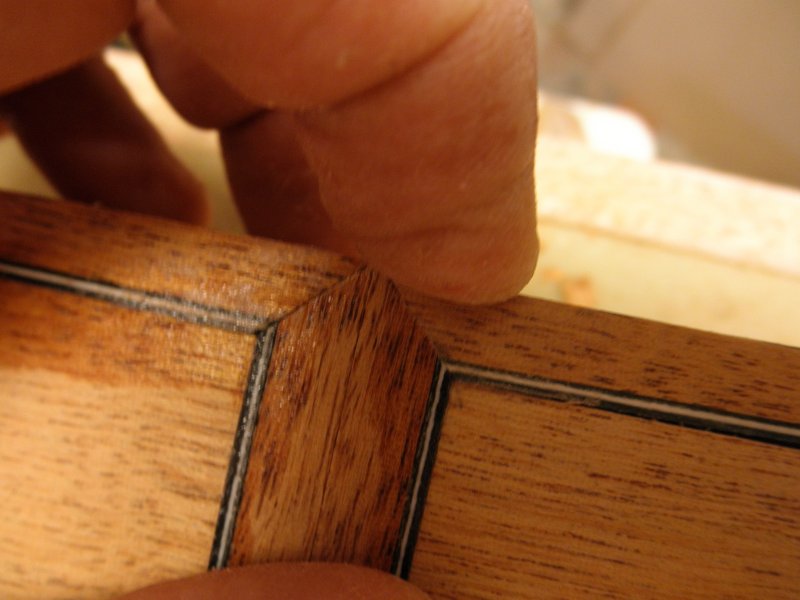
The tip of the binding point seems to want to stand proud so make sure to glue it down. Not sure what hammered that purfling but i just carried on.

Image

Then bind as usual.

The next piece is fit in a similar fashion.

Line up the wedge pieces and the first binding

Image

Run the second binding piece over the wedge, mark and cut the binding.

Image

Image

Mark and cut the second wedge piece.

Image

Image

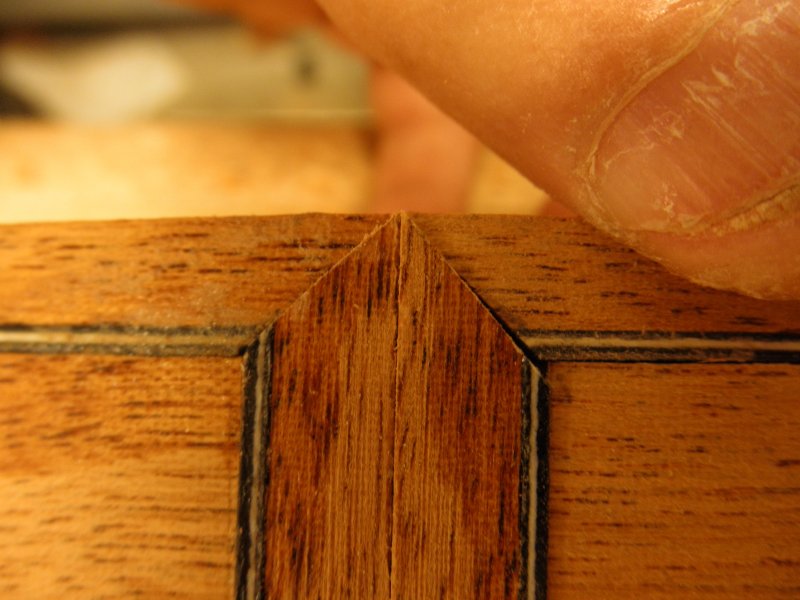
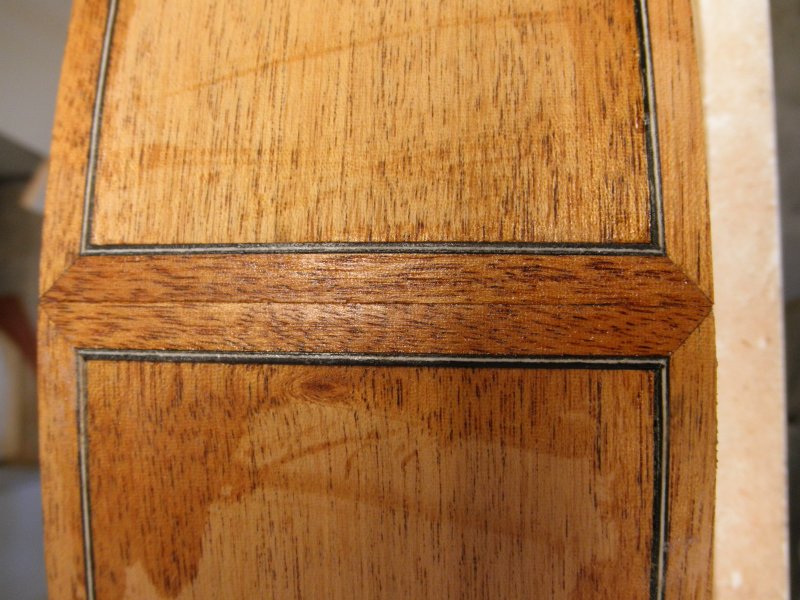
Sand trim to fit - that's better.

Image

Remove the wedge pieces and tack the second binding in place.

Image

Finish binding this side.

Bottom binding. Very similar to first set of binding but remember DO NOT glue the wedge pieces in yet. That's the very last step.

Mark and trim.

Image

Tack the ends and bind as normal.

Image

Now comes the hard part.

The wedge pieces are now cut and trimmed to fit both the top and bottom binding cuts. No short cuts. Just cut, sand, fit, sand, fit sand some more till you get a good tight fit.

Image

Image

Image

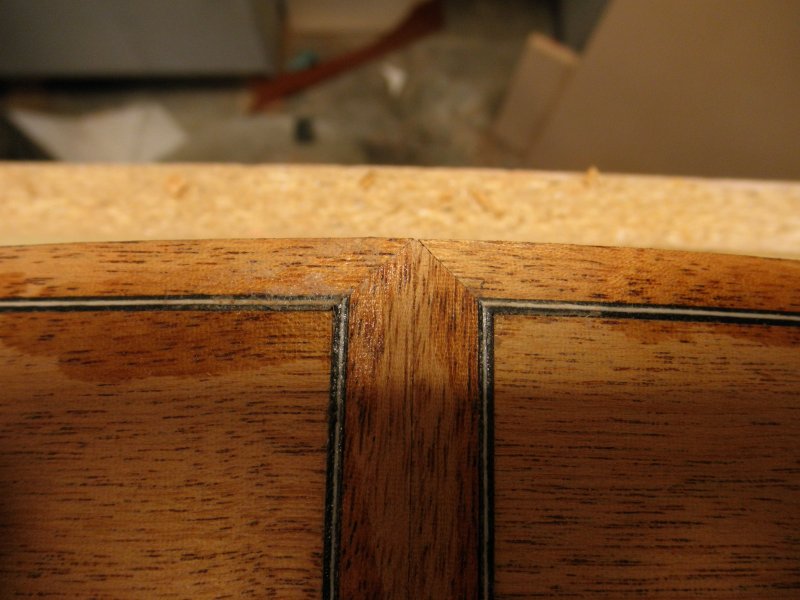
The fit was very tight on this set of wedge pieces and the assembly had to be lightly pounded in.

Flood with CA

Image

Scrape and sand to finish.

Image

Author:  rtpipkin [ Sun Jun 02, 2013 8:36 pm ]
Post subject:  Re: Tail Wedge Miter

Hey! That's pretty cool. Wish I'd have seen that about a month ago. Thanks for showing this!

Author:  LarryH [ Sun Jun 02, 2013 8:55 pm ]
Post subject:  Re: Tail Wedge Miter

Todd Stock wrote:
Now that is a butt wedge...you gonna cross-post into tutorials?


Forgot about that - will do Todd.

Author:  Daniel Minard [ Mon Jun 03, 2013 10:40 am ]
Post subject:  Re: Tail Wedge Miter

Nice! Thanks for posting.

Author:  Pmaj7 [ Mon Jun 03, 2013 11:44 am ]
Post subject:  Re: Tail Wedge Miter

Nice Larry! I haven't seen that style b4. The mitre ties in the curl much better than the standard butted butt wedge. I suppose you could use a standard one piece wedge also.

Author:  theguitarwhisperer [ Mon Jun 03, 2013 12:18 pm ]
Post subject:  Re: Tail Wedge Miter

That's way cool!

It seems interesting woods like Ziricote or figured woods like Flame Maple or Koa could be bookmatched for effect.

Author:  LarryH [ Mon Jun 03, 2013 12:22 pm ]
Post subject:  Re: Tail Wedge Miter

I was just thinking that maybe cutting the last wedge strips, then gluing them in place BEFORE cutting the last 2 binding pieces might be easier. You can always chase the angle on the binding strip to match the wedge strips quite a ways before you get into trouble at the waist and if you use the method above and wait till the last step to fit the wedge strips and you get it wrong you really need to start over. DAMHIK. Any way just thinking out loud.

Author:  LarryH [ Mon Jun 03, 2013 12:24 pm ]
Post subject:  Re: Tail Wedge Miter

Here's bloodwood binding and Walnut.

Image

Author:  mkellyvrod [ Mon Jun 03, 2013 1:08 pm ]
Post subject:  Re: Tail Wedge Miter

I admired your tail wedge on a previous post; thanks for expanding - lots of pictures are always good. Great job!
Marty

Author:  Terence Kennedy [ Mon Jun 03, 2013 3:47 pm ]
Post subject:  Re: Tail Wedge Miter

Slick!

Author:  LarryH [ Wed Jun 05, 2013 5:27 pm ]
Post subject:  Re: Tail Wedge Miter

CA Flood

Image

Scrape and sand - finally got around to it.

Image

Author:  Tony_in_NYC [ Wed Jun 05, 2013 5:52 pm ]
Post subject:  Tail Wedge Miter

Nice. It's always good to learn another way to do it. Now I have!

Author:  Bryan Bear [ Thu Jun 06, 2013 11:14 am ]
Post subject:  Re: Tail Wedge Miter

Very nice!

Author:  Barry Daniels [ Thu Jun 06, 2013 12:14 pm ]
Post subject:  Re: Tail Wedge Miter

Why two separate pieces? I prefer one wide, wedge shaped piece. It looks better to my eye.

Author:  LarryH [ Thu Jun 06, 2013 12:32 pm ]
Post subject:  Re: Tail Wedge Miter

Sounds good to me Barry. I'm sure it would look great but there's something about this miter, if done well, that also looks really good to my eye. I'm in the process of standardizing a few methods so I can get a guitar done without learning an entirely new technique each time but again, why not?

It seems the technique would be different and much less forgiving if the purfling remains. Have you done it that way? Would love to see one complete.

EDIT: Just re-read your post and the one large wedge shaped piece is my least favorite of the tail wedge techniques which is where this idea was born. Of course to each their own, different strokes, of course, of course, of course, etc. etc. etc.

Author:  mkellyvrod [ Thu Jun 06, 2013 12:45 pm ]
Post subject:  Re: Tail Wedge Miter

As a newbie, I think one advantage to Larry's technique is that you can use two short pieces of binding with purfling already attached for the tail piece. Although I didn't miter mine as Larry did (probably will try it next time), I did use some binding to make a mitered tail piece recently, and it looks pretty good IMO, and, of course, matches the binding exactly.

Author:  Pmaj7 [ Thu Jun 06, 2013 1:26 pm ]
Post subject:  Re: Tail Wedge Miter

Well, I was thinking that you could use one solid piece in the middle, but with the same miters on the top and bottom. But after thinking about it, it would only be good if it was non figured wood. With the curly binding, it's nice to have 2 separate pieces because it gives each side it's on flow.

Larry, how does it look on the top and back? It seems like with those miters coming together to a point you might have a little gap there?

Author:  LarryH [ Thu Jun 06, 2013 1:44 pm ]
Post subject:  Re: Tail Wedge Miter

pat macaluso wrote:
Well, I was thinking that you could use one solid piece in the middle, but with the same miters on the top and bottom. But after thinking about it, it would only be good if it was non figured wood. With the curly binding, it's nice to have 2 separate pieces because it gives each side it's on flow.

Larry, how does it look on the top and back? It seems like with those miters coming together to a point you might have a little gap there?


Yup, small gap where the 4 pieces come together and of course it's as small as how tight those joints are, actually more of a glue line than a gap. Another downside is if you have to final thickness the top or bottom too much you can flatten that same mitered area from too much sanding. Never even looked there as I was doing the job but as the technique gets refined that will be another place to make sure it's just right.

Page 1 of 1 All times are UTC - 5 hours
Powered by phpBB® Forum Software © phpBB Group
http://www.phpbb.com/