Official Luthiers Forum!

Owned and operated by Lance Kragenbrink
It is currently Fri Apr 19, 2024 3:52 am


All times are UTC - 5 hours


Forum rules


Be nice, no cussin and enjoy!


Post new topic Reply to topic  [ 69 posts ]  Go to page 1, 2, 3  Next
Author Message
PostPosted: Wed May 28, 2014 4:09 pm 
Offline
Cocobolo
Cocobolo
User avatar

Joined: Mon May 26, 2008 2:31 pm
Posts: 243
Location: Conway, Arkansas
Can anyone tell me what gap measurement at the bridge I should be looking for when I am trial fitting a neck with no fingerboard? (This gap would be under a straight edge extending from the neck.)
Thanks

_________________
Formerly know as Mandodiddle.


These users thanked the author Bill Higgs for the post: Joe Beaver (Fri Apr 14, 2017 1:28 pm)
Top
 Profile  
 
PostPosted: Wed May 28, 2014 4:12 pm 
Offline
Contributing Member
Contributing Member
User avatar

Joined: Fri Dec 21, 2012 11:52 am
Posts: 1388
First name: Zeke
Last Name: McKee
City: Goodlettsville
State: TN
Zip/Postal Code: 37070
Country: United States
Focus: Build
Status: Amateur
Well I think that all depends on your fretboard and bridge thickness. But I shoot for the strings to be around 1/2" over the top at the saddle. You can plug in the other numbers and calculate what you need from that.


Top
 Profile  
 
PostPosted: Wed May 28, 2014 4:24 pm 
Offline
Brazilian Rosewood
Brazilian Rosewood

Joined: Mon Jan 28, 2008 5:21 am
Posts: 4846
Location: Central PA
First name: john
Last Name: hall
City: Hegins
State: pa
Zip/Postal Code: 17938
Country: usa
Focus: Build
Status: Professional
with out the fretboard the perfect number is 3/32 .094 in.

I would say if you are 1/16 to 1/8 in on a pre set neck you are will within the norm.

_________________
John Hall
blues creek guitars
Authorized CF Martin Repair
Co President of ASIA
You Don't know what you don't know until you know it


These users thanked the author bluescreek for the post (total 2): Michael Lloyd (Tue May 02, 2017 11:30 am) • Joe Beaver (Fri Apr 14, 2017 1:29 pm)
Top
 Profile  
 
PostPosted: Wed May 28, 2014 4:44 pm 
Offline
Koa
Koa

Joined: Sat May 19, 2007 11:03 am
Posts: 1737
Location: Litchfield MI
Focus: Build
Status: Professional
Too me its far more important to make sure that the neck/finger board plane transitions onto the sound-board in a manner that results in a straight line, in other words hump or ski slope free. To that end I like to think in terms of having a 1.3 to 1.5 degree neck set to the rim/neck block. This gets the strings on a plane which can be adjusted for low action. To this end the Martin factory for one, has at least three or four different bridge thicknesses which sort of makes the measurement you are asking about not quite so critical, but rather adjustable. Of course the saddle height is also adjustable. Our kit instructions go into some methodology to accomplish this goal.

http://kennethmichaelguitars.com/neckfitpart1.html

_________________
Ken Cierp

http://www.kennethmichaelguitars.com/


These users thanked the author kencierp for the post: Joe Beaver (Fri Apr 14, 2017 1:29 pm)
Top
 Profile  
 
PostPosted: Wed May 28, 2014 4:49 pm 
Offline
Brazilian Rosewood
Brazilian Rosewood

Joined: Mon Jan 28, 2008 5:21 am
Posts: 4846
Location: Central PA
First name: john
Last Name: hall
City: Hegins
State: pa
Zip/Postal Code: 17938
Country: usa
Focus: Build
Status: Professional
I must agree that the plane is as important as the angle. If that is not correct you have a box with strings.

_________________
John Hall
blues creek guitars
Authorized CF Martin Repair
Co President of ASIA
You Don't know what you don't know until you know it


Top
 Profile  
 
PostPosted: Wed May 28, 2014 7:56 pm 
Offline
Cocobolo
Cocobolo
User avatar

Joined: Mon May 26, 2008 2:31 pm
Posts: 243
Location: Conway, Arkansas
Thanks very much guys.
In a practical manner, how does one accurately determine, measure and lay out small angles, eg.- 1.5 degrees ?

_________________
Formerly know as Mandodiddle.


Top
 Profile  
 
PostPosted: Thu May 29, 2014 6:00 am 
Offline
Brazilian Rosewood
Brazilian Rosewood

Joined: Mon Jan 28, 2008 5:21 am
Posts: 4846
Location: Central PA
First name: john
Last Name: hall
City: Hegins
State: pa
Zip/Postal Code: 17938
Country: usa
Focus: Build
Status: Professional
This link can show you how I lay out the geometry to control this angle. The angle is important as it helps to get you that 1/2 in string height when you set up the guitar.
https://www.youtube.com/watch?v=LrgRKKsxL-M

once the top gets attached you can per set the neck and adjust the neck. At that point you want to true up the plane of the fretboard and how it meets the top. Here is how I set the neck
https://www.youtube.com/watch?v=L3YJh9OT4mw

Once the neck is set you can run a sanding block to true the top to the neck so the extension is flat. I don't want the fret board extension to rise , and a small amount of fall away is ok ( .020) .

These are the details that can make a good guitar better. While I am doing a dovetail neck , even a bolt on neck may need to be set for angle and center line.

It may sound silly but when you set the neck and get ready to glue the bridge you need to use the fretboard center line to place the bridge.

_________________
John Hall
blues creek guitars
Authorized CF Martin Repair
Co President of ASIA
You Don't know what you don't know until you know it


These users thanked the author bluescreek for the post: Joe Beaver (Fri Apr 14, 2017 1:29 pm)
Top
 Profile  
 
PostPosted: Thu May 29, 2014 6:32 am 
Offline
Koa
Koa

Joined: Sat May 19, 2007 11:03 am
Posts: 1737
Location: Litchfield MI
Focus: Build
Status: Professional
I use a little different process which does not involve a radius dish -- we start by working from a "true position" so as you requested you can apply practical math -- notice in the first link a simple length, height = angle formula is used.

http://www.kennethmichaelguitars.com/rimslopeMM.html

http://www.youtube.com/watch?v=sy7ieraU-Ns

Actually in a different thread the guitarwhisperer outlines how he set this angle using a no mold build method.

_________________
Ken Cierp

http://www.kennethmichaelguitars.com/


These users thanked the author kencierp for the post: Joe Beaver (Fri Apr 14, 2017 1:30 pm)
Top
 Profile  
 
PostPosted: Fri May 30, 2014 10:55 pm 
Offline
Cocobolo
Cocobolo
User avatar

Joined: Mon May 26, 2008 2:31 pm
Posts: 243
Location: Conway, Arkansas
John and Ken,
Thanks so much for the replies. I have watched all of your sites and have learned much!
Bill

_________________
Formerly know as Mandodiddle.


Top
 Profile  
 
PostPosted: Sat May 31, 2014 2:46 am 
Offline
Brazilian Rosewood
Brazilian Rosewood

Joined: Wed Feb 20, 2008 7:15 pm
Posts: 7255
First name: Ed
Last Name: Bond
City: Vancouver
Country: Canada
Focus: Build
Status: Professional
I use spring clamps to hold the FB to the neck blank. I tape the finished bridge in situ, and run a straight edge down its length to see where it hits the bridge and adjust accordingly. Mind you I use a bolt on butt joint these days, but I did that when I was using dovetails too.

John, using the FB to locate the bridge is how I do it too, it just makes sense to me...


These users thanked the author meddlingfool for the post: Joe Beaver (Fri Apr 14, 2017 1:30 pm)
Top
 Profile  
 
PostPosted: Sat May 31, 2014 6:04 am 
Offline
Brazilian Rosewood
Brazilian Rosewood

Joined: Mon Jan 28, 2008 5:21 am
Posts: 4846
Location: Central PA
First name: john
Last Name: hall
City: Hegins
State: pa
Zip/Postal Code: 17938
Country: usa
Focus: Build
Status: Professional
I found that getting the neck joint trued to the body , then gluing the fretboard on and then truing the fretboard will get you a better playing neck.

Ken and I may have different methods but they work for getting the neck straight. Never assume that the fretboard is true. I have yet to see one that was. They all seem to vary slightly. Especially after it is glued to the neck.

_________________
John Hall
blues creek guitars
Authorized CF Martin Repair
Co President of ASIA
You Don't know what you don't know until you know it


These users thanked the author bluescreek for the post: Rocky Road (Wed Apr 19, 2017 8:24 pm)
Top
 Profile  
 
PostPosted: Sun Jun 01, 2014 11:46 am 
Offline
Koa
Koa
User avatar

Joined: Mon Oct 08, 2007 2:31 am
Posts: 936
Location: Ottawa, Canada
I'll add that in my opinion it's good to start a new guitar off with a generous amount of saddle showing above the bridge. Often plans will show a lesser amount i.e. an amount that seems to assume the top will not belly up at all in the first part of its life. To that end, I like to aim for about 4 mm of saddle initially showing. Inevitably, after a little bit of time, i.e. a few weeks, at string tension, I am able to refine the action and take another mm or so off that.

Pat

_________________
There are three kinds of people:

Those that make things happen,
those that watch things happen,
and those that wondered what happened.


Top
 Profile  
 
PostPosted: Sun Jun 01, 2014 6:57 pm 
Offline
Brazilian Rosewood
Brazilian Rosewood

Joined: Mon Jan 28, 2008 5:21 am
Posts: 4846
Location: Central PA
First name: john
Last Name: hall
City: Hegins
State: pa
Zip/Postal Code: 17938
Country: usa
Focus: Build
Status: Professional
I will set up a guitar and want to see about .150 in of saddle To much saddle can be a bad thing. The height on a standard drop in should be about 1/2 in. a .350 bridge and .150 saddle is about what I look for. Once you get above 180 your stretching it. You can adjust the saddle before you glue it on.

_________________
John Hall
blues creek guitars
Authorized CF Martin Repair
Co President of ASIA
You Don't know what you don't know until you know it


Top
 Profile  
 
PostPosted: Sun Jun 01, 2014 10:04 pm 
Offline
Contributing Member
Contributing Member
User avatar

Joined: Tue Mar 19, 2013 3:34 pm
Posts: 1097
First name: Bob
Last Name: Russell
State: Michigan USA
Focus: Repair
Status: Semi-pro
Bill.
I am a new builder as well and just finished my first parlor also. I used the LMI kit as the base for mine but changed up a few things so it was a kit / hyibrid.

I used an outside mold and radius dishes from bluescreek and I was quite happy with the results. I did struggle with the concept of radius of the top and the transition to the headblock and UTB (which is related to your question). There are a number of threads here that discuss it so take the time to look them up. The topic can be a bit confusing since people treat this transition in a number of ways. Ultimately you will end up at the same results but how you get there can be a struggle if you try to listen to how everyone gets there.

I have concluded that the way theguitarwisperer builds makes more sense to me personally so I have decided to build my next one in the Cumpiano method which uses a workboard instead of a mold. You can find his book on line and it may be worth looking into. This method makes the neck angle/radius a straight forward process with little to no variables to think about.

Since I am a new builder I don't have any preconceived ideas of what is the best way to build and have an open mind. So I am not saying one way is better than the other but it would be worth your time to investigate both.

All this does have to do with your question so try to keep in mind that everyone will have a slightly different answer to get the same results.

Cheers,
Bob


Top
 Profile  
 
PostPosted: Mon Jun 02, 2014 8:46 am 
Offline
Koa
Koa
User avatar

Joined: Mon Oct 08, 2007 2:31 am
Posts: 936
Location: Ottawa, Canada
bluescreek wrote:
You can adjust the saddle before you glue it on.


John, did you really mean to suggest that you glue the saddle?

Pat

_________________
There are three kinds of people:

Those that make things happen,
those that watch things happen,
and those that wondered what happened.


Top
 Profile  
 
PostPosted: Mon Jun 02, 2014 6:25 pm 
Offline
Brazilian Rosewood
Brazilian Rosewood

Joined: Fri Dec 14, 2007 3:21 pm
Posts: 3301
Location: Alexandria MN
Here's yet one more angle on the angle.

The profiled rimset is radiused to 15' back, 30' front ( or whatever you use) and the back glued. headblock and tailblocks are kept at 90 degrees to the floor of the mold during all this and right on the centerline.

I then stick the "boat" back in the adjustable mold with tapered wedge support so that the headblock is 90 degrees to the floor of the mold and clamp a crossbar across the body at the level of the bridge. I try to thickness it so the angle of the upper bout will be co-planar with where I expect the extension to wind up under tension. For me currently this translates to expected bridge thickness or around 11/32.

Image

I mark the upper bout with chalk to just shy of the waist and sand with a flat sanding board that has a 1/4" piece of plexiglass attached to the bottom to mimic the fretboard. Sand till all the chalk lines are gone on the headblock and lining.

Image

Image

After the top is glued on the upper bout angle is checked with a fretboard clamped on and a trial bridge in place to check. I want a sraightedge to just hit the top of the bridge. A big mistake I made at first was to sand the bout the same as the angle I wanted for the neck unstrung which for me is about 1/16" clearance over the top of the bridge. If you do that you get a rising extension under tension instead of the slight drop off desired.

Fine tuning can be done with the Fox paddle and again the thickness of the pivot point for me is approx. bridge thickness.

Image

I like to sand the angle into the upper bout after the back is glued on as things seem more stable at that point.

I've used this approach on probably 50 or more guitars and it works, the main trick is figuring how thick to make the pivot point to give the final angle you want for the fretboard extension after the guitar settles in. If the angle is such that the extension is perfectly coplanar unstrung you could be looking at a rising extension when settled in. It all depends on your neck attachment system and how much your stuff moves. Took me a while to dial that in. Recently I have been putting a very slight radius on the top brace along with a few other mods and the settling is less so I had to adjust accordingly.

_________________
It's not what you don't know that hurts you, it's what you do know that's wrong.


These users thanked the author Terence Kennedy for the post: Joe Beaver (Fri Apr 14, 2017 1:31 pm)
Top
 Profile  
 
PostPosted: Mon Jun 02, 2014 6:57 pm 
Offline
Koa
Koa
User avatar

Joined: Sat Aug 19, 2006 1:29 am
Posts: 1379
Location: United States
I fret the FB off of the guitar so I use that clamped to the neck to set the height. That eliminates any discrepancy in FB thickness or fret height.

I am looking for .4-.45 off of the top at the bridge location with a straightedge on top of the frets. For my guitars, once strung up, this gives me right around .5 string height (usually just slightly less) for the center strings. I normally shoot for .42.

_________________
Burton
http://www.legeytinstruments.com
Brookline, MA.


These users thanked the author Burton LeGeyt for the post: Joe Beaver (Fri Apr 14, 2017 1:31 pm)
Top
 Profile  
 
PostPosted: Tue Jun 03, 2014 6:54 am 
Offline
Brazilian Rosewood
Brazilian Rosewood

Joined: Mon Jan 28, 2008 5:21 am
Posts: 4846
Location: Central PA
First name: john
Last Name: hall
City: Hegins
State: pa
Zip/Postal Code: 17938
Country: usa
Focus: Build
Status: Professional
glued saddles for a through style but I was talking about gluing the bridge , you can adjust at that point.

Getting this plane correct is what will in many cases set your guitar above the rest. To get the very best fretboard plane and lets face it , the fret job is what makes the guitar in the end.
I glue the fretboard on , set on the guitar and then fret. Amazing what happens to a fretboard when you glue it on. I have yet to see on perfect after gluing. I do dovetails and you can clamp them in and true it , then take off the guitar and fret it up. Since I have been doing this my fret jobs are so much more playable and you can get very low on the action without buzzing.

My target overall height is dependent on the guitars I made
Martin through saddle I will set a touch lower about .450 to .465 drop in I shoot for .500 and you can adjust the bridge height for the final adjustment of saddle height.

I apply about 12 to 14 lb on the shoulders with a propped up neck. this applies a force that will bend the neck. I can then adjust the neck for a rough in of the relief then take a reading off the 1st fret to the bridge to get a good estimate of the height needed at the saddle and bridge. I can then adjust the bridge for the saddle height.

through saddle I like under .150
drop in I like to see about .170

we all have our favorite combination

_________________
John Hall
blues creek guitars
Authorized CF Martin Repair
Co President of ASIA
You Don't know what you don't know until you know it


These users thanked the author bluescreek for the post: Joe Beaver (Fri Apr 14, 2017 1:31 pm)
Top
 Profile  
 
PostPosted: Tue Jun 03, 2014 7:58 am 
Offline
Cocobolo
Cocobolo
User avatar

Joined: Wed Jun 02, 2010 7:35 pm
Posts: 280
First name: tim
Last Name: minkkinen
City: charlotte
State: nC
Zip/Postal Code: 28203
Country: united States
Focus: Build
Status: Amateur
Terence Kennedy wrote:
Here's yet one more angle on the angle.

The profiled rimset is radiused to 15' back, 30' front ( or whatever you use) and the back glued. headblock and tailblocks are kept at 90 degrees to the floor of the mold during all this and right on the centerline.

I then stick the "boat" back in the adjustable mold with tapered wedge support so that the headblock is 90 degrees to the floor of the mold and clamp a crossbar across the body at the level of the bridge. I try to thickness it so the angle of the upper bout will be co-planar with where I expect the extension to wind up under tension. For me currently this translates to expected bridge thickness or around 11/32.

Image

I mark the upper bout with chalk to just shy of the waist and sand with a flat sanding board that has a 1/4" piece of plexiglass attached to the bottom to mimic the fretboard. Sand till all the chalk lines are gone on the headblock and lining.

Image

Image

After the top is glued on the upper bout angle is checked with a fretboard clamped on and a trial bridge in place to check. I want a sraightedge to just hit the top of the bridge. A big mistake I made at first was to sand the bout the same as the angle I wanted for the neck unstrung which for me is about 1/16" clearance over the top of the bridge. If you do that you get a rising extension under tension instead of the slight drop off desired.

Fine tuning can be done with the Fox paddle and again the thickness of the pivot point for me is approx. bridge thickness.

Image

I like to sand the angle into the upper bout after the back is glued on as things seem more stable at that point.

I've used this approach on probably 50 or more guitars and it works, the main trick is figuring how thick to make the pivot point to give the final angle you want for the fretboard extension after the guitar settles in. If the angle is such that the extension is perfectly coplanar unstrung you could be looking at a rising extension when settled in. It all depends on your neck attachment system and how much your stuff moves. Took me a while to dial that in. Recently I have been putting a very slight radius on the top brace along with a few other mods and the settling is less so I had to adjust accordingly.


Terence,

I have to say that how you do it makes a ton on sense and reminds me a great deal of how Jim Olson does it, without the ultra slick machined aluminum Olson fixtures and jigs [:Y:] . You really can't get the angle wrong and you have a flat upper bout for the fretboard.

Burton LeGeyt wrote:
I fret the FB off of the guitar so I use that clamped to the neck to set the height. That eliminates any discrepancy in FB thickness or fret height.

I am looking for .4-.45 off of the top at the bridge location with a straightedge on top of the frets. For my guitars, once strung up, this gives me right around .5 string height (usually just slightly less) for the center strings. I normally shoot for .42.


Burton,

You do a lot of elevated fretboards correct? Do you fret with a press? I have always felt if everything is fitted precisely this might be a great way to do it.

Tim


Top
 Profile  
 
PostPosted: Tue Jun 03, 2014 10:04 am 
Offline
Koa
Koa
User avatar

Joined: Sat Aug 19, 2006 1:29 am
Posts: 1379
Location: United States
Tim,

Yes, I do use an elevated fretboard. I build all that up and get it as perfect as possible before gluing on the fretted board. It does work well. I do epoxy on the FB and use a petty hefty straight edge as a caul. It works very well. I do not experience unwanted distortion from the glue up procedure.

I made a fret press fixture (based on Mario's) that can press in 3 at a time and lock them tight while the HHG dries. That allows me to work on other things while fretting. Overall it takes a while but doesn't impact production too badly. I do have a full set of the fret press cauls which makes it possible.

I can certainly see the argument for doing it the other way (level board once glued up and then fret) but I am practiced and experiencing no issues doing it the way I have been.

Like John, I weight down the shoulders when doing the initial fret level (or at least fret check). To get the frets level at that stage (with the weights) I find it necessary to glue up the FB with a very slight bit of backbow. How much exactly is a guessing game based on how stiff you think the neck wood is. I tend to think of it as better to very slightly overshoot than under. At least then in the fret level you are removing the littlest bit more from the middle frets instead of the first few which in my experience get the most wear. It depends of course on what you expect the relief to be. If you want bluegrass relief then glue the board on flat- I think most people would say to just use the truss rod at that point to dial it in instead of messing with backbow etc.... Ideally I want it perfect without the rod and to save the rod for insurance only.

For me, the method and numbers emerged with practice. I settled on the .42 number because it works with my guitars. The math doesn't work out to have the strings at .5 off the top with the amount of saddle I want visible at .42 but with the amount everything flexes upon stringing up it works for the way I build.

_________________
Burton
http://www.legeytinstruments.com
Brookline, MA.


Top
 Profile  
 
PostPosted: Tue Jun 03, 2014 10:36 am 
Offline
Brazilian Rosewood
Brazilian Rosewood

Joined: Mon Jan 28, 2008 5:21 am
Posts: 4846
Location: Central PA
First name: john
Last Name: hall
City: Hegins
State: pa
Zip/Postal Code: 17938
Country: usa
Focus: Build
Status: Professional
This is all good info. It shows that there are different techniques that work for different styles. I am a Martin traditionalist but that doesn't mean I can't appreciate contemporary designs and techniques. Find what works for you and use it.

_________________
John Hall
blues creek guitars
Authorized CF Martin Repair
Co President of ASIA
You Don't know what you don't know until you know it


These users thanked the author bluescreek for the post: James Orr (Thu Apr 13, 2017 10:14 pm)
Top
 Profile  
 
PostPosted: Tue Jun 03, 2014 12:43 pm 
Offline
Contributing Member
Contributing Member
User avatar

Joined: Wed Jan 13, 2010 12:46 am
Posts: 1247
First name: Beth
Last Name: Mayer
City: Tucson
State: AZ
Country: United States
Focus: Build
Status: Amateur
John and Burton, I don't understand the how and why of the "weighting of the shoulders". Are you suspending the neck on a rest so you're basically slightly making the neck concave?


Top
 Profile  
 
PostPosted: Tue Jun 03, 2014 1:08 pm 
Offline
Koa
Koa
User avatar

Joined: Sat Aug 19, 2006 1:29 am
Posts: 1379
Location: United States
Beth,

Yes, it mimics the neck under tension. I support the neck as close to the nut as possible and the pivot point for the back is usually near the third brace. The weights go on the shoulders and work surprisingly well at giving you a sense of what the neck might do. I've been using a little less weight at 10-12 lbs.

For the weight anything works as long as it does not mar the top (obviously). The best things I ever used were some small lead shot filled leather pouches. They were great. They weren't mine though unfortunately! I need to find some more of those......

_________________
Burton
http://www.legeytinstruments.com
Brookline, MA.


These users thanked the author Burton LeGeyt for the post: Beth Mayer (Tue Jun 03, 2014 4:07 pm)
Top
 Profile  
 
PostPosted: Tue Jun 03, 2014 2:26 pm 
Offline
Brazilian Rosewood
Brazilian Rosewood

Joined: Mon Jan 28, 2008 5:21 am
Posts: 4846
Location: Central PA
First name: john
Last Name: hall
City: Hegins
State: pa
Zip/Postal Code: 17938
Country: usa
Focus: Build
Status: Professional
Burton and I do basically the same thing. Mimic a string load on the neck. You can use flour bags , sand. My favorite are the large steel set up bars I used as a machinist. Lay a towel and presto

_________________
John Hall
blues creek guitars
Authorized CF Martin Repair
Co President of ASIA
You Don't know what you don't know until you know it


These users thanked the author bluescreek for the post: Beth Mayer (Tue Jun 03, 2014 4:08 pm)
Top
 Profile  
 
PostPosted: Tue Jun 03, 2014 5:10 pm 
Offline
Cocobolo
Cocobolo
User avatar

Joined: Wed Jun 02, 2010 7:35 pm
Posts: 280
First name: tim
Last Name: minkkinen
City: charlotte
State: nC
Zip/Postal Code: 28203
Country: united States
Focus: Build
Status: Amateur
Burton, it sounds like you've found a reliable method. I'm moving toward elevated fretboards more and more. Most players like them and tonally I really like them. You might want to look into neoprene divers bags. I use some small lead shot bags I had made when I was in the film biz. Heavy nylon.

Tim


Top
 Profile  
 
Display posts from previous:  Sort by  
Post new topic Reply to topic  [ 69 posts ]  Go to page 1, 2, 3  Next

All times are UTC - 5 hours


Who is online

Users browsing this forum: stumblin and 96 guests


You cannot post new topics in this forum
You cannot reply to topics in this forum
You cannot edit your posts in this forum
You cannot delete your posts in this forum
You cannot post attachments in this forum
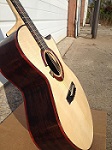
Jump to:  
Powered by phpBB® Forum Software © phpBB Group
phpBB customization services by 2by2host.com