Measuring the amount of deflection that a successful completed instrument has can provide useful information for future builds. Making the same measurements during the build can help the builder come close to reproducing the qualities of a successful instrument. Herein I create a three part series on making, calibrating and using a simple jig for measuring guitar family instrument tops.
The first picture shows the parts for the lever portion of the jig with an 18" ruler for scale.
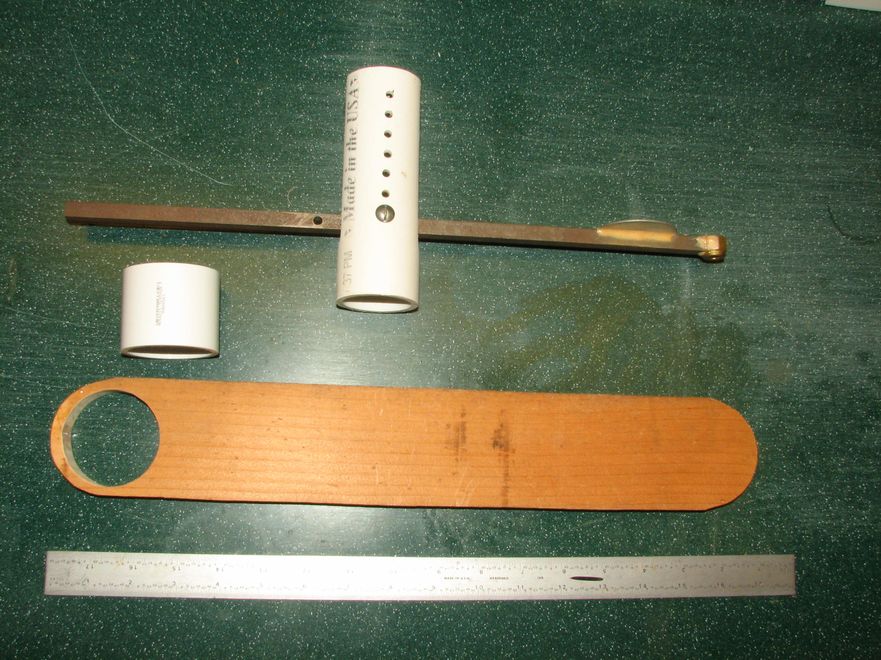
The materials list is simple and inexpensive: a piece of 1x3 about 18" long; a 1 1/2" size PVC coupling, a piece of 1 1/2" PVC pipe about 8" long, a 3/8" square metal rod ~ 18" long, a large fender washer and a 1/2"-5/8" lock nut or brass bushing and a 3/16 bolt (and nut) with the bolt longer than the pipe is wide.
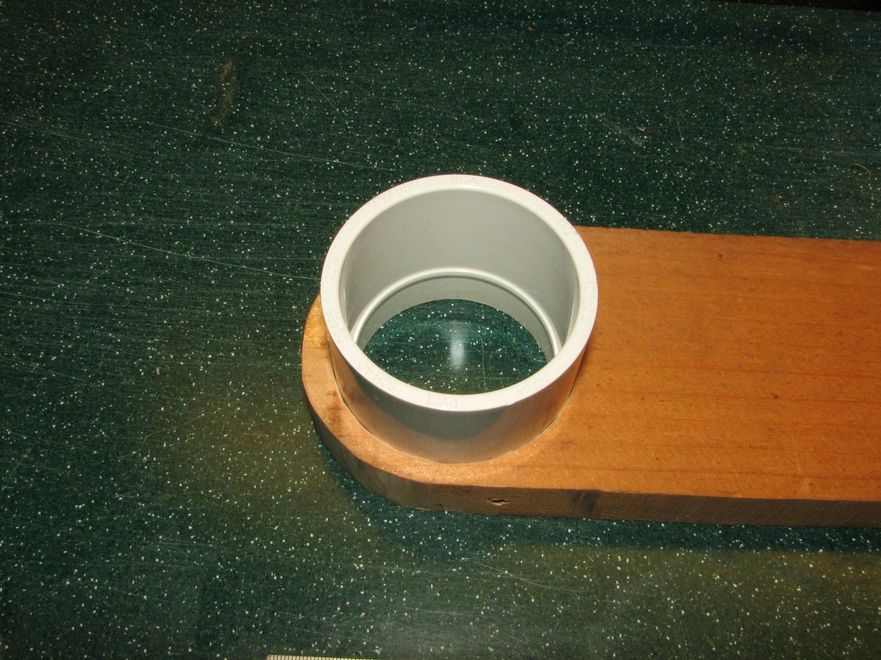
I first rounded the ends of the board and then traced the outline of the coupling ~ 3/8" from one end. Using a jig saw I then cut along the inside of the traced line and removed the plug. I then epoxied the cut closed. At this point the PVC coupling should fit firmly in the hole but still rotate easily. I now cut 3/4" from one end of the coupling and squared the cut surface. This cut surface will be the bottom of the holder.
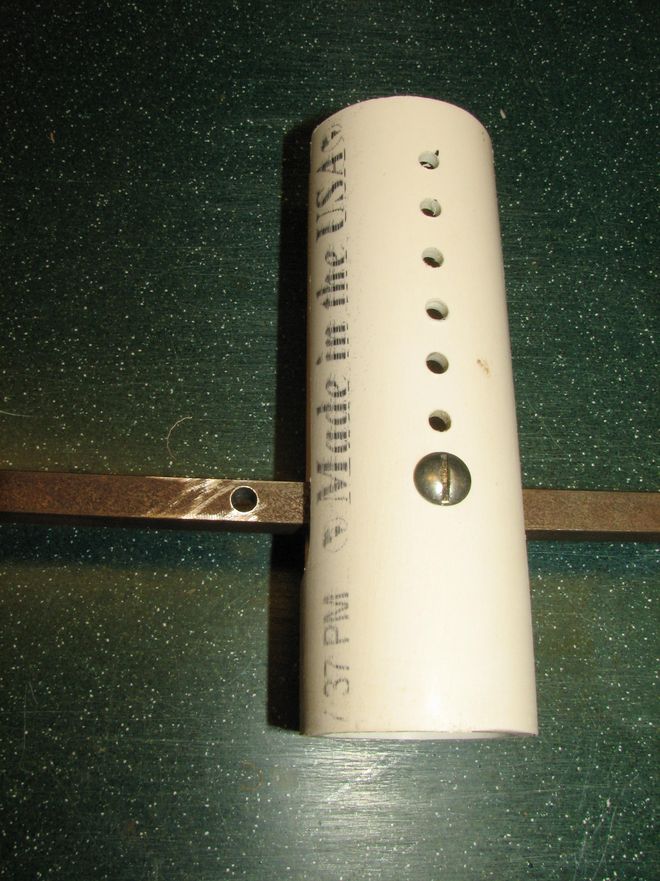
Next I drilled a 5/8" hole completely through the 8" length of PVC pipe about 2" from one end. Turning the pipe 90 degrees, I then drilled a series of 3/16" holes ~ 1/2" apart, again completely through the pipe. Now using a bandsaw (blade with fine teeth) or hand saw make slots from the top of the pipe to the 5/8" holes. Smooth the cut surfaces with 120 grit sandpaper.
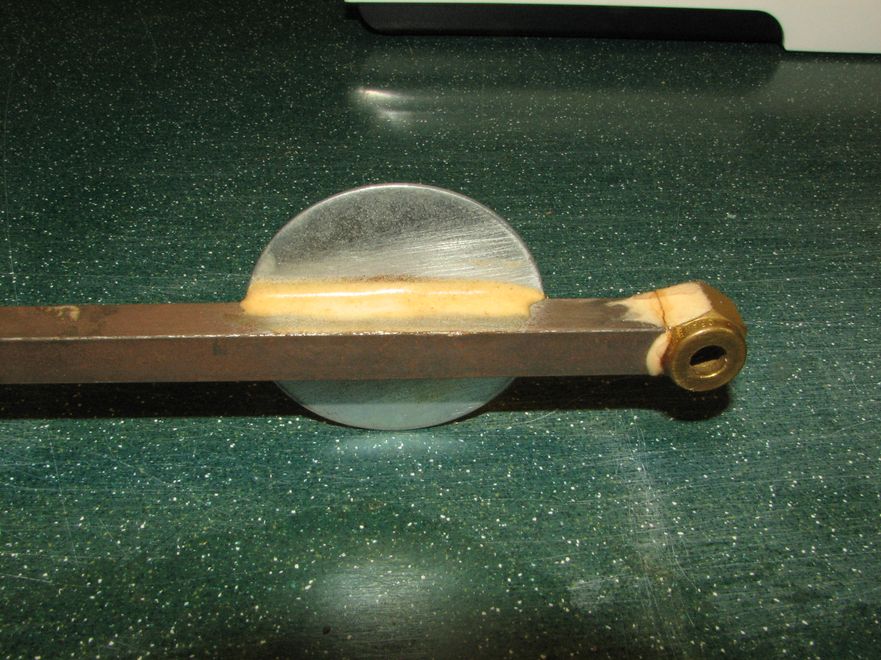
Drill a hole slightly larger than 3/16" through the middle of the 3/8" metal rod. Epoxy the large fender washer about 3/4" from the end of the rod and at right angles to the rod surface that the hole was drilled through. Epoxy the lock nut or bushing to the squared off end of the rod as shown in the picture. Allow time for the epoxy to harden. I also used some filler in the epoxy to make it easier to apply and make the fillets for extra strength.
At this point we can assemble the unit. The fender washer will be on the upper surface of the rod. Choose any pair of the 3/16" holes, thread the bolt through the PVC pipe and metal rod and lightly secure it with the nut. Place the PVC pipe in the PVC couple and press down lightly. The unit as a whole should rotate easily but not sloppily in the wood base. Now on to the dial indicator frame.

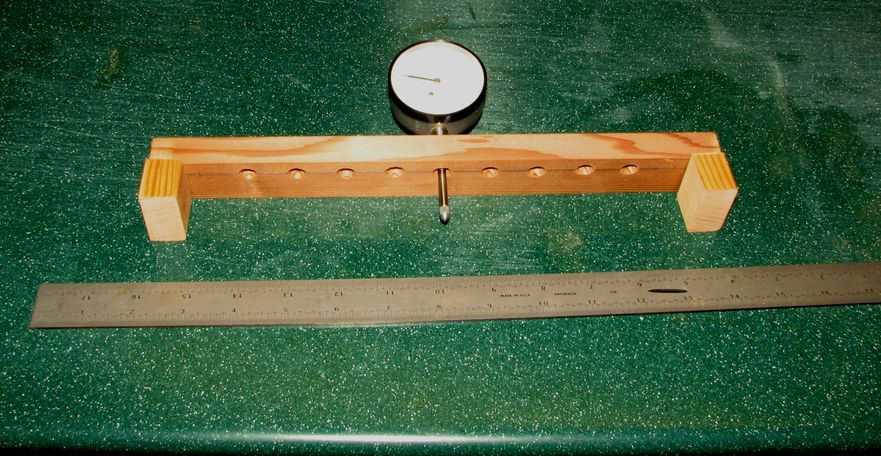
The wooden frame consists of three parts: a piece of wood ~1 1/2-1 3/4" wide and 3/4" thick that's 2" longer than the widest dimension of the lower bout of the instrument; and two pieces of wood the width of the first piece and about 1" long. You will also need an inexpensive dial indicator for making the deflection measurements.
Beginning ~ 1 1/2" from the end of the long wooden piece, drill a series of holes 1" apart until you reach the other end of the piece. The hole diameter should be the same as the main stem of the dial indicator. See below.
Part 2 will show the calibration of the deflection device and Part 3 will show how to make top deflection measurements.
aloha,