
![[:Y:]](./images/smilies/smiley20.gif "Thumbs Up")
| Official Luthiers Forum! http://luthiersforum.com/forum/ |
|
| Dave's Daft Experimental ESJ-2 Build http://luthiersforum.com/forum/viewtopic.php?f=10133&t=37353 |
Page 3 of 5 |
| Author: | SteveSmith [ Wed Aug 29, 2012 5:44 am ] |
| Post subject: | Re: Dave's Daft Experimental ESJ-2 Build |
|
|
|
| Author: | Don Williams [ Wed Aug 29, 2012 6:13 am ] |
| Post subject: | Re: Dave's Daft Experimental ESJ-2 Build |
Dave Fifield wrote: JLK - Well I'll be......just goes to prove there's nothing new under the sun! I doff my cap to Mr. Schwartz and will henceforth pay him due deference! So, it's to be called the "Schwartz Smooth Bevel" from now on.... Aaron - I'm glad you are finding the build interesting. I'm looking forward to hearing how she sounds at the end also. I have a special treat lined up for y'all for the video demo at the end..... Steve/Tony - you guys are great! I found the bucket of kerfings in my workshop when I got over here tonight, just where Tony said they'd be - excellent! ![[clap]](./images/smilies/smiley32.gif "adulations") Here's a short video of the kerfings restoration process. As you will see, they did the trick! More later... Cheers for now, Dave F. Love the video. Restored kerfings. Awesome. |
|
| Author: | Tony_in_NYC [ Wed Aug 29, 2012 7:38 am ] |
| Post subject: | Re: Dave's Daft Experimental ESJ-2 Build |
Greatest. Video. Ever. Dave, you are my new hero! You can just hear the guitar open up after you restored the kerfings! Free lifetime supply for you! Laser beams and kerfing restorations. Seems like you have it all! You deserve this:  And this: Oops! Had to remove that picture after I read the fine print. You still get an internet though Dave. On me! Kudos sir. |
|
| Author: | WudWerkr [ Wed Aug 29, 2012 7:54 am ] |
| Post subject: | Re: Dave's Daft Experimental ESJ-2 Build |
Sooooooooooooooooooooooo Much Kerfing ......... Sooooooooooo little time !! What really surprised me was the sound of those Kerfings , They must have been Tenor Kerfings . A very distinct tone . The BIG question is , Once you have tuned a top how do you know that the Kerfings are the proper note before the application ? What happens if you pour a bucket of "F" Kerfings into a Top thats tap tuned to "G" ?? |
|
| Author: | Tony_in_NYC [ Wed Aug 29, 2012 8:05 am ] |
| Post subject: | Dave's Daft Experimental ESJ-2 Build |
My kerfings just know. |
|
| Author: | Linus [ Mon Sep 03, 2012 8:51 am ] |
| Post subject: | Re: Dave's Daft Experimental ESJ-2 Build |
Wow... This build blows my mind. It's fantastic. |
|
| Author: | Dave Fifield [ Tue Sep 04, 2012 2:07 am ] |
| Post subject: | Re: Dave's Daft Experimental ESJ-2 Build |
Cheers Linus, and welcome to the OLF! There are lots of very innovative folk on here and you'll get loads of great ideas! I suggest you spend a few hours (days? weeks?) browsing the archives - there's a ton of great info to be had.... I've been working on my challenge2 build over the long weekend. The kerfings kept leaking out of the binding/purfling channel, so I decided to bite the bullet and get the binding/purf done and out of the way. The purf bent around the smooth bevel area okay, but the binding didn't want to cooperate at all. I had to bend it in the z direction manually on my old bending iron. It took about a half hour of tweaking it, but I finally got it shaped so that it would glue into the channel properly without too much force. Here's a shot of one of the purfling "packets". Note the support wood either side of the purfling to stop it from deforming when I bent it in my Fox style bending machine: 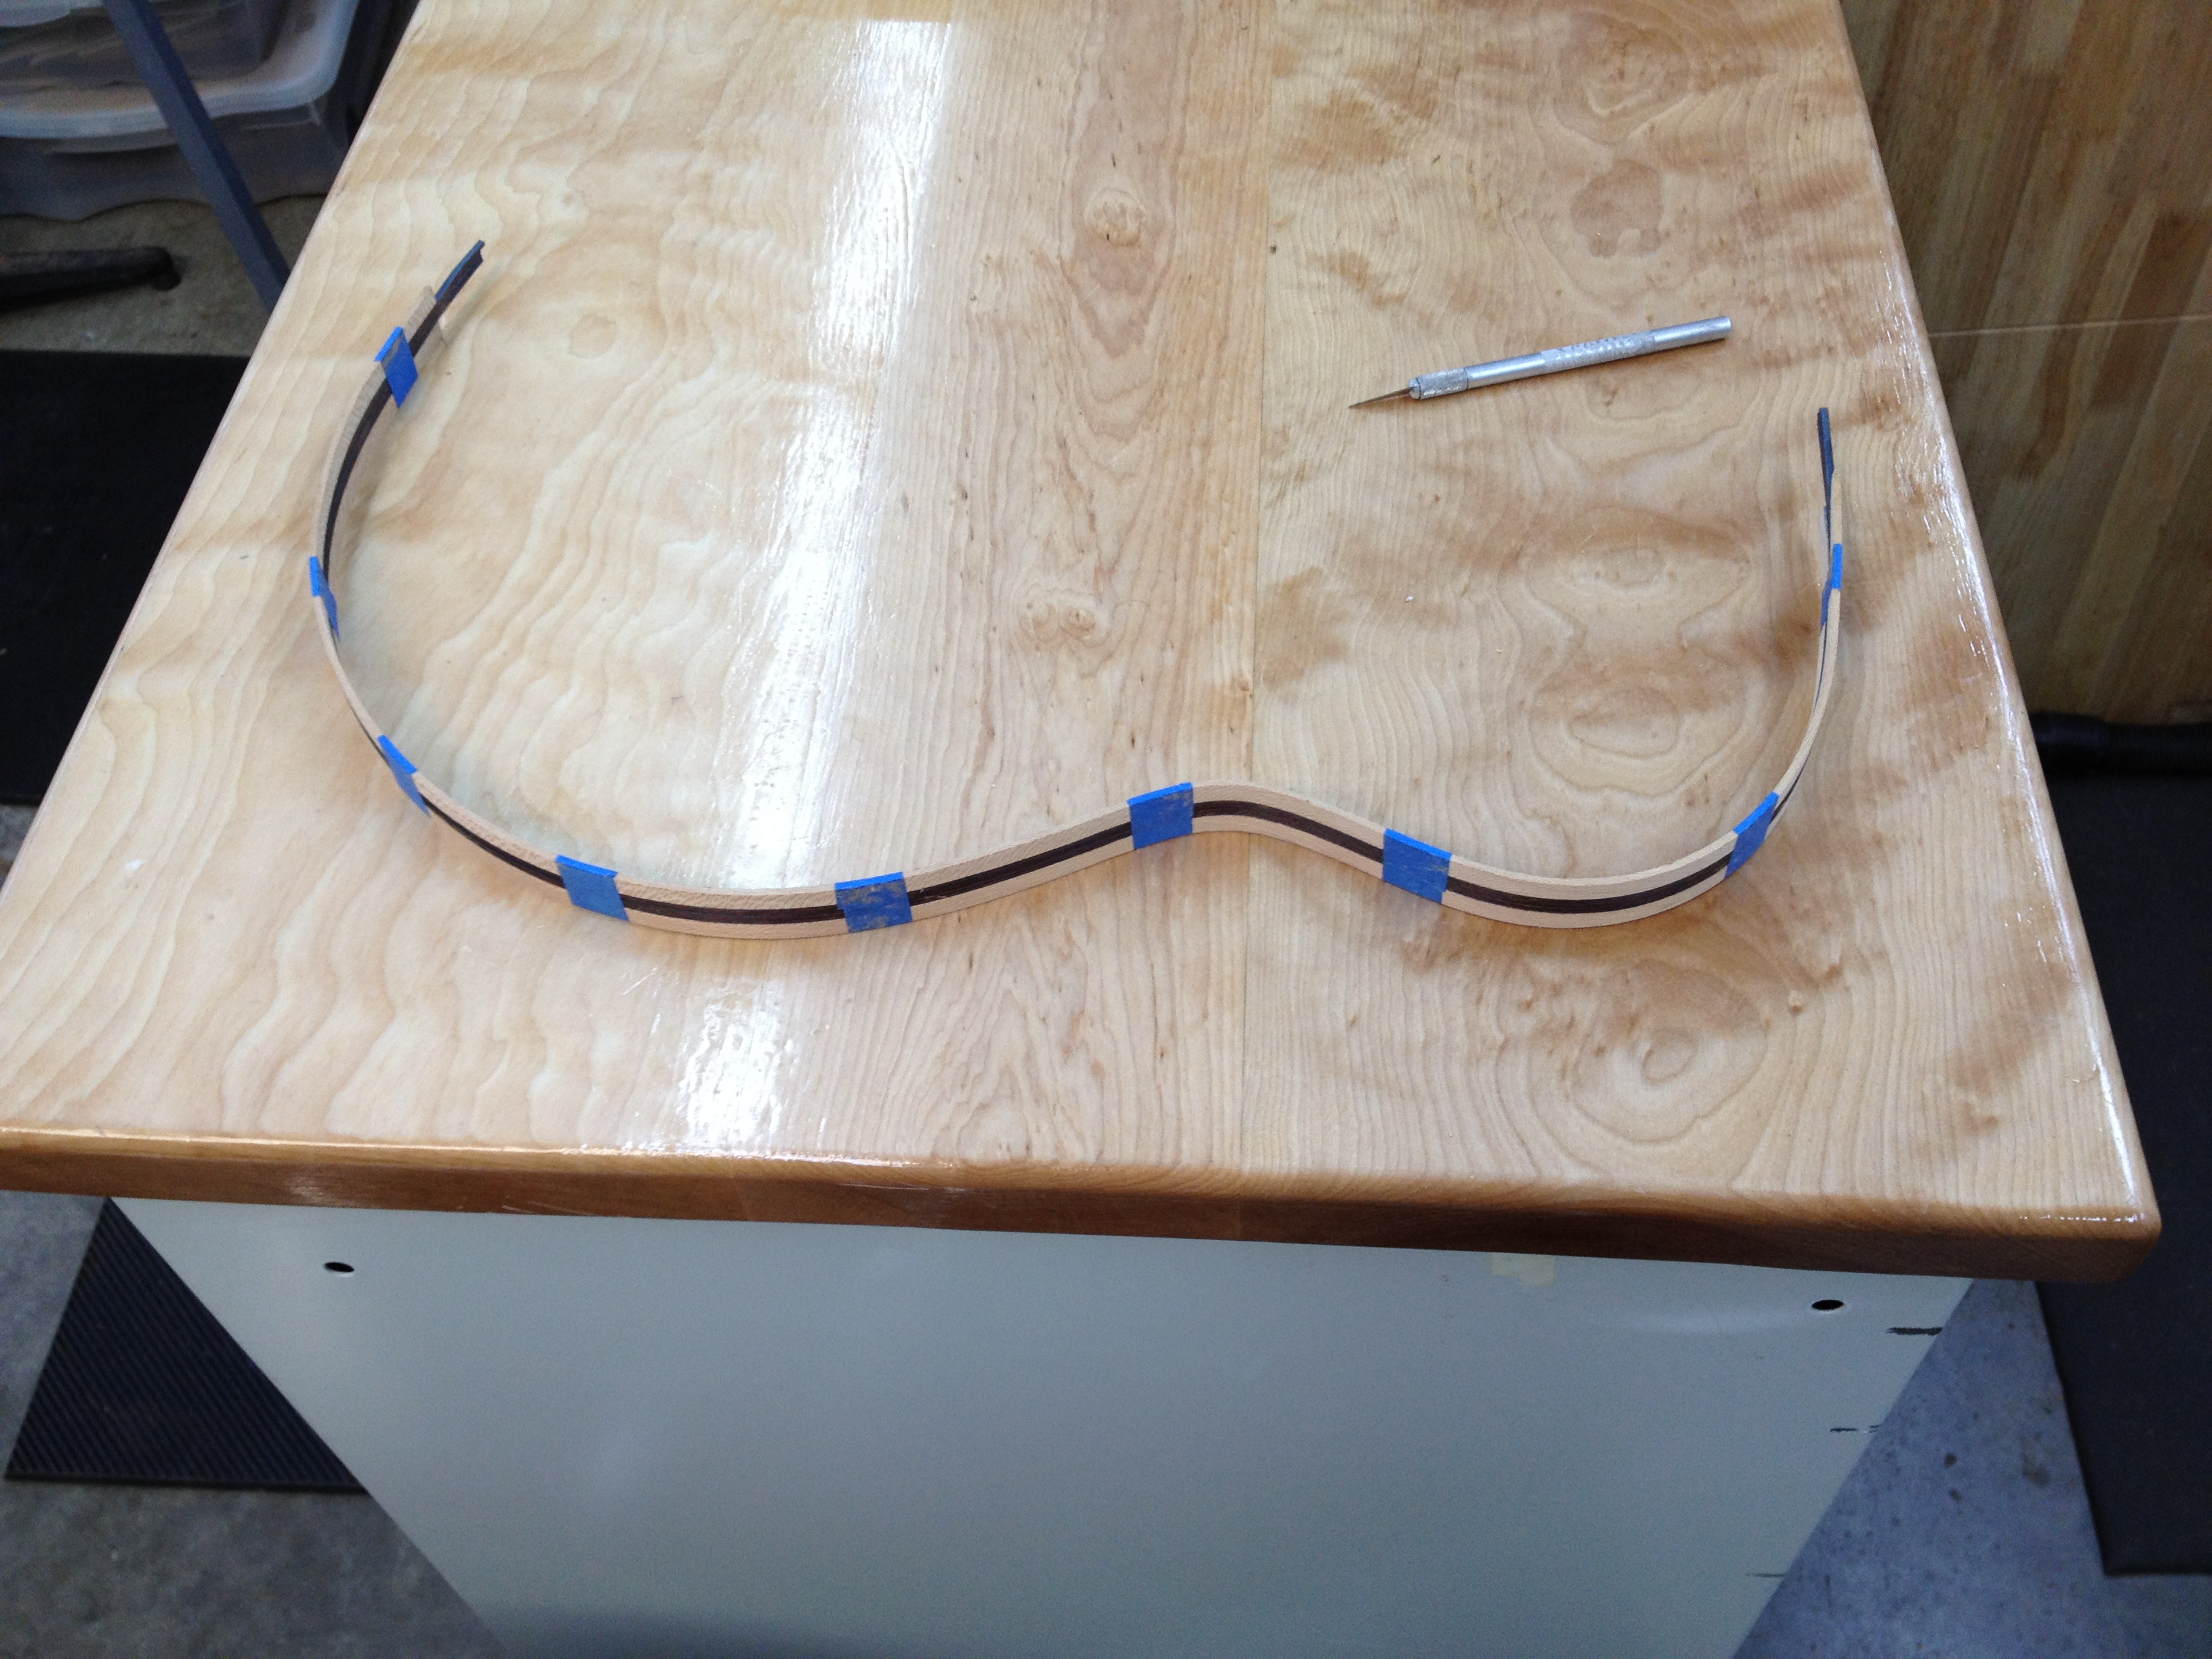 Here's the binding and purfling bent in the x and y directions (binding needs to be bent in z direction also): 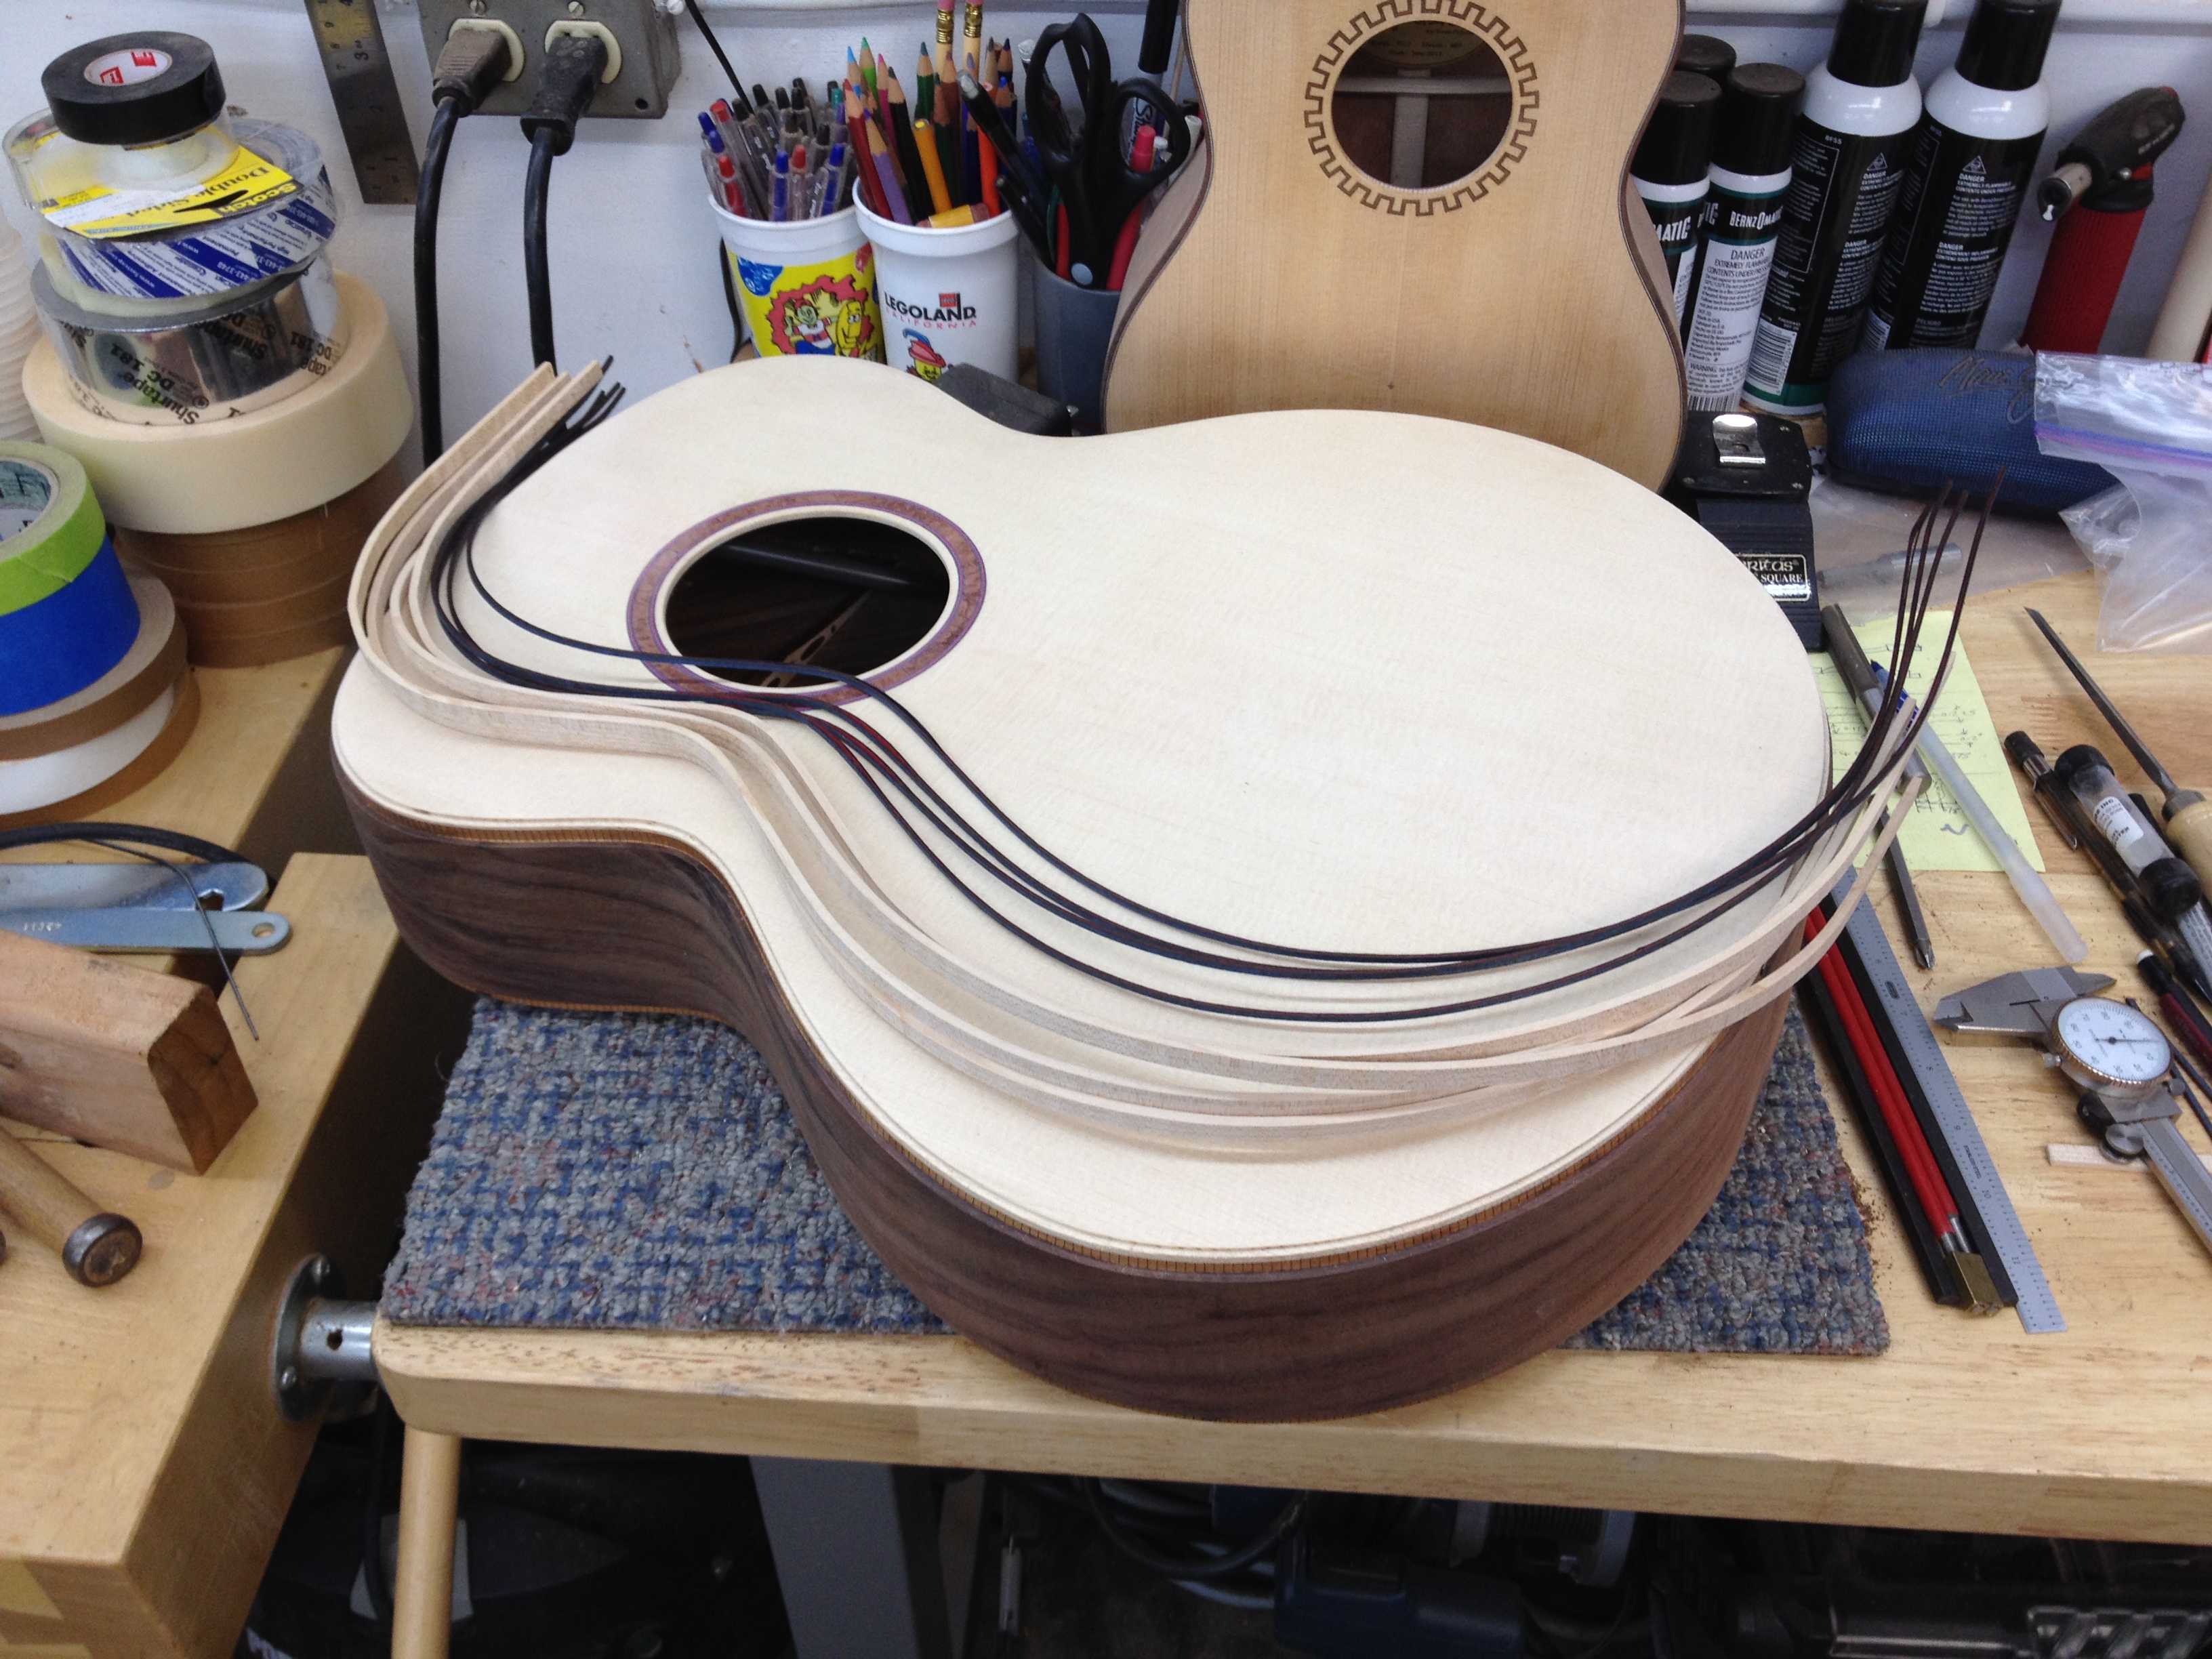 Here are a few random piccies of the rest of the binding process: 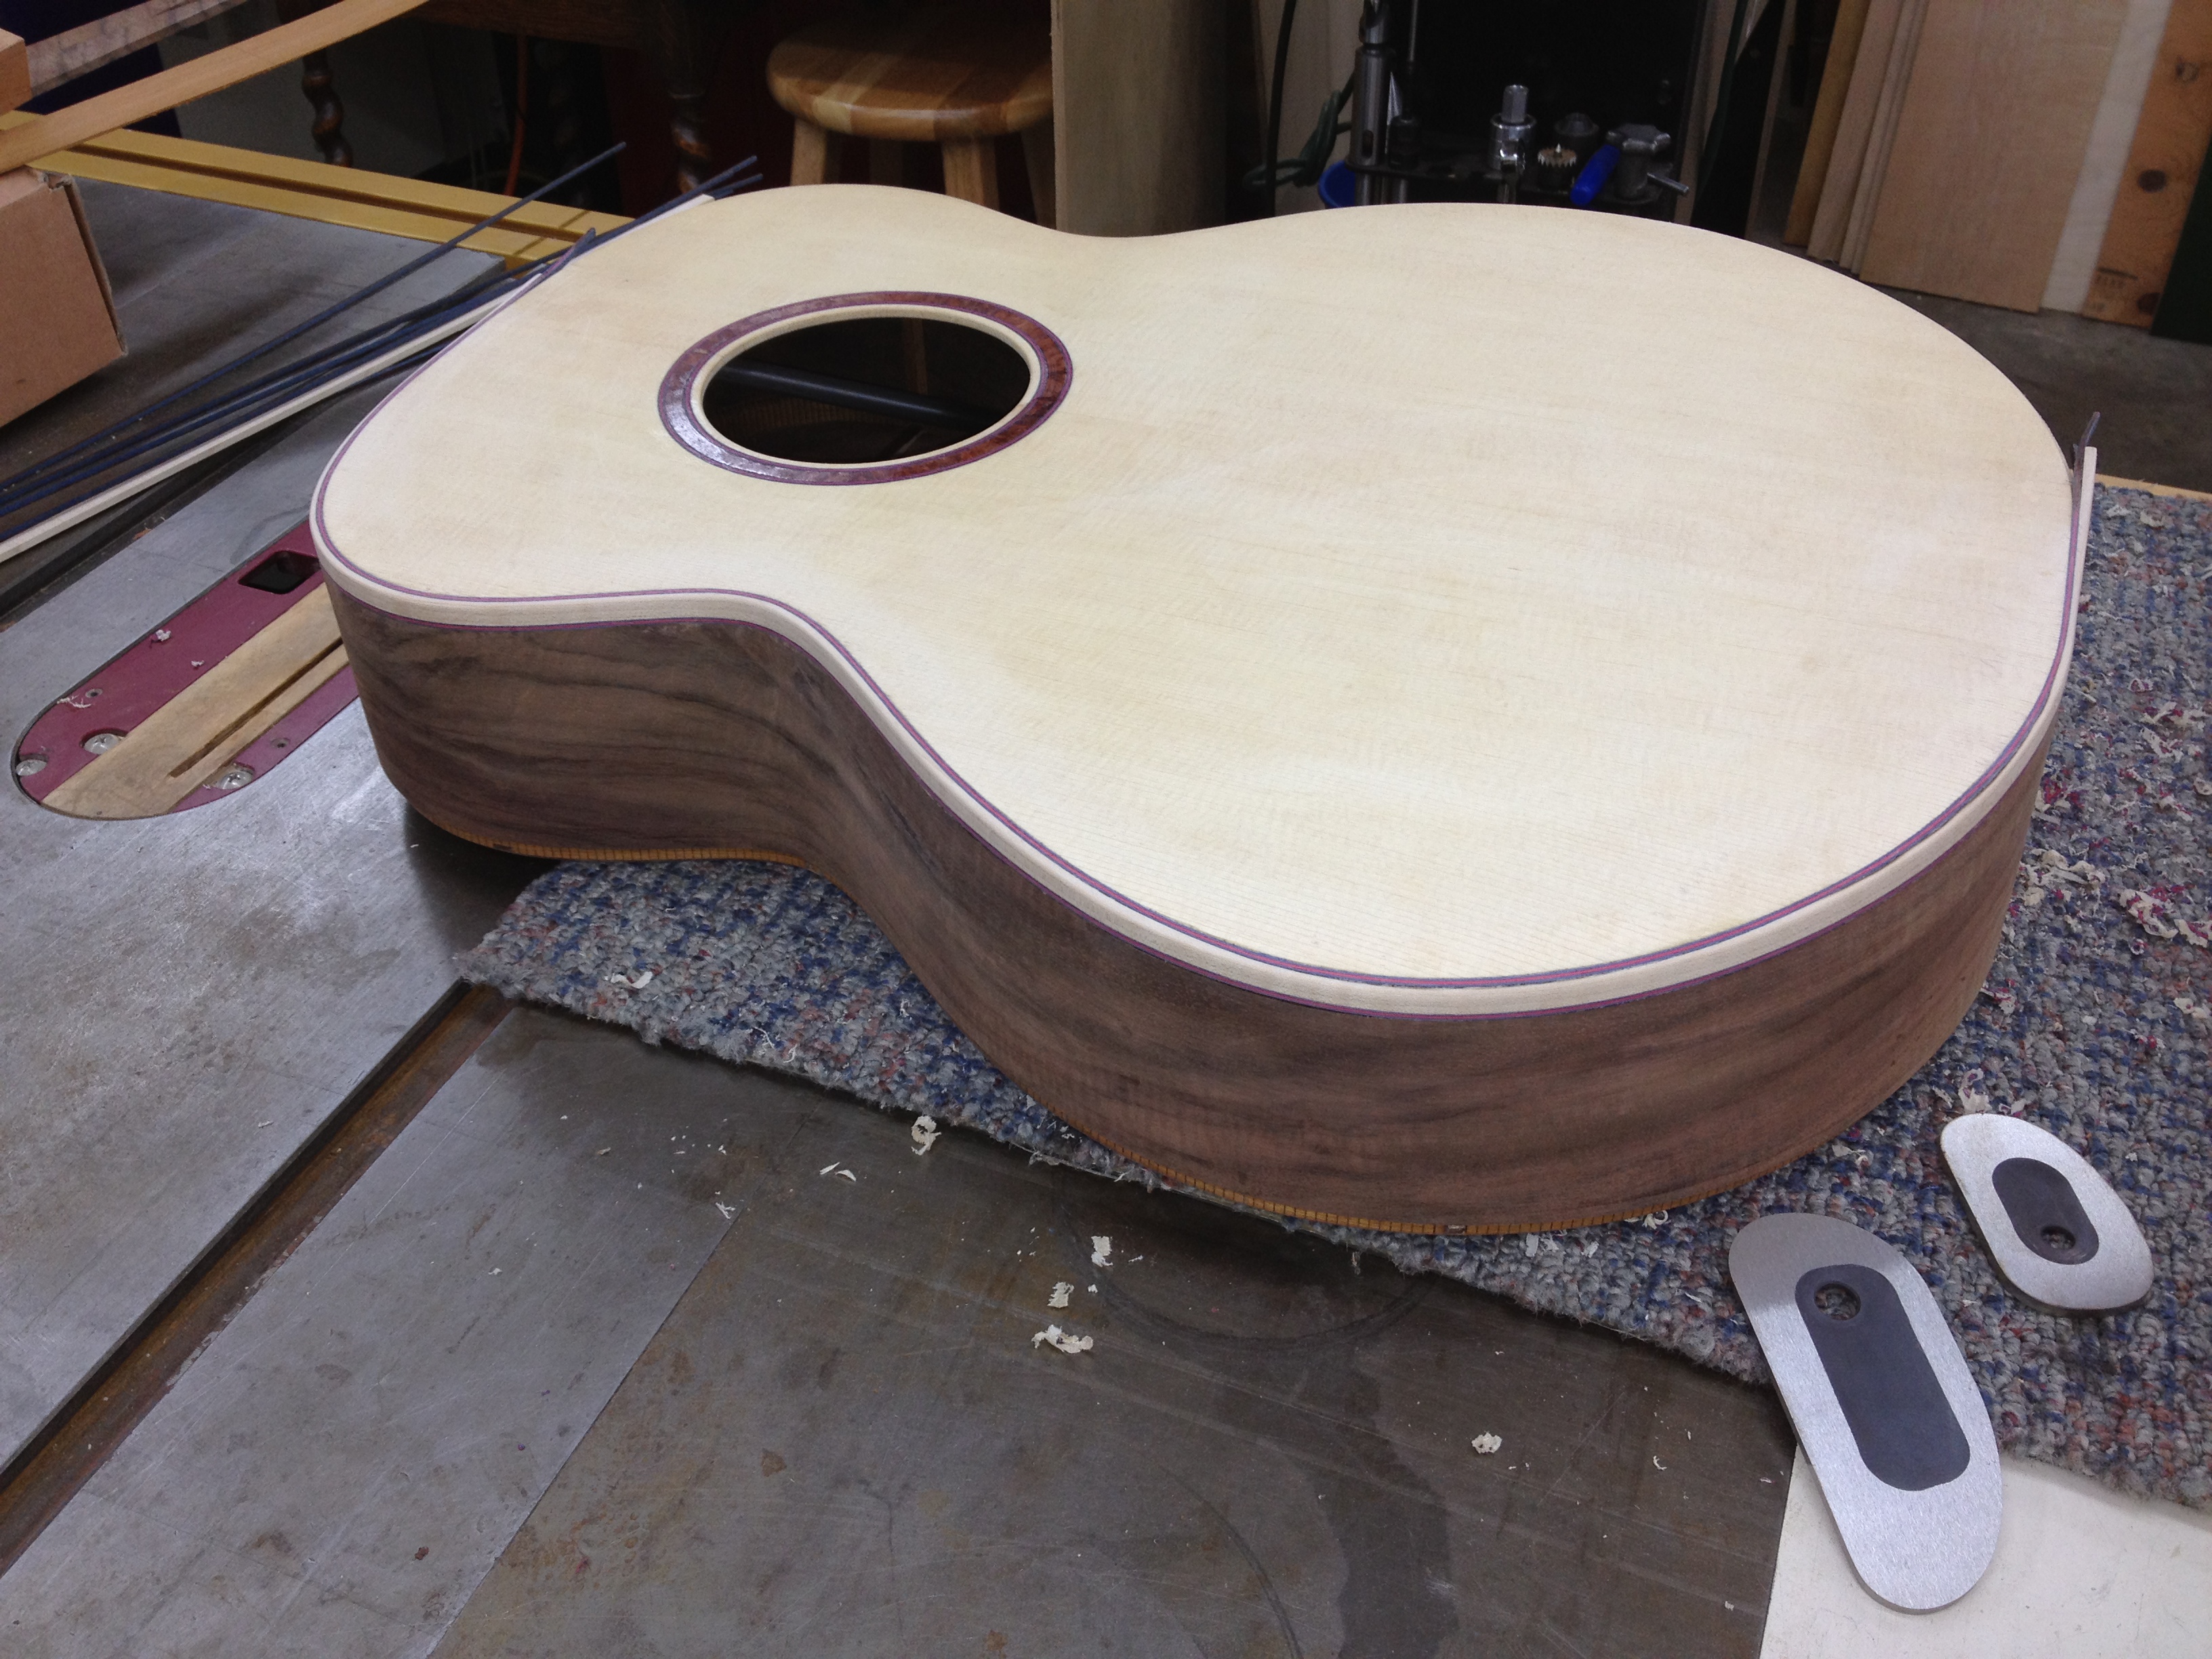 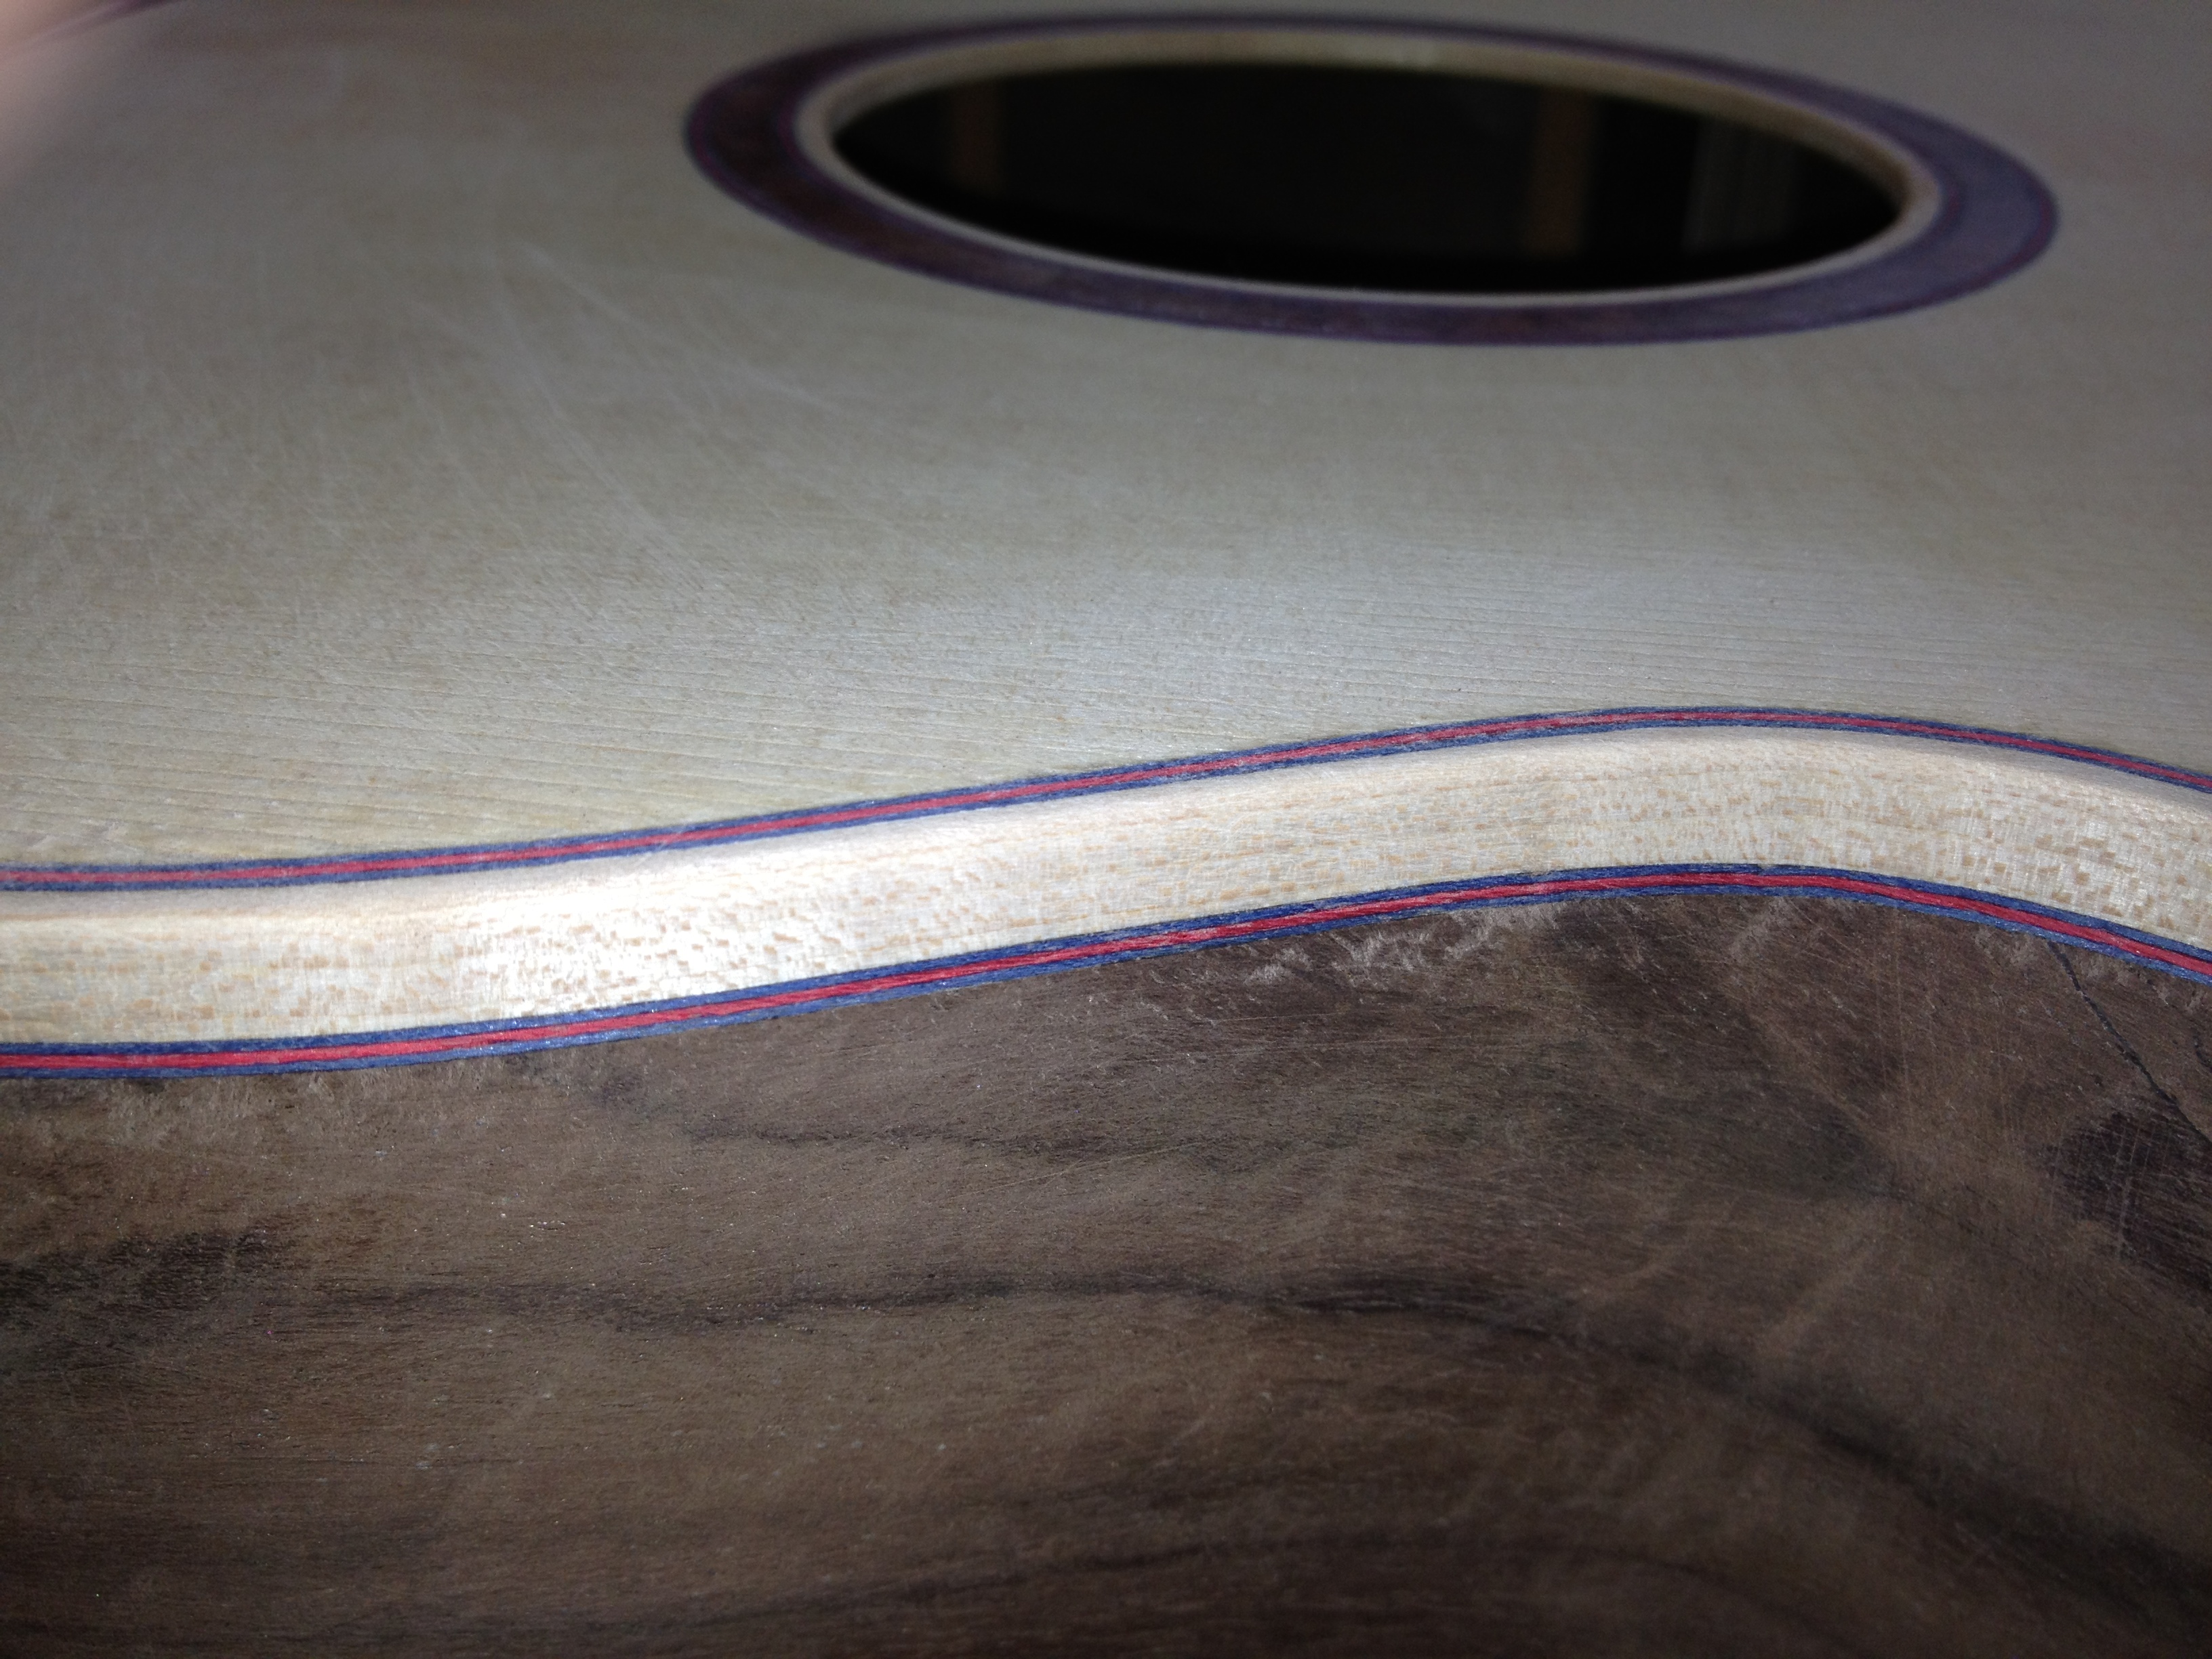 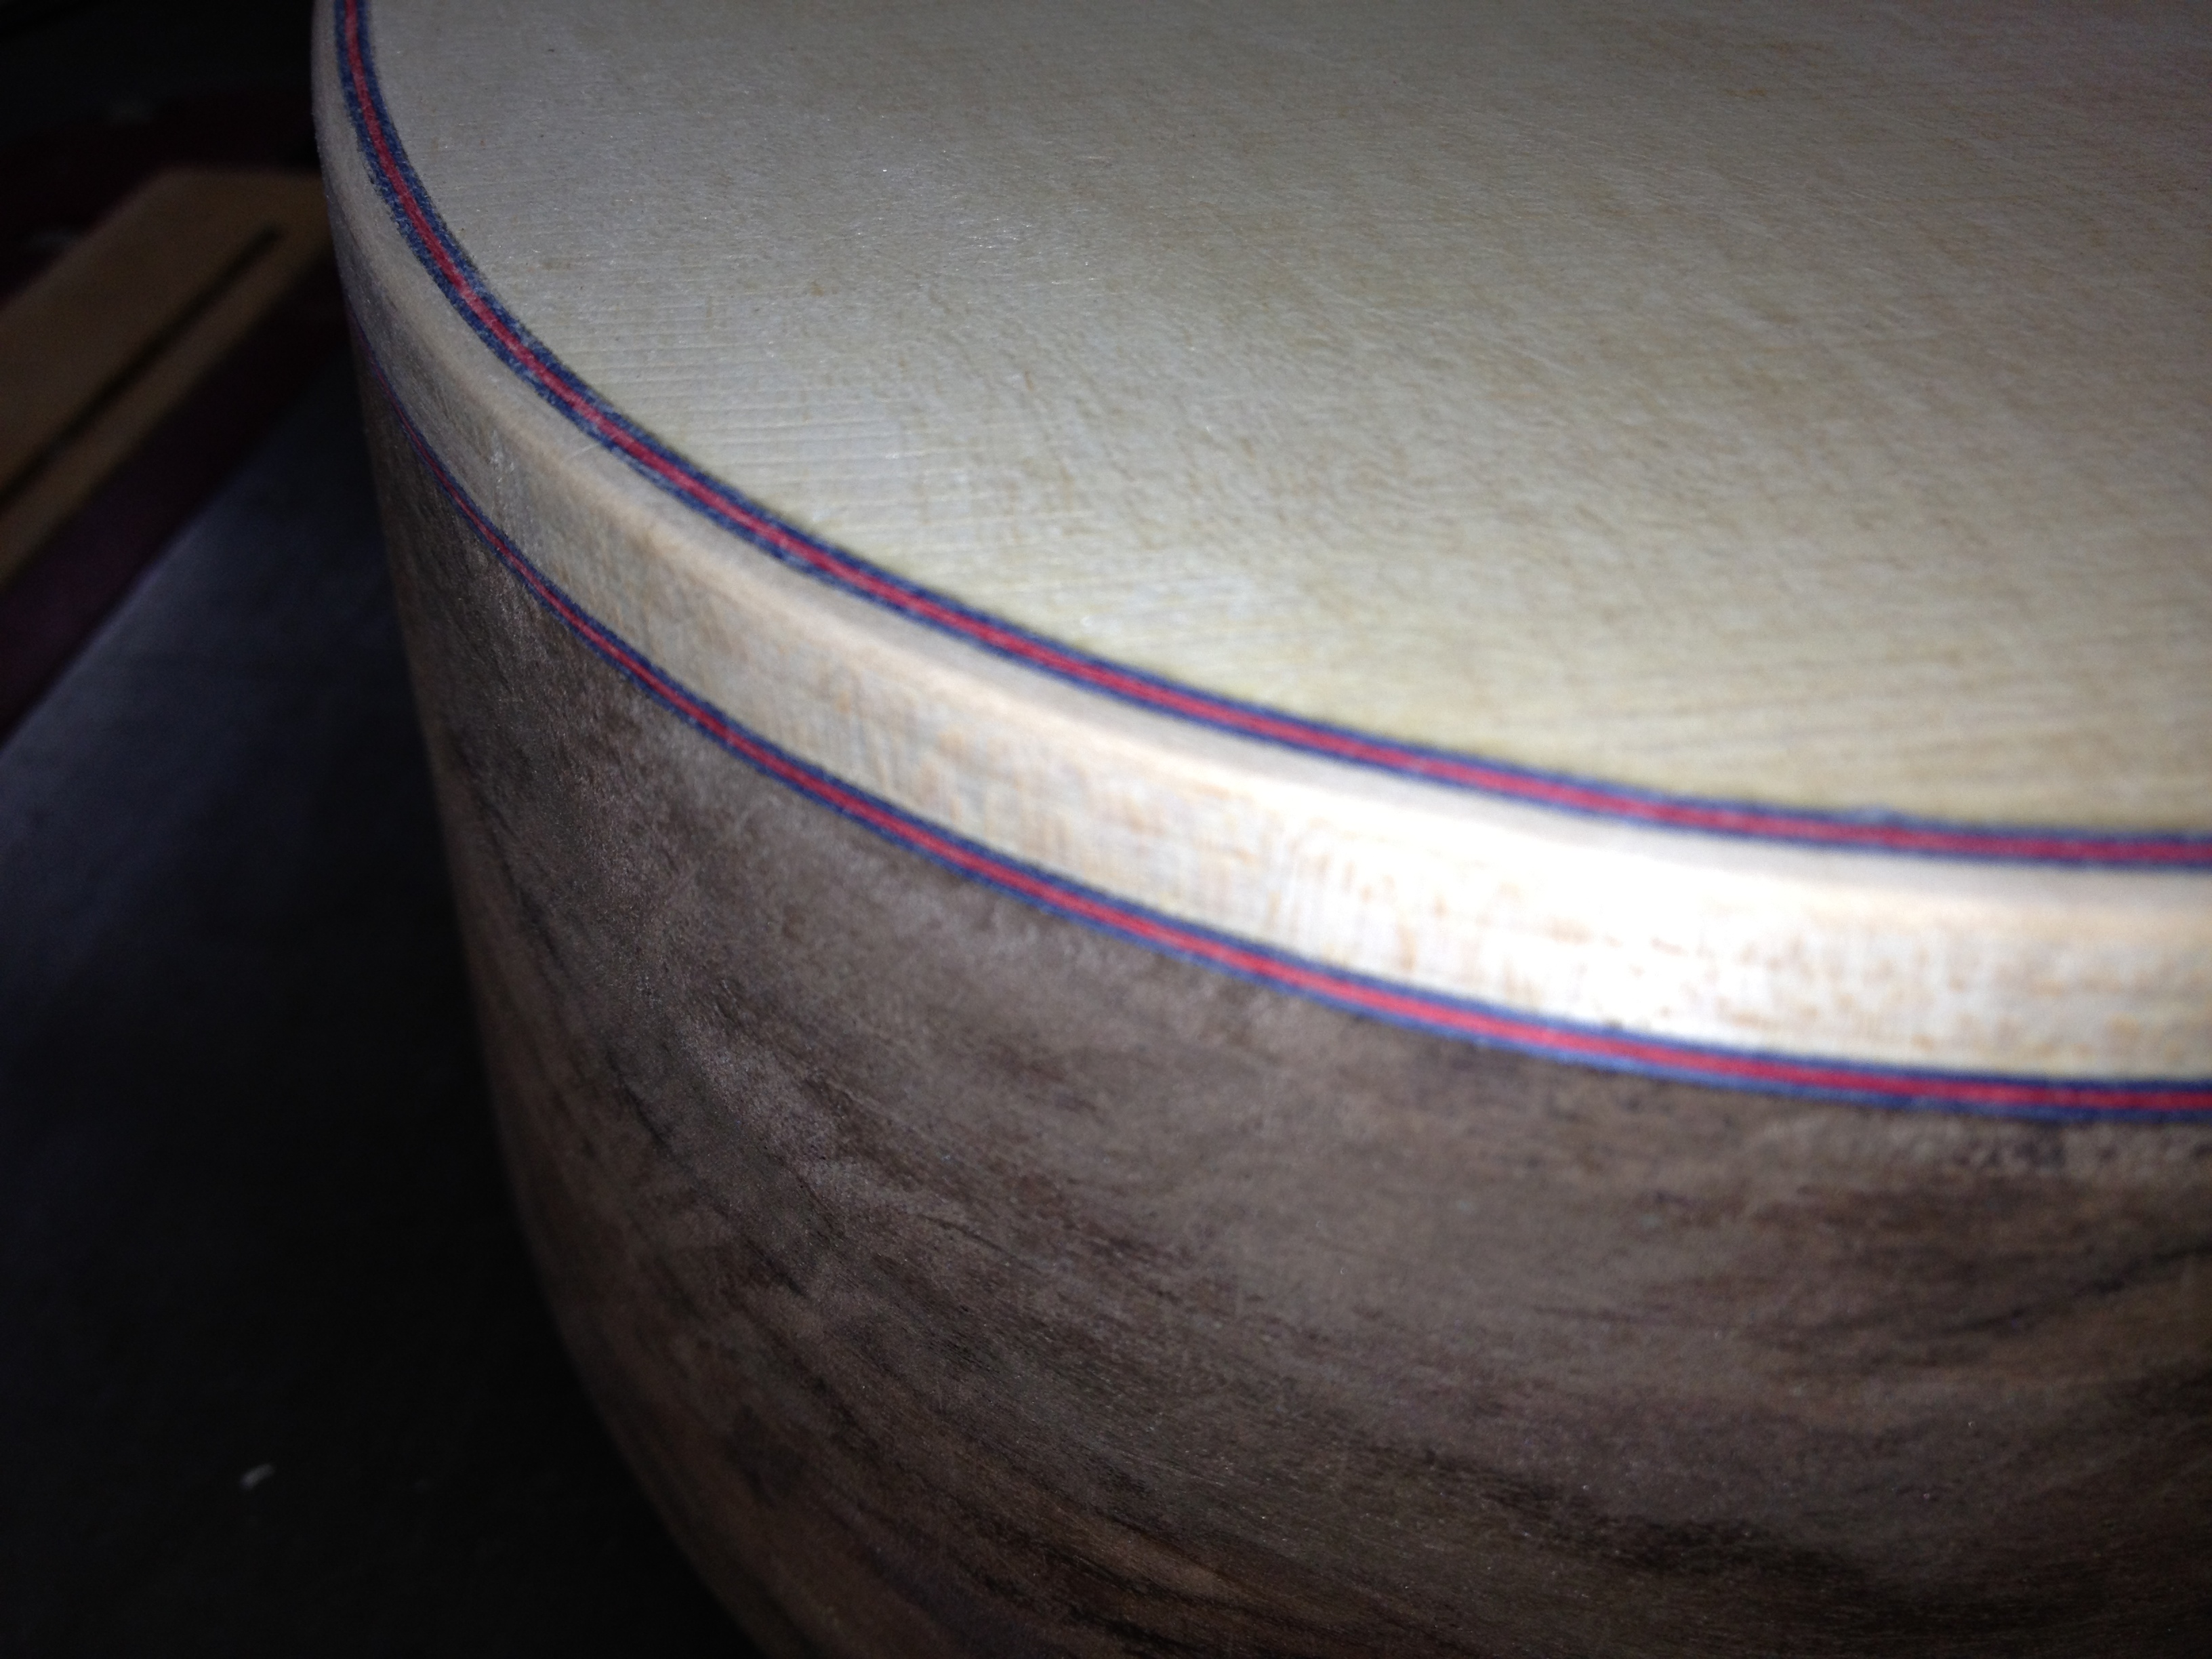 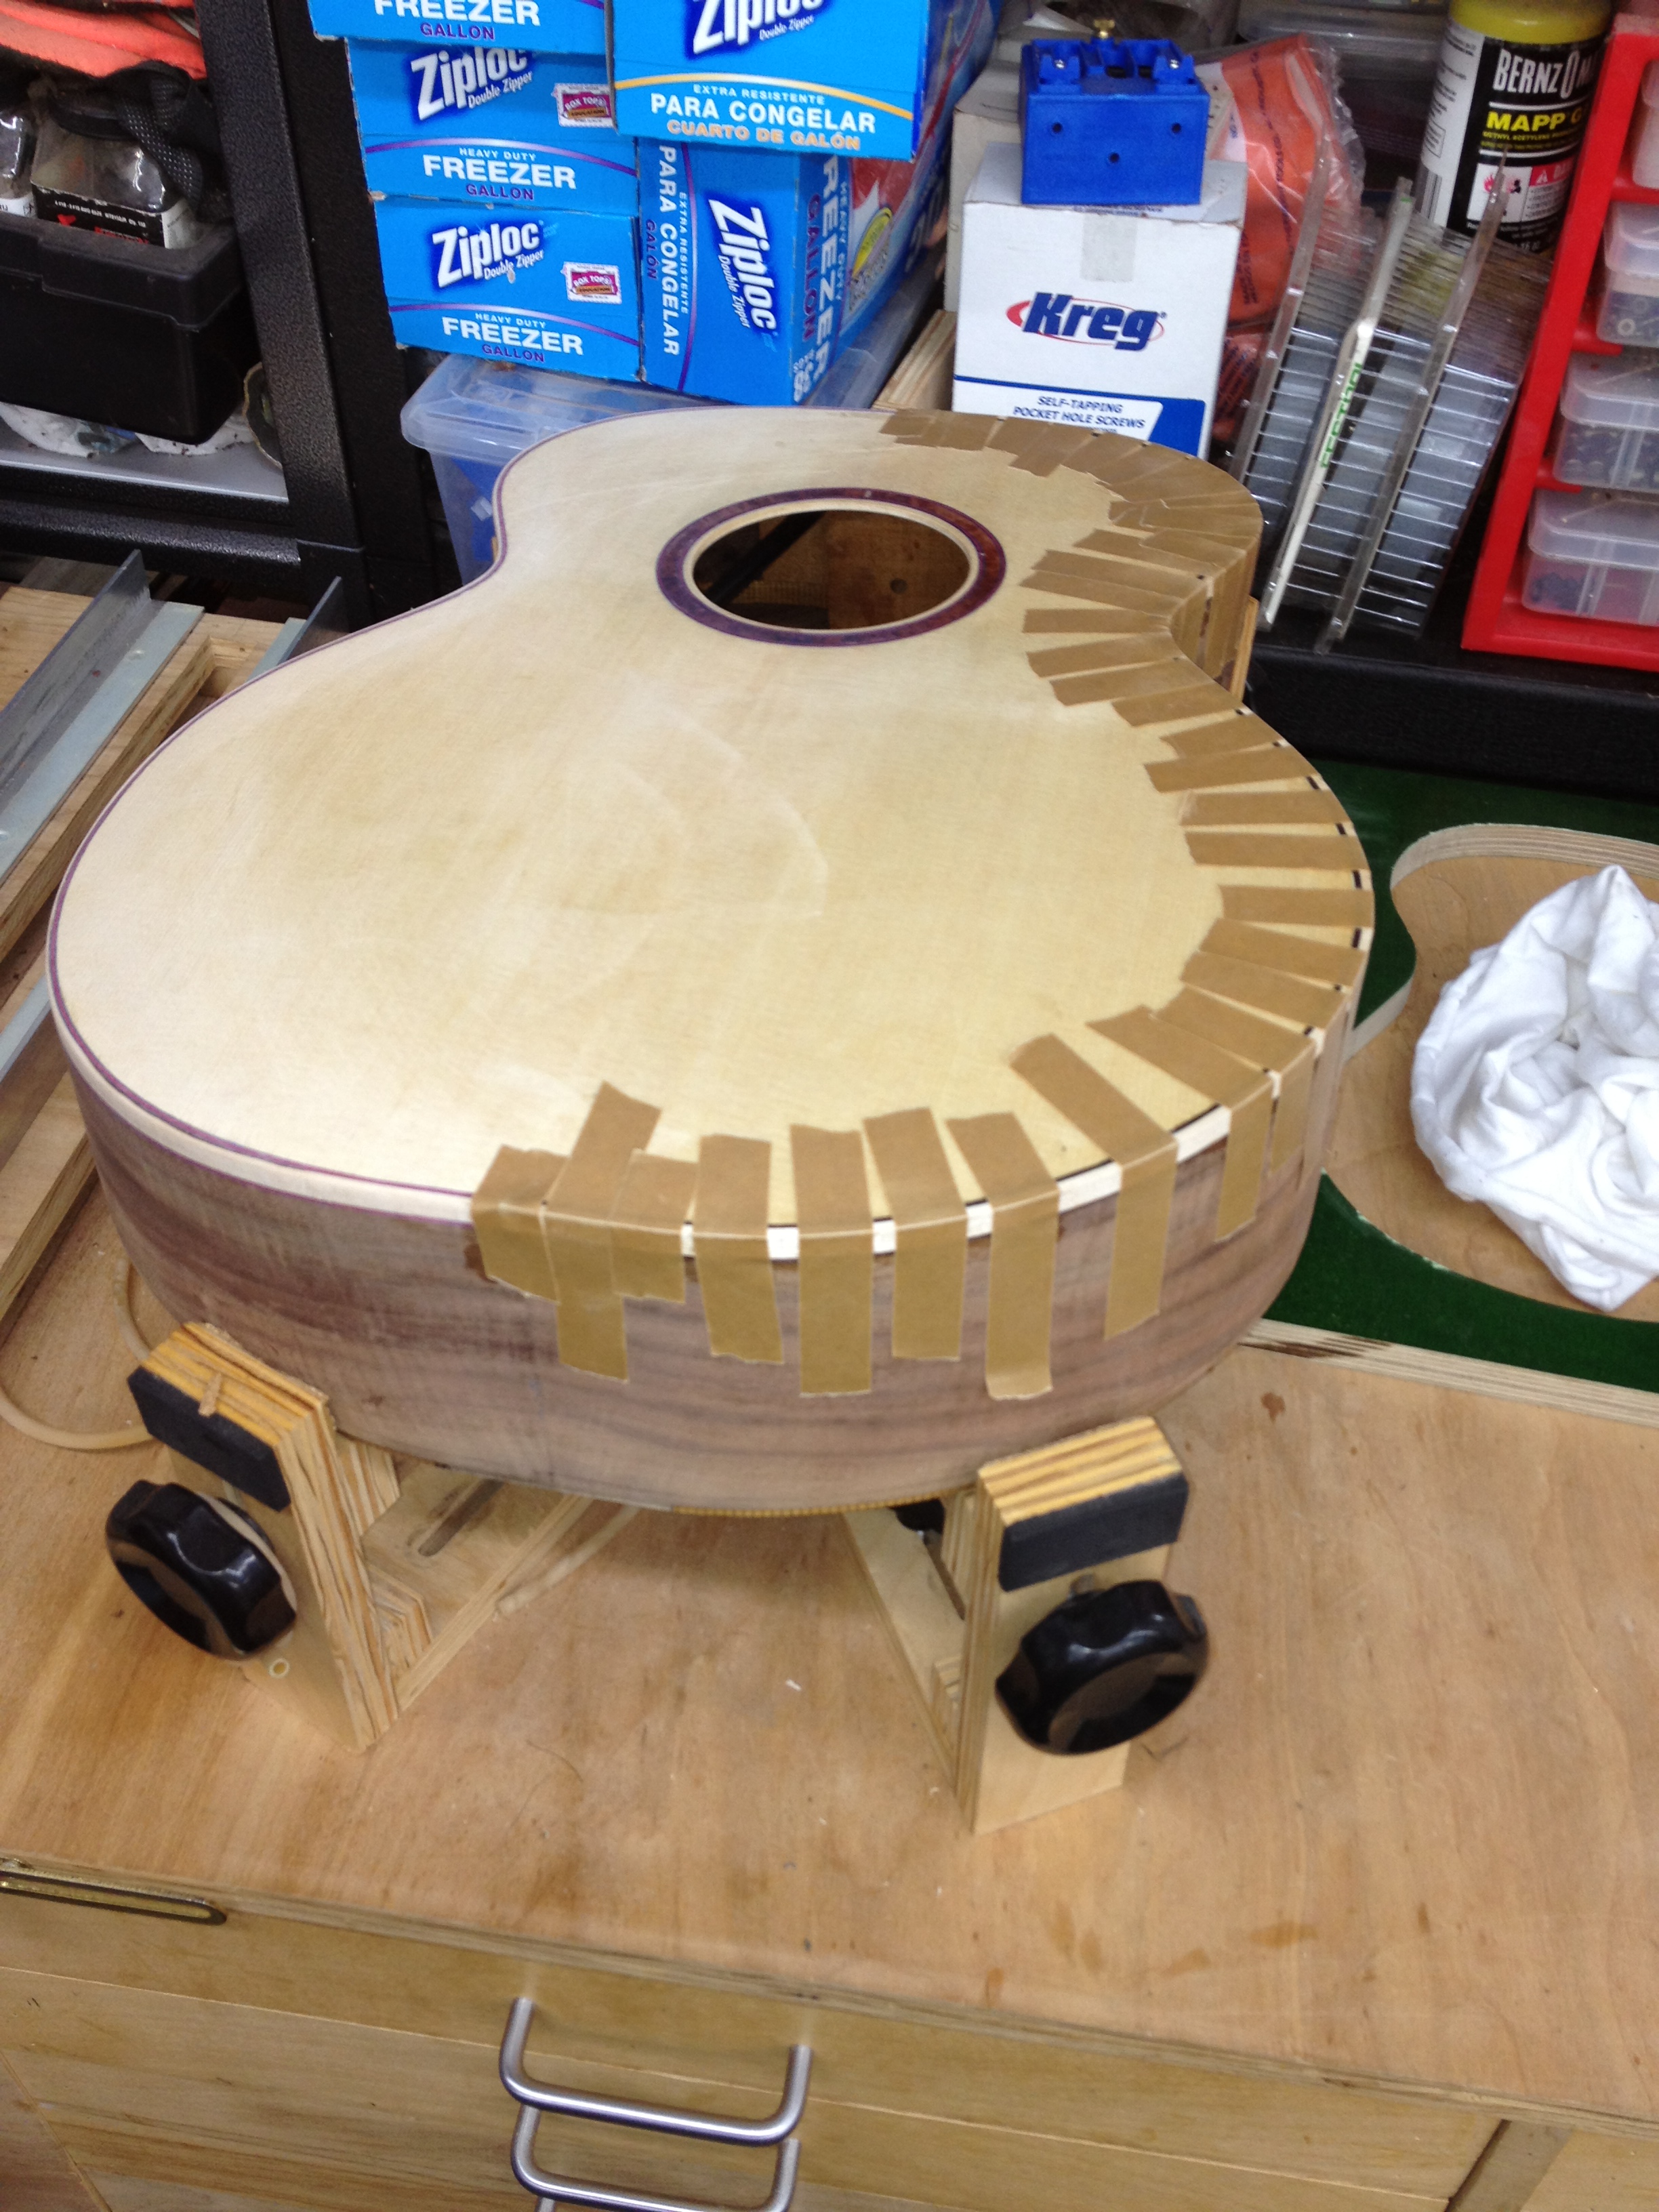 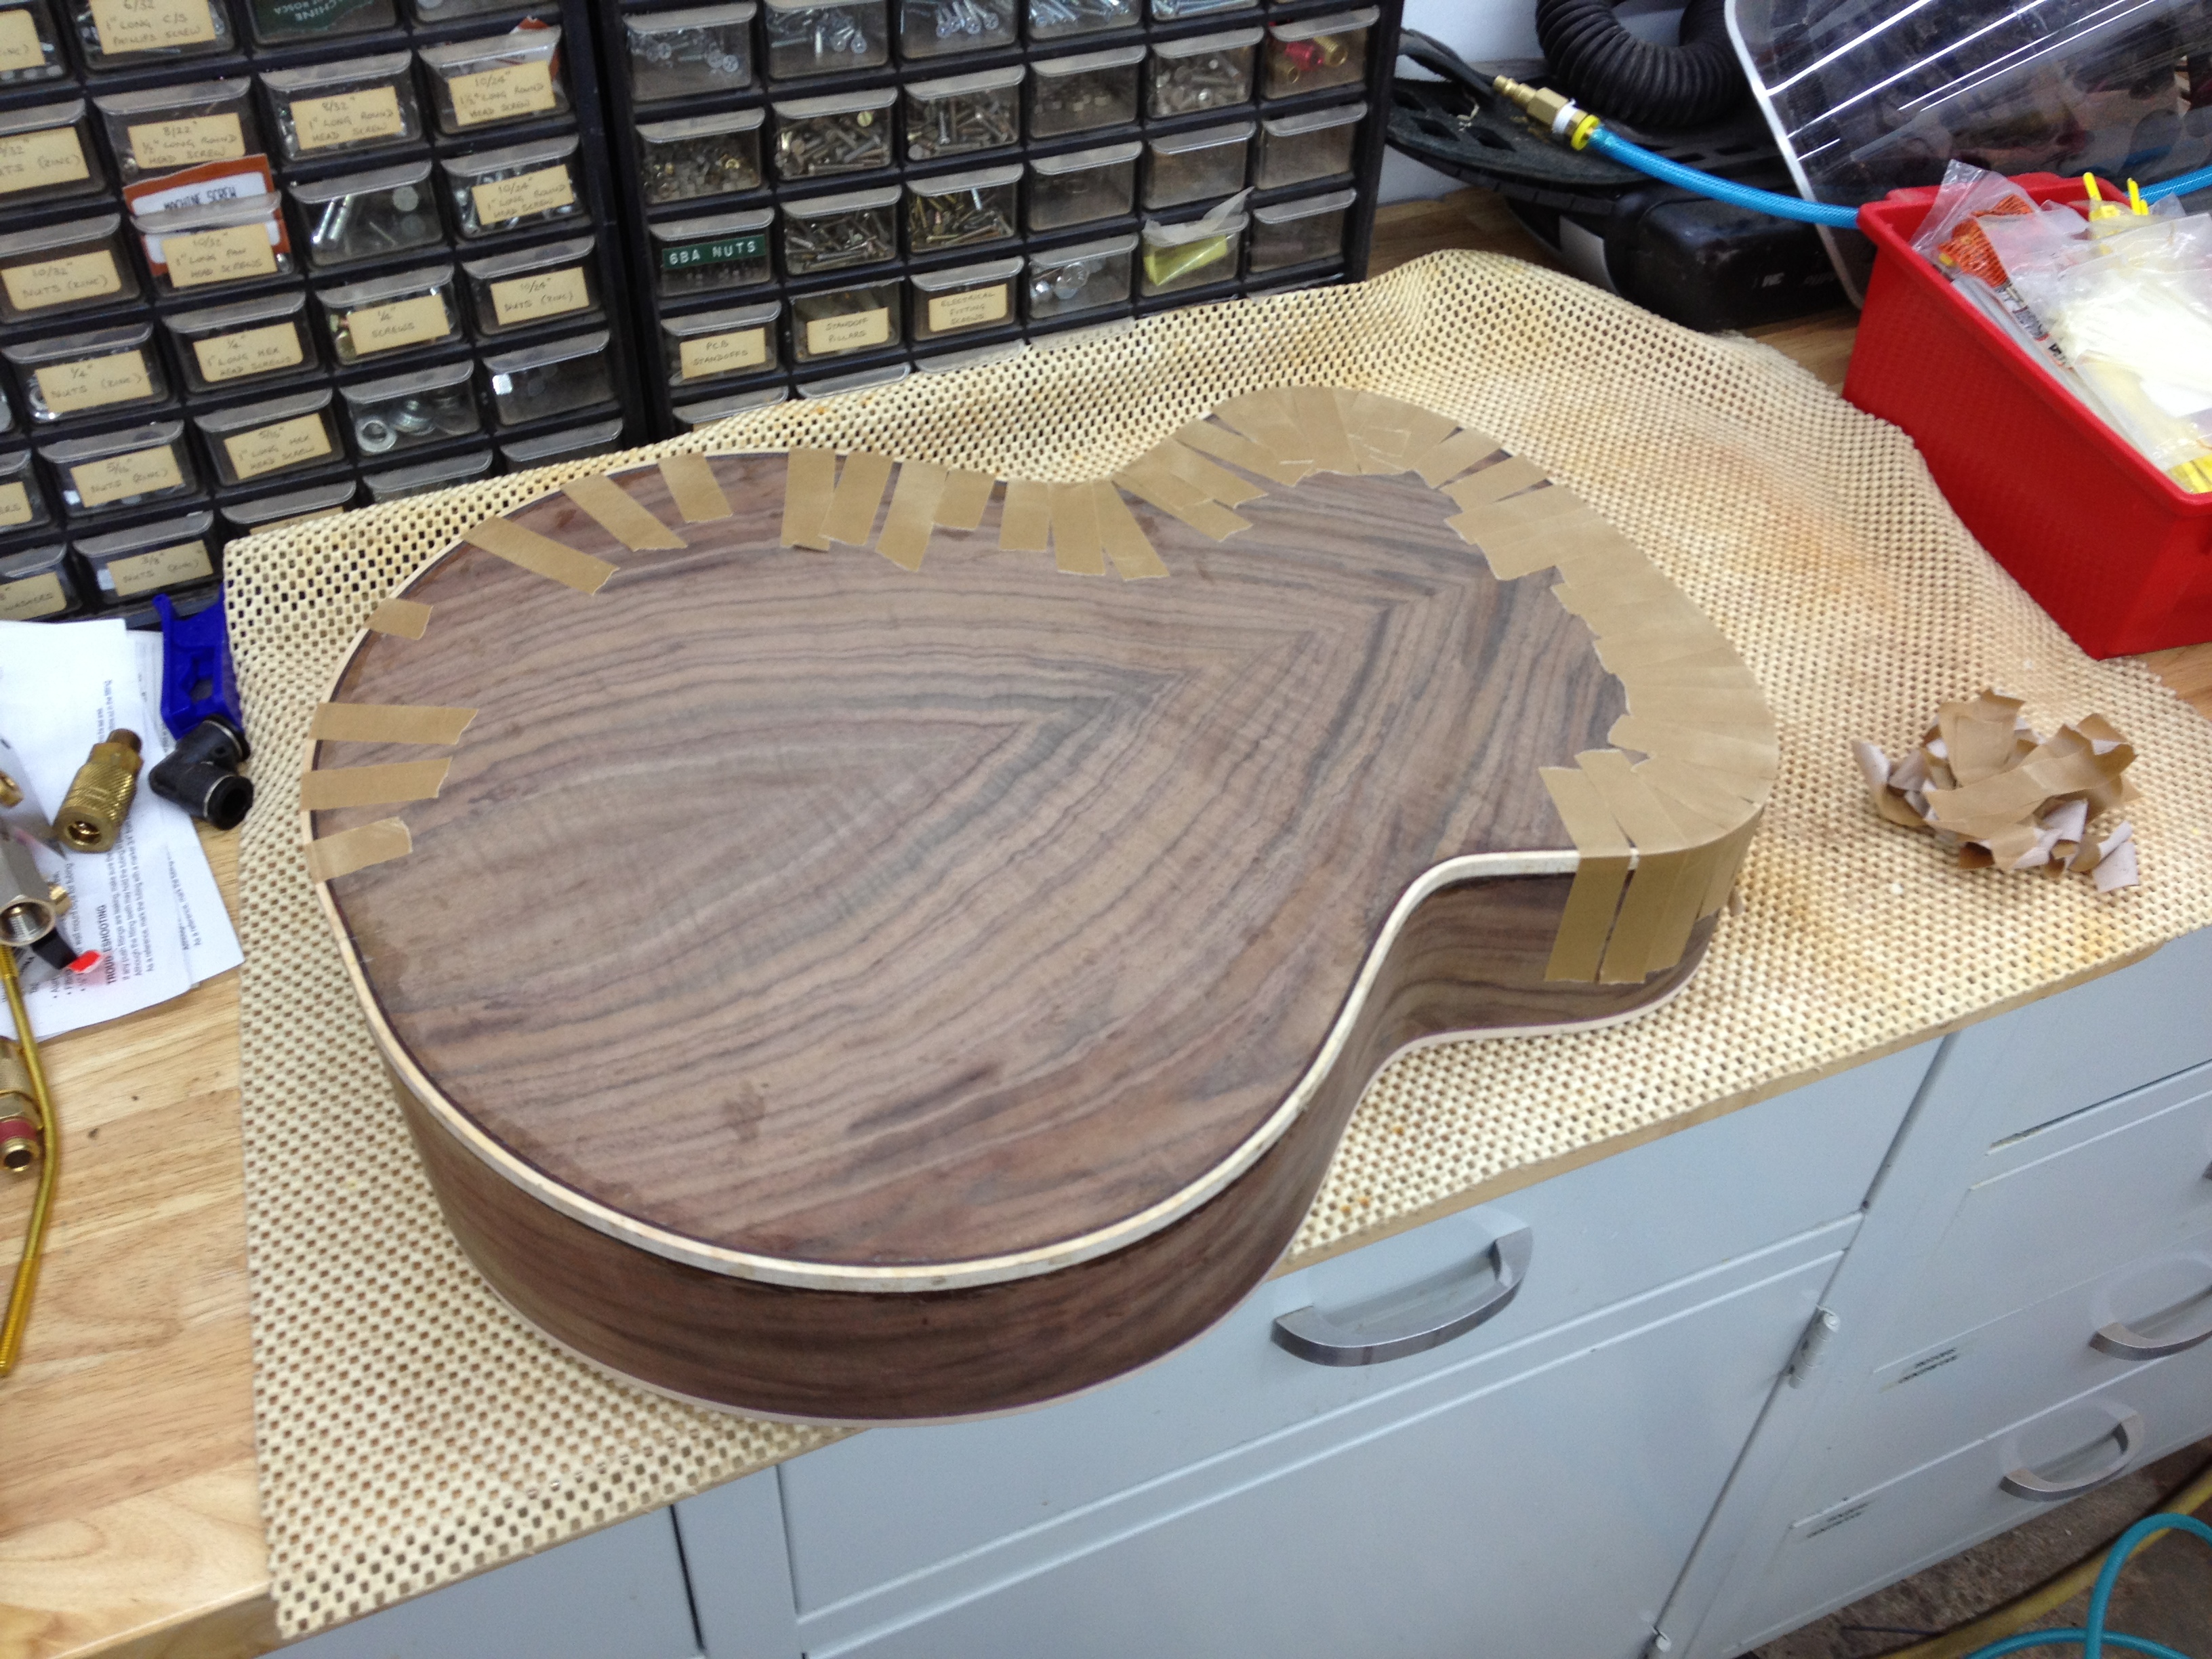 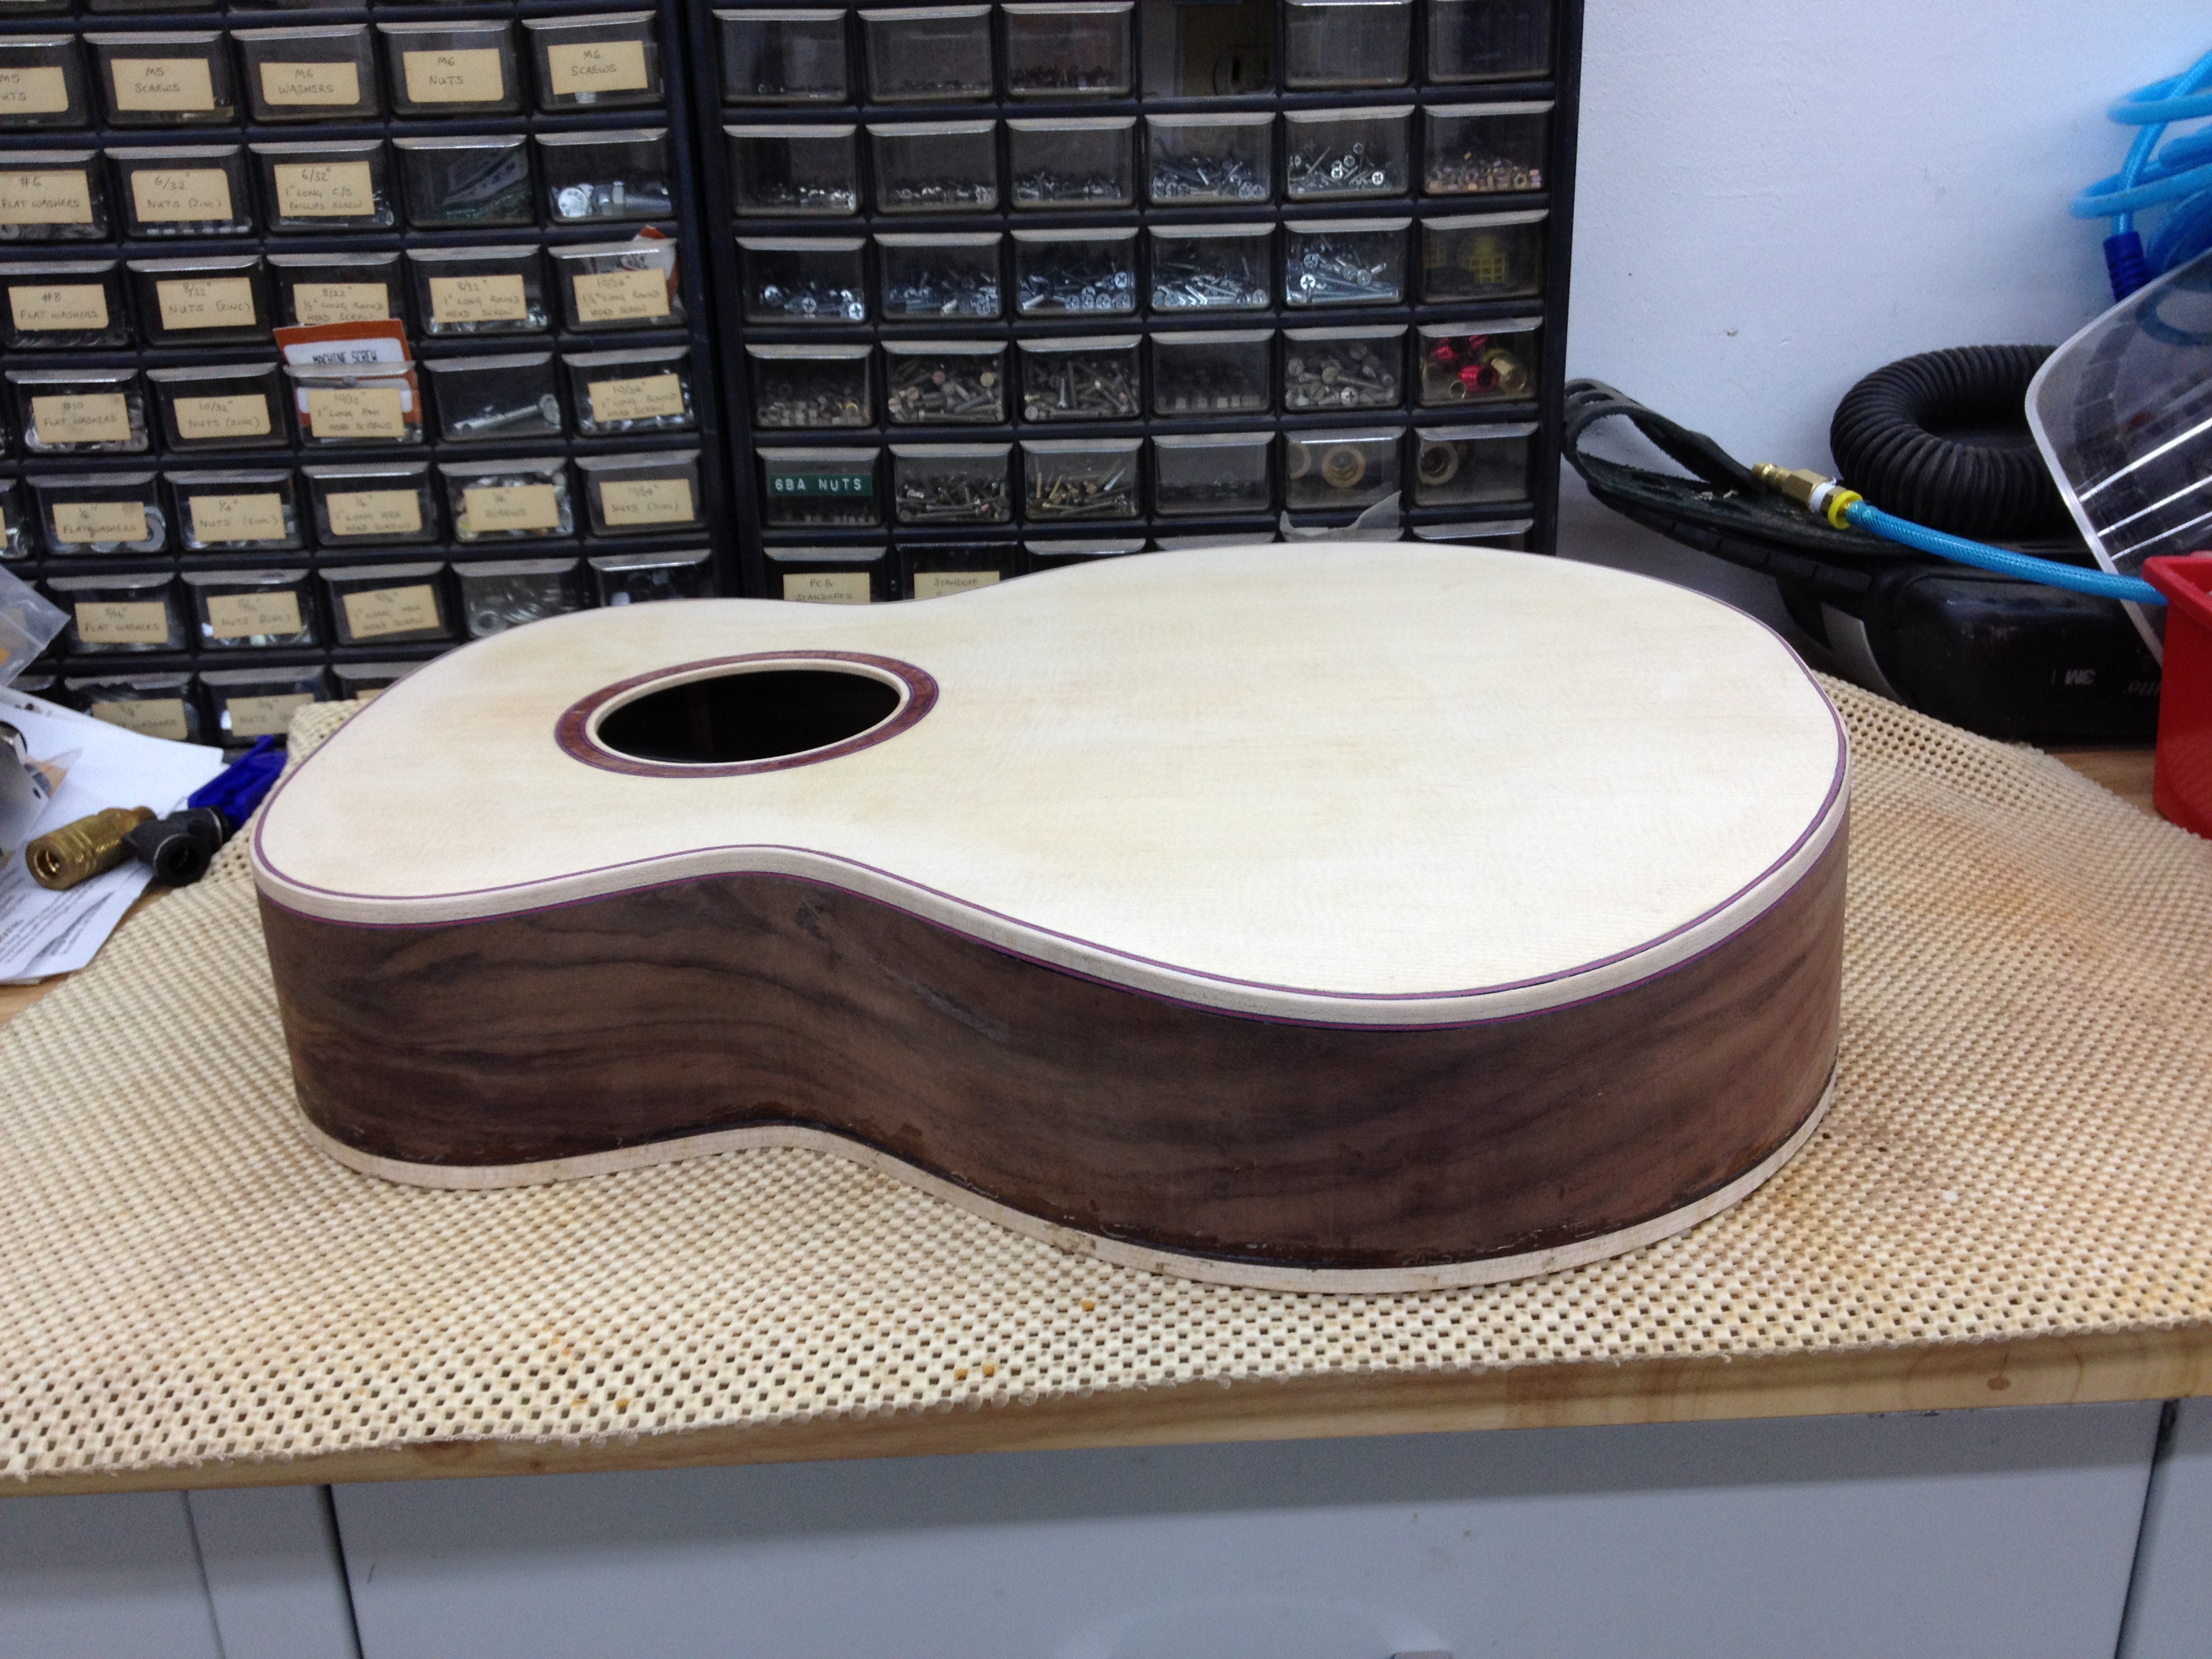 In this last shot, the binding/purfling is all on the guitar, but still needs the back binding/purf scraping and sanding. I'm going to leave that for tomorrow night! I poured in a whole new batch of fresh kerfings now that the guitar is "sealed" at the edges, no more kerfing leaks for me! The guitar taps much better now as a result! Cheers for now, Dave F. |
|
| Author: | SteveSmith [ Tue Sep 04, 2012 7:38 am ] |
| Post subject: | Re: Dave's Daft Experimental ESJ-2 Build |
I like that bevel. Been trying to figure out what all I'd have to do to get that same effect in a conventionally braced guitar. Maybe next years challenge. |
|
| Author: | Dave Fifield [ Tue Sep 04, 2012 11:37 am ] |
| Post subject: | Re: Dave's Daft Experimental ESJ-2 Build |
Steve, I gave some thought to that issue previously. I think it could be done fairly easily. Bending a standard thickness soundboard using a heating blanket and some kind of pattern jig to get it just right should be fairly easy to do, but of course, 1/4" wide braces aren't going to bend much (if they did, they'd be pretty useless as braces, right?). So, how about making the X-brace on the smooth bevel side up as a laminated assembly using strips of spruce around 0.1" tall (experiment will show what the maximum thickness that will conform without breaking is)? You could use the same pattern jig to bend and glue up the brace laminations. Or, just stop the brace/s short of where the bend starts? Or, maybe ask Mr. Schwartz (nicely) how he does it? Cheers for now, Dave F. |
|
| Author: | SteveSmith [ Tue Sep 04, 2012 12:23 pm ] |
| Post subject: | Re: Dave's Daft Experimental ESJ-2 Build |
Good ideas. I suppose the bracing structure would be doable - a laminated assembly might work best. Would take some experimentation to get it right, I suppose. It would be an intriguing challenge. Asking Mr Schwartz would always be an option but isn't that kind of like asking for directions |
|
| Author: | Dave Fifield [ Wed Sep 05, 2012 2:02 am ] |
| Post subject: | Re: Dave's Daft Experimental ESJ-2 Build |
Tonight I scraped and sanded the binding/purfling. I just got a pair of the Al Carruth ultimate scrapers from Stewmac recently, so I thought I'd give them a spin on this instrument. They are very nice to use, sharp, and overall did a great job. I'm not looking forward to sharpening them later though... There are a few areas where there are some small gaps - I'm not sure how they got there......I'm pretty certain I'd closed them all up while gluing... ![[headinwall]](./images/smilies/headbangwalluf8.gif "Mad") I will have to fill them with tiny silvers of wood tomorrow night. Here's the photolog from tonight's work: I will have to fill them with tiny silvers of wood tomorrow night. Here's the photolog from tonight's work: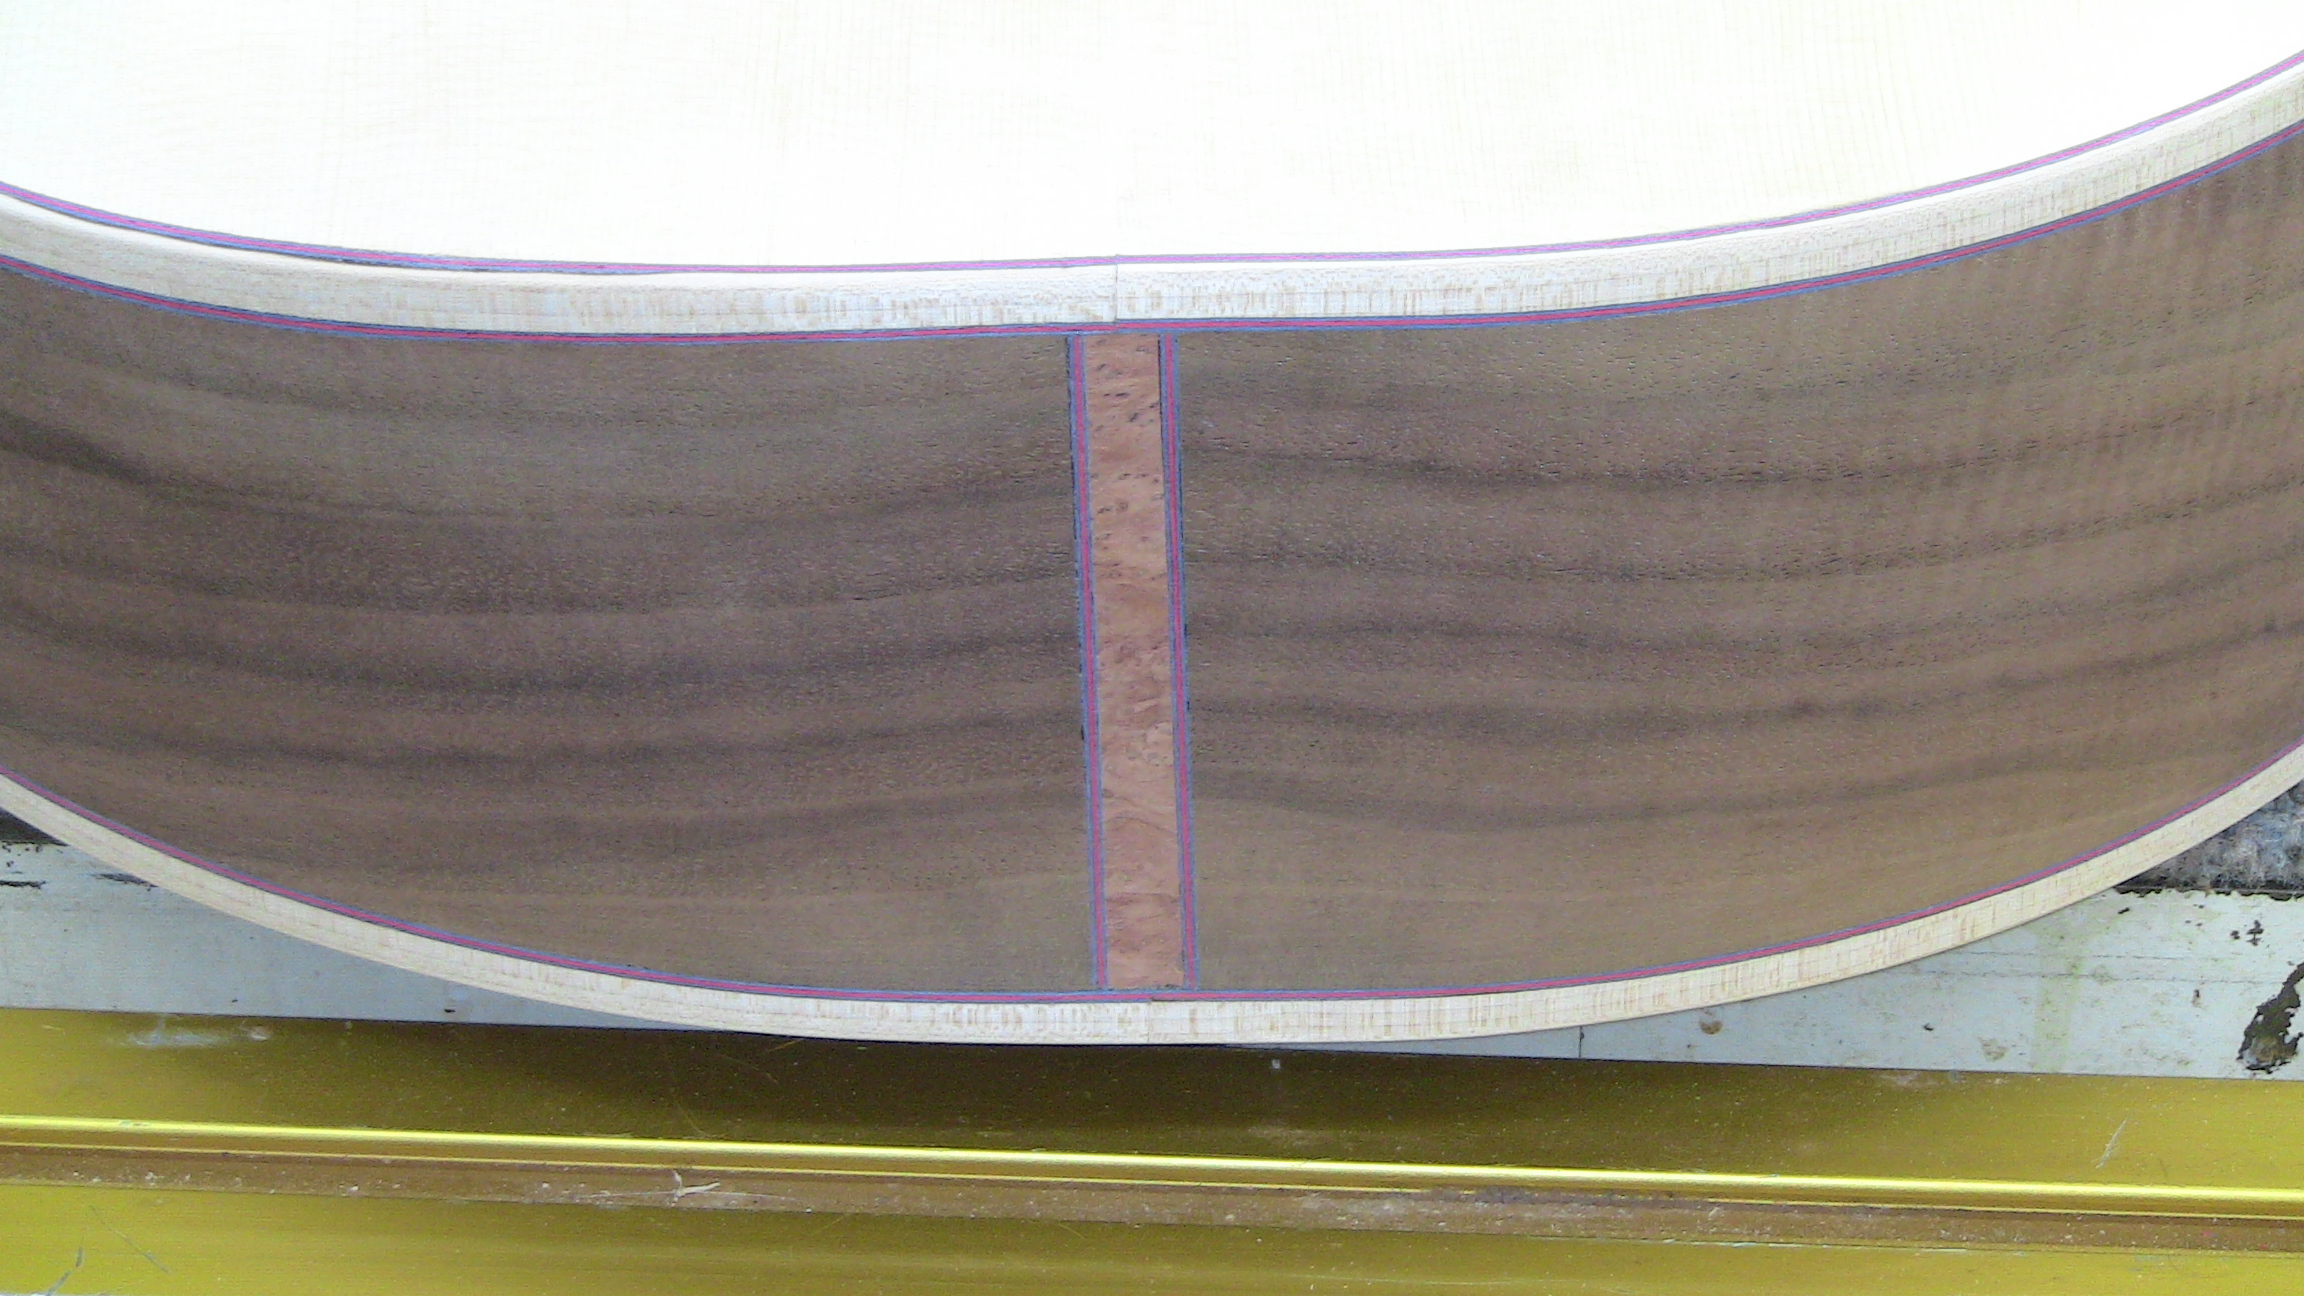 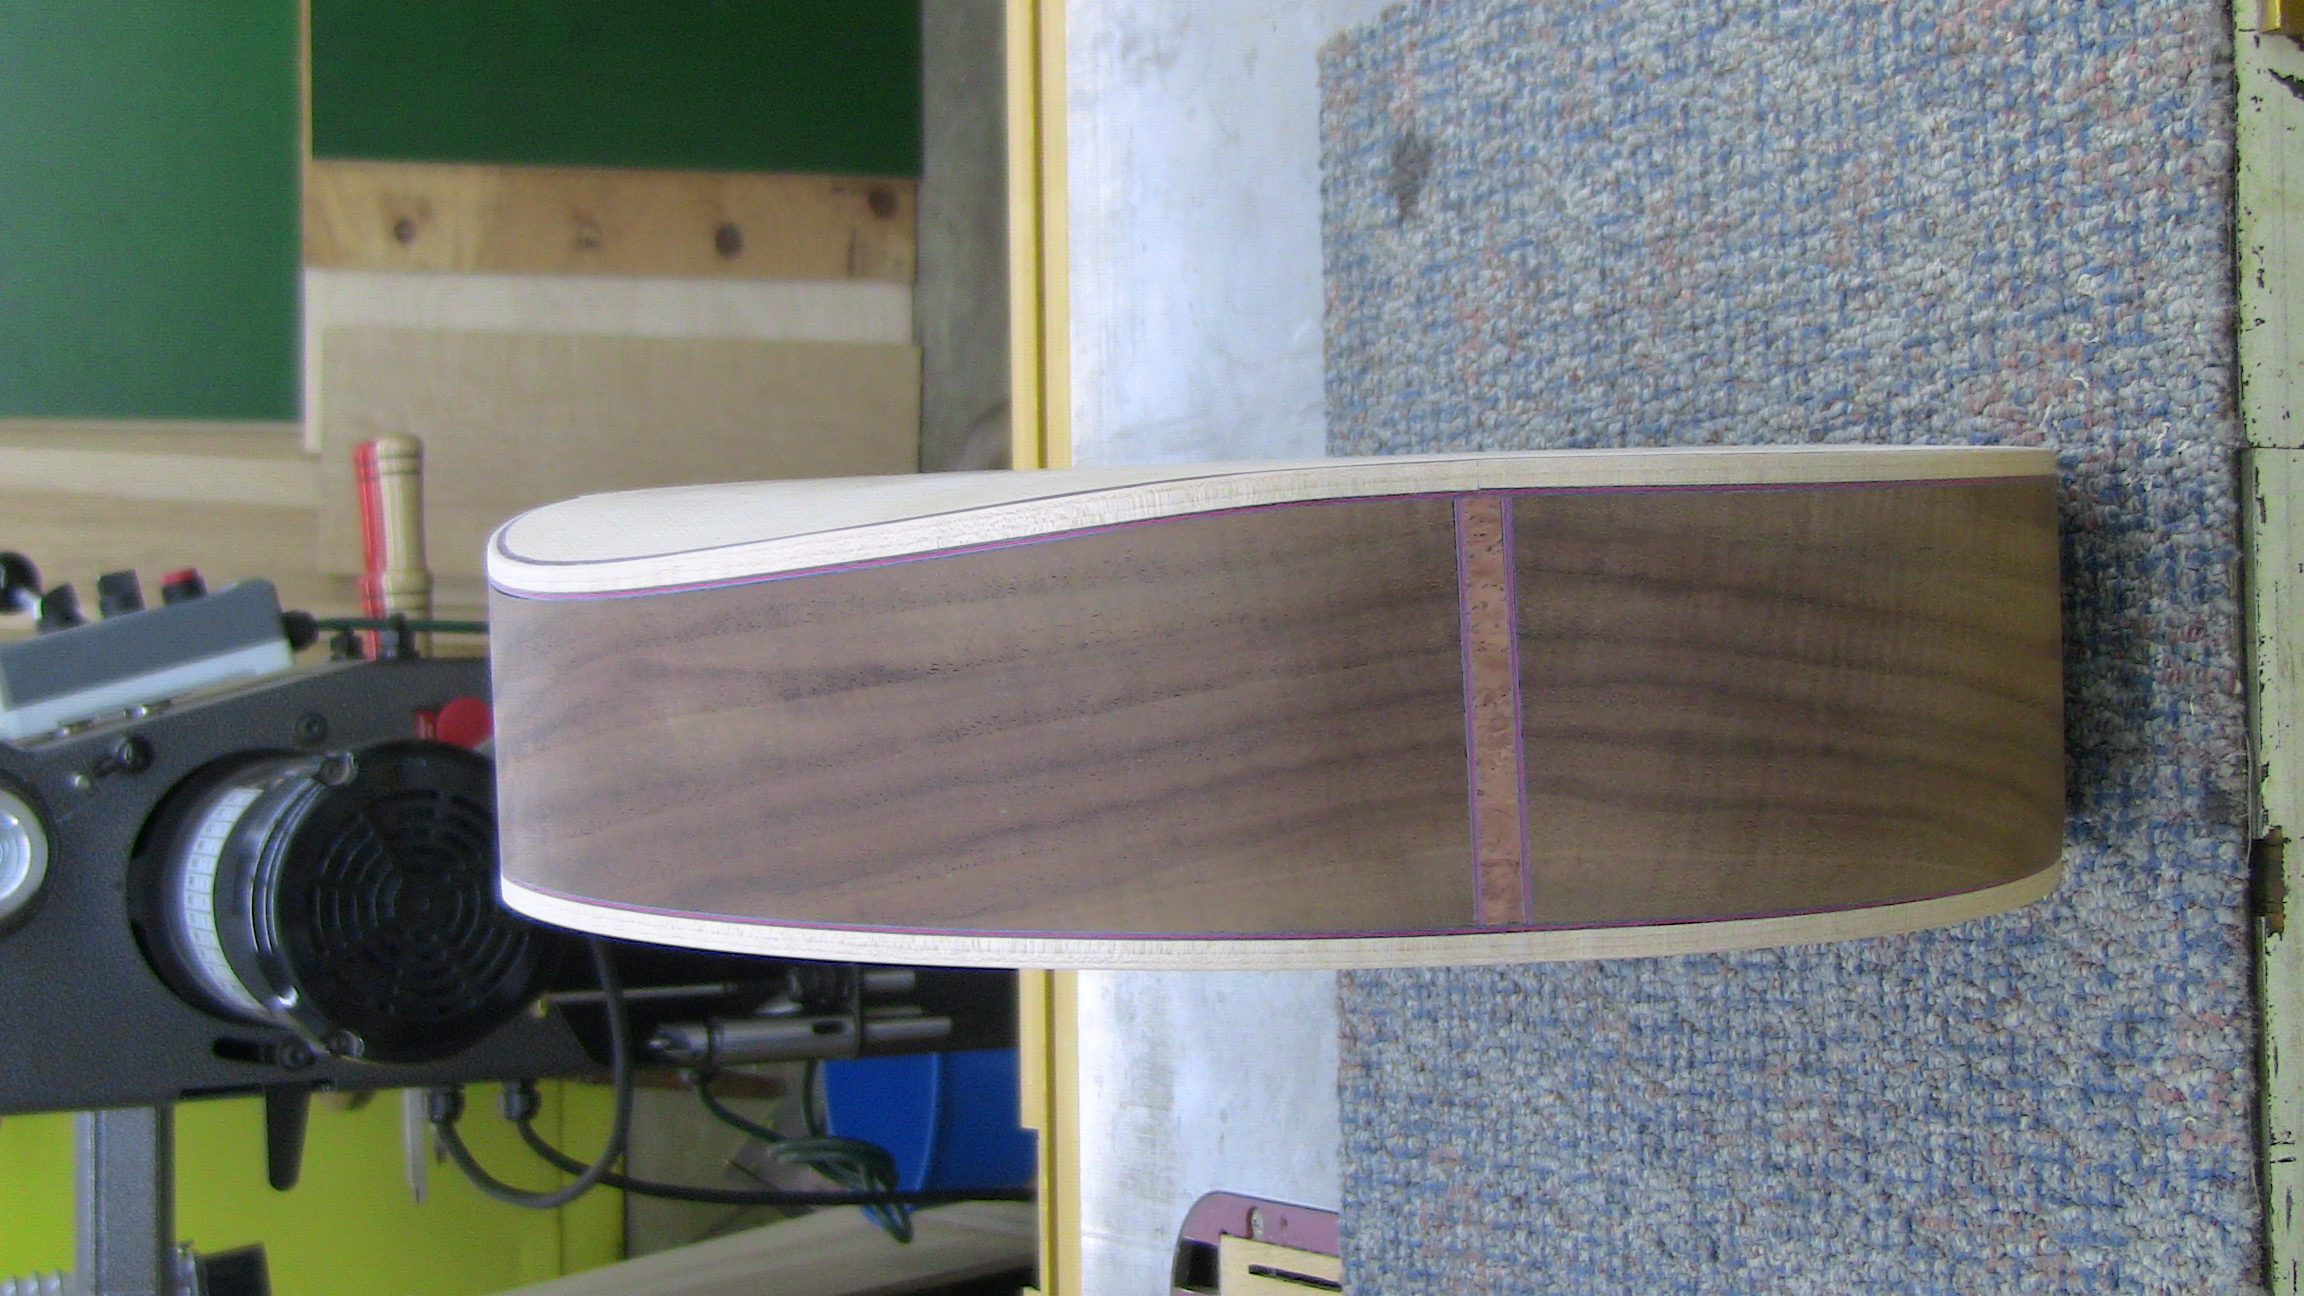 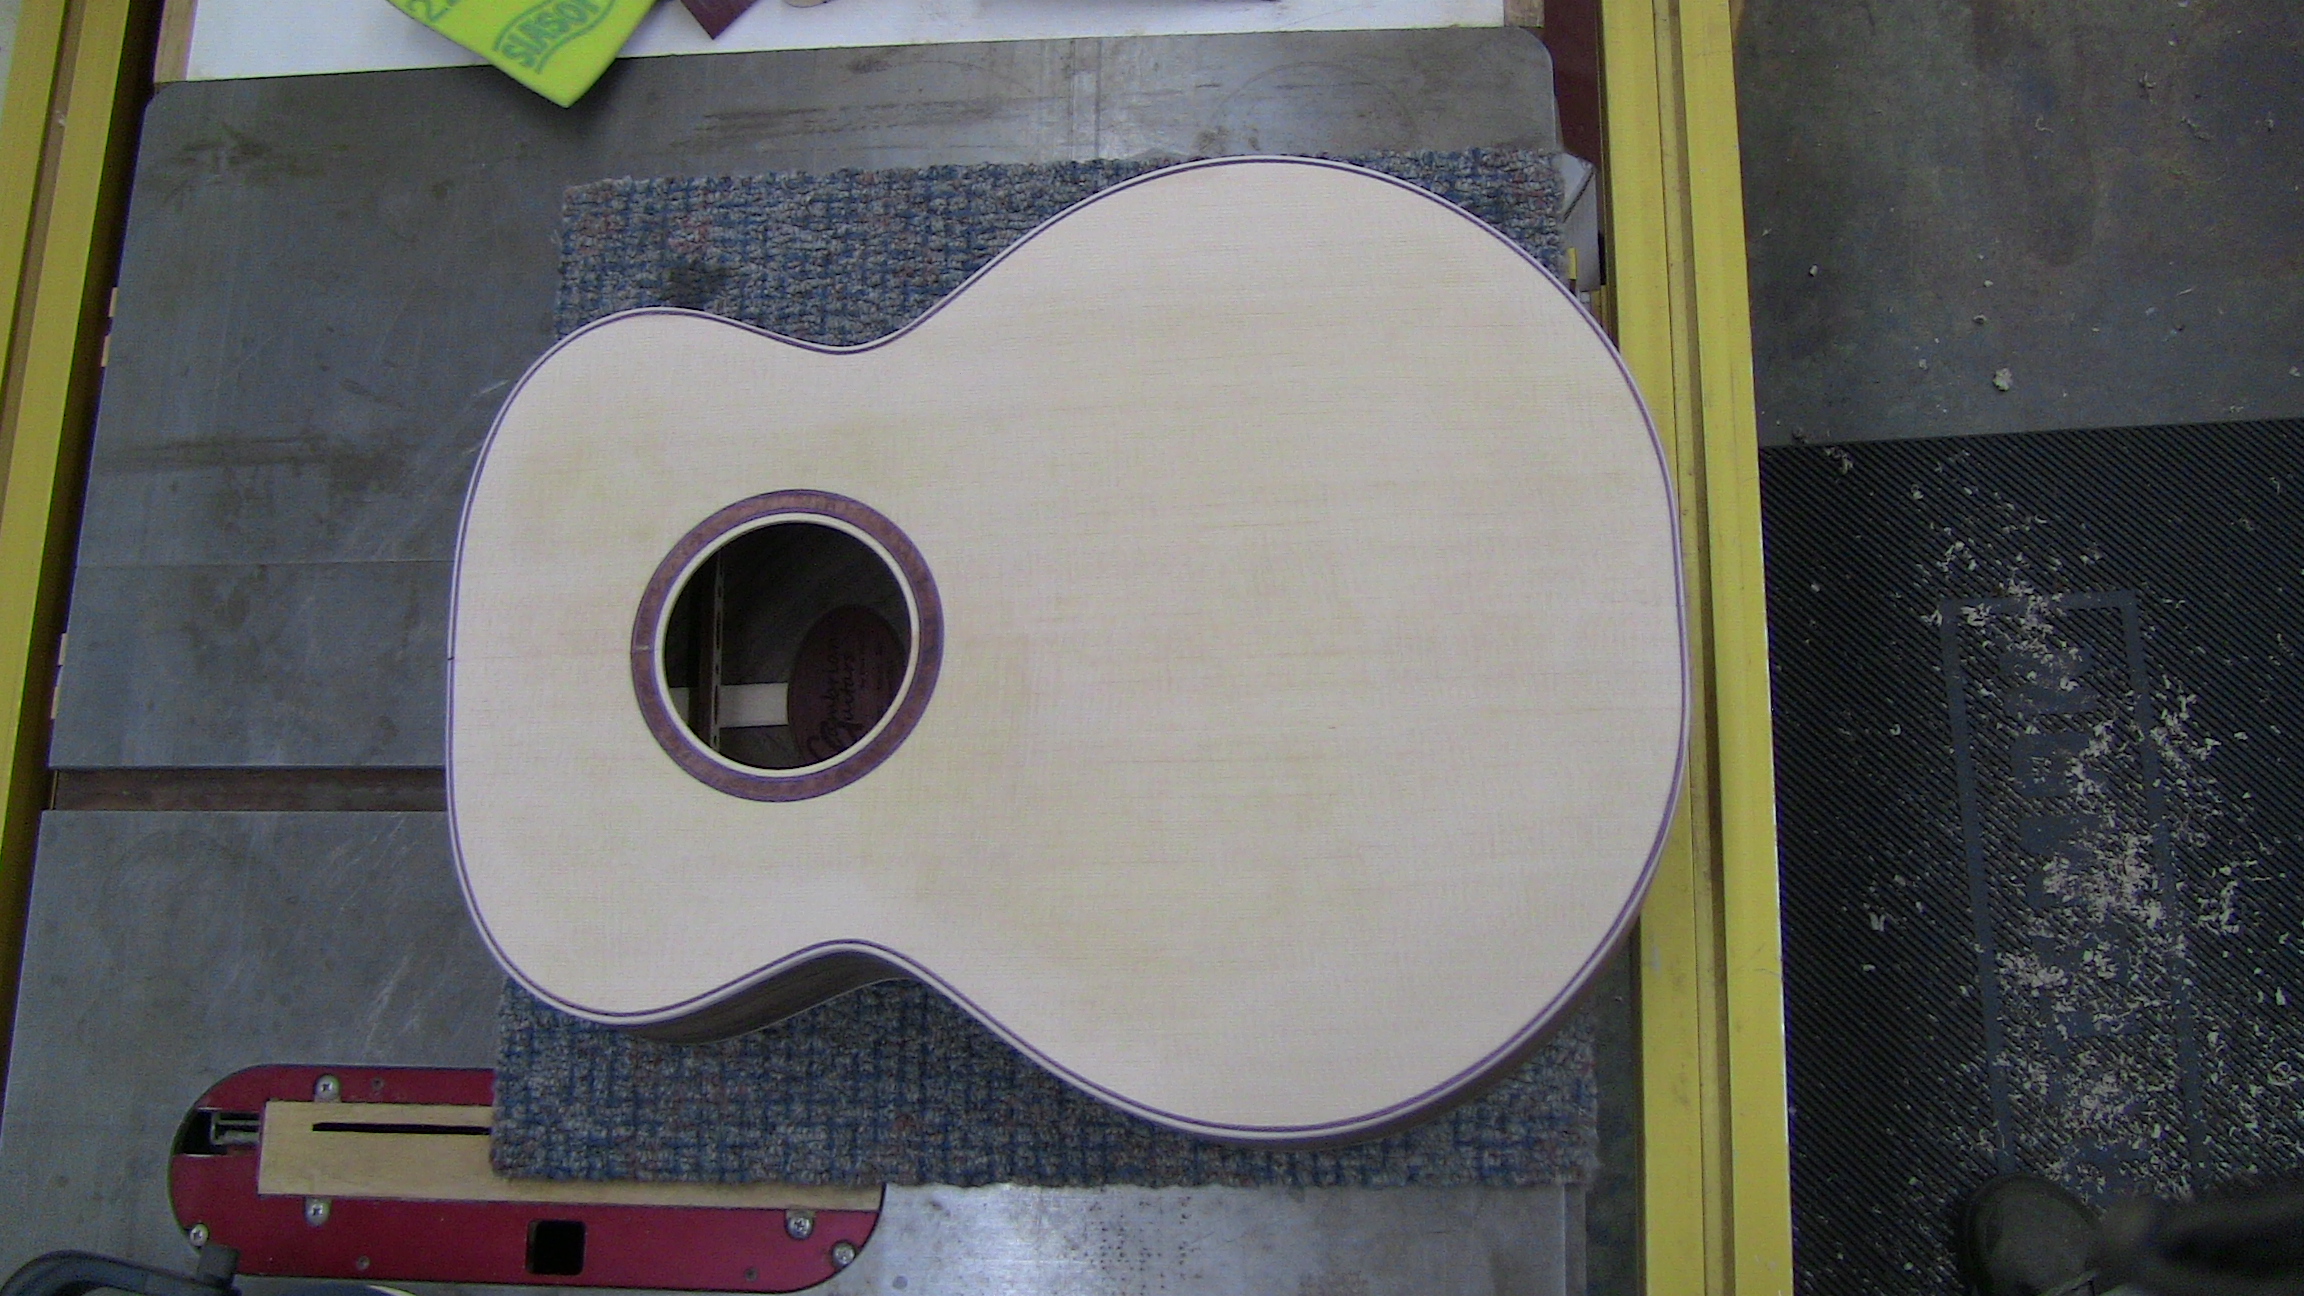 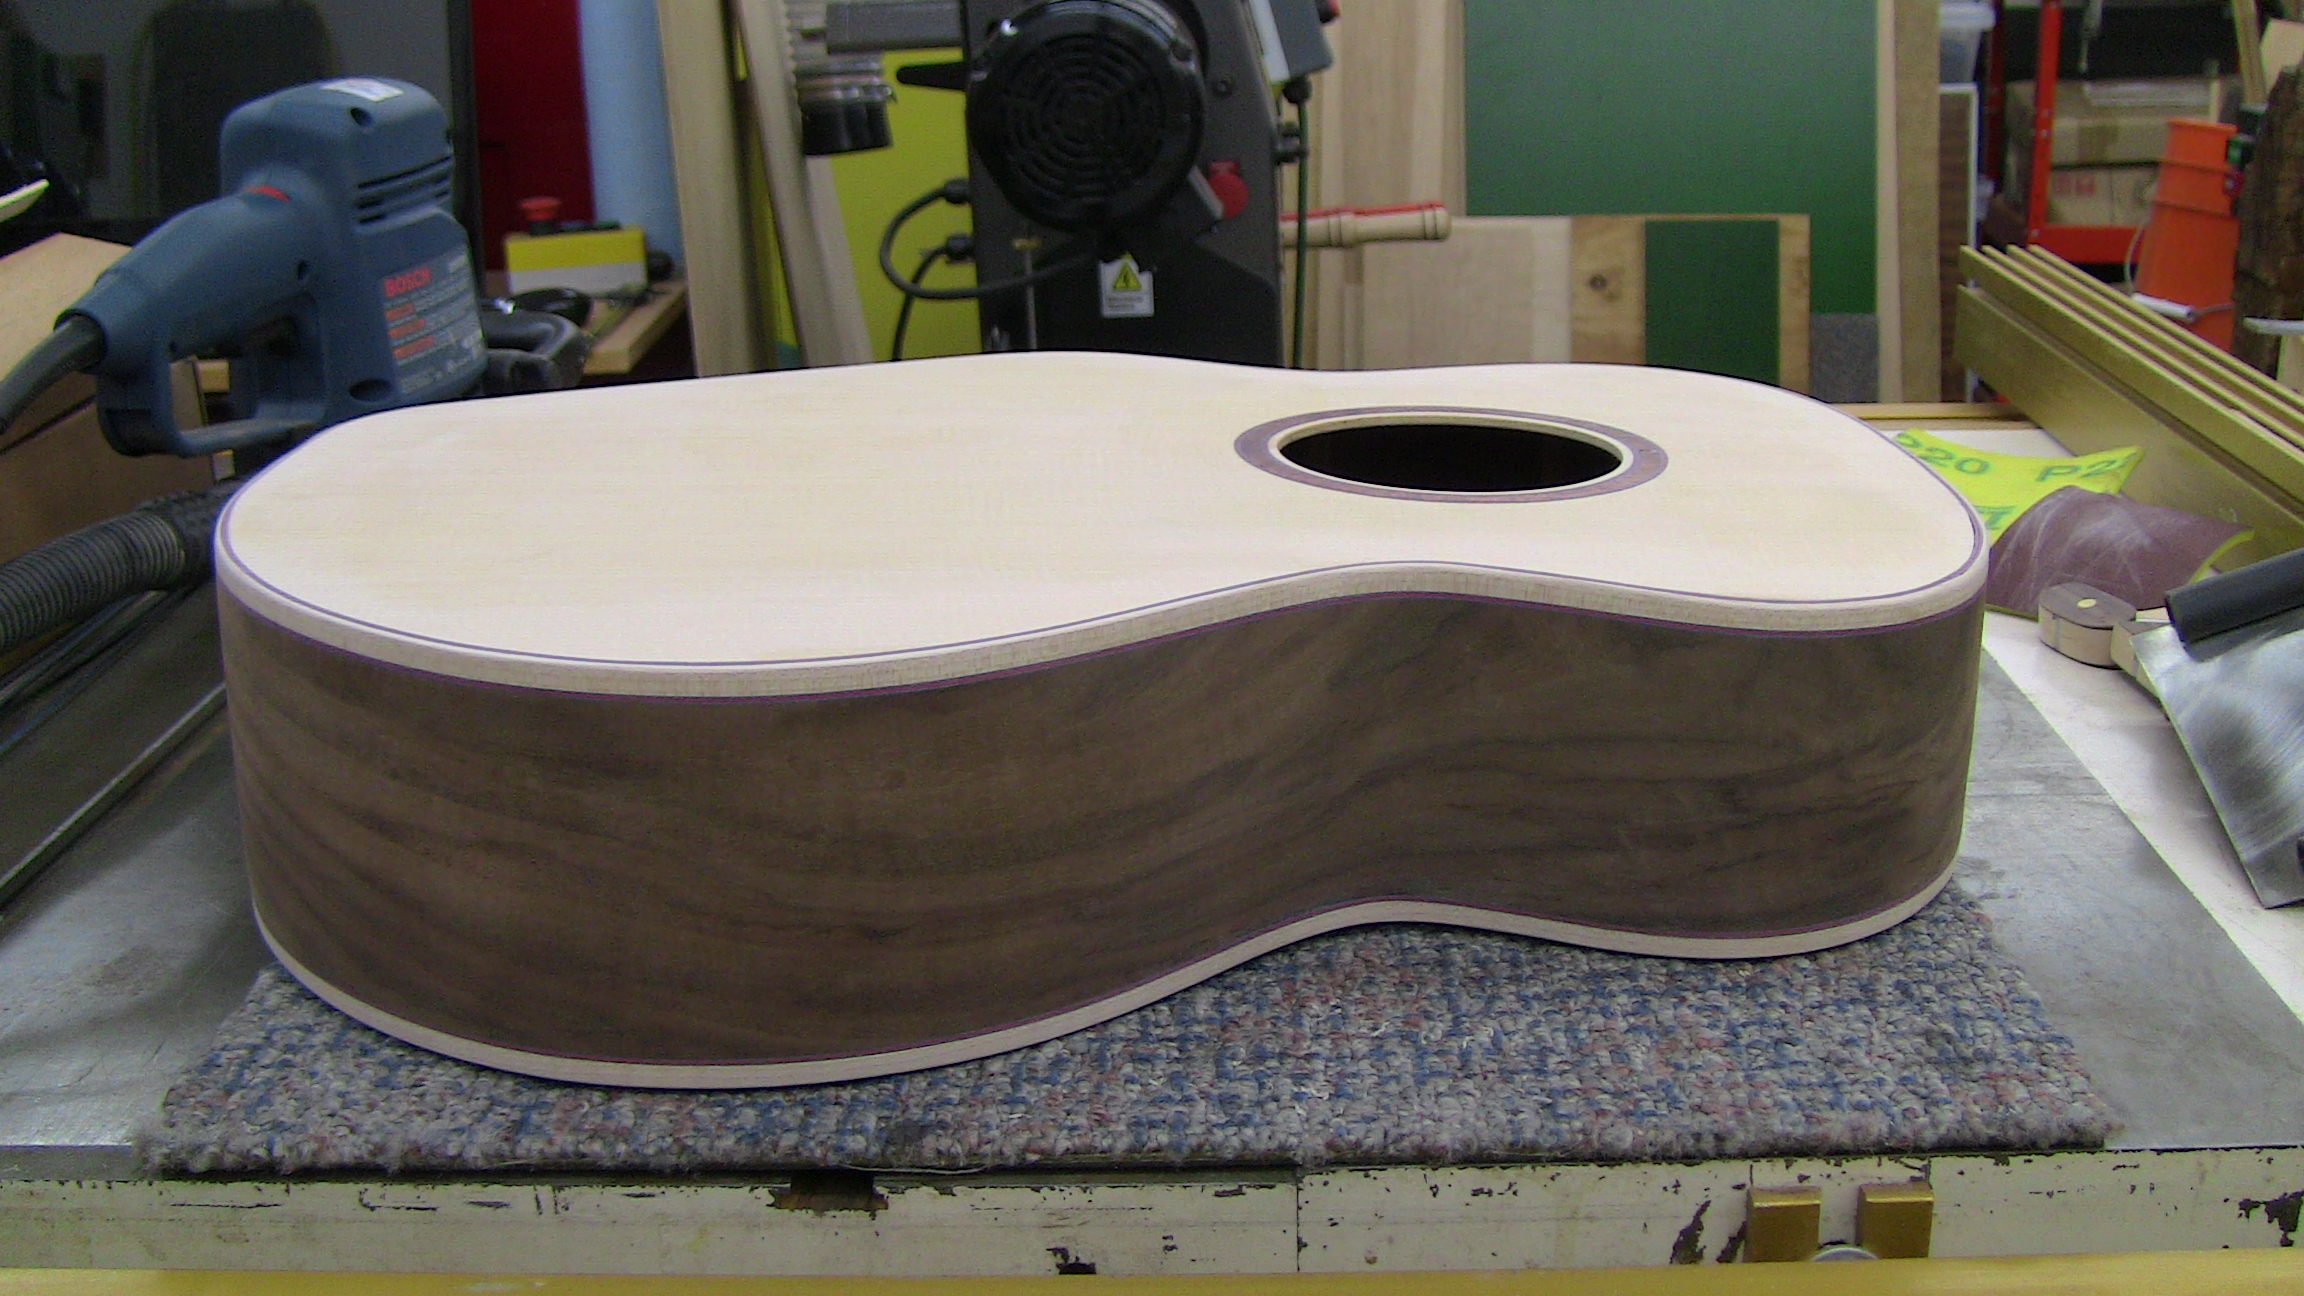 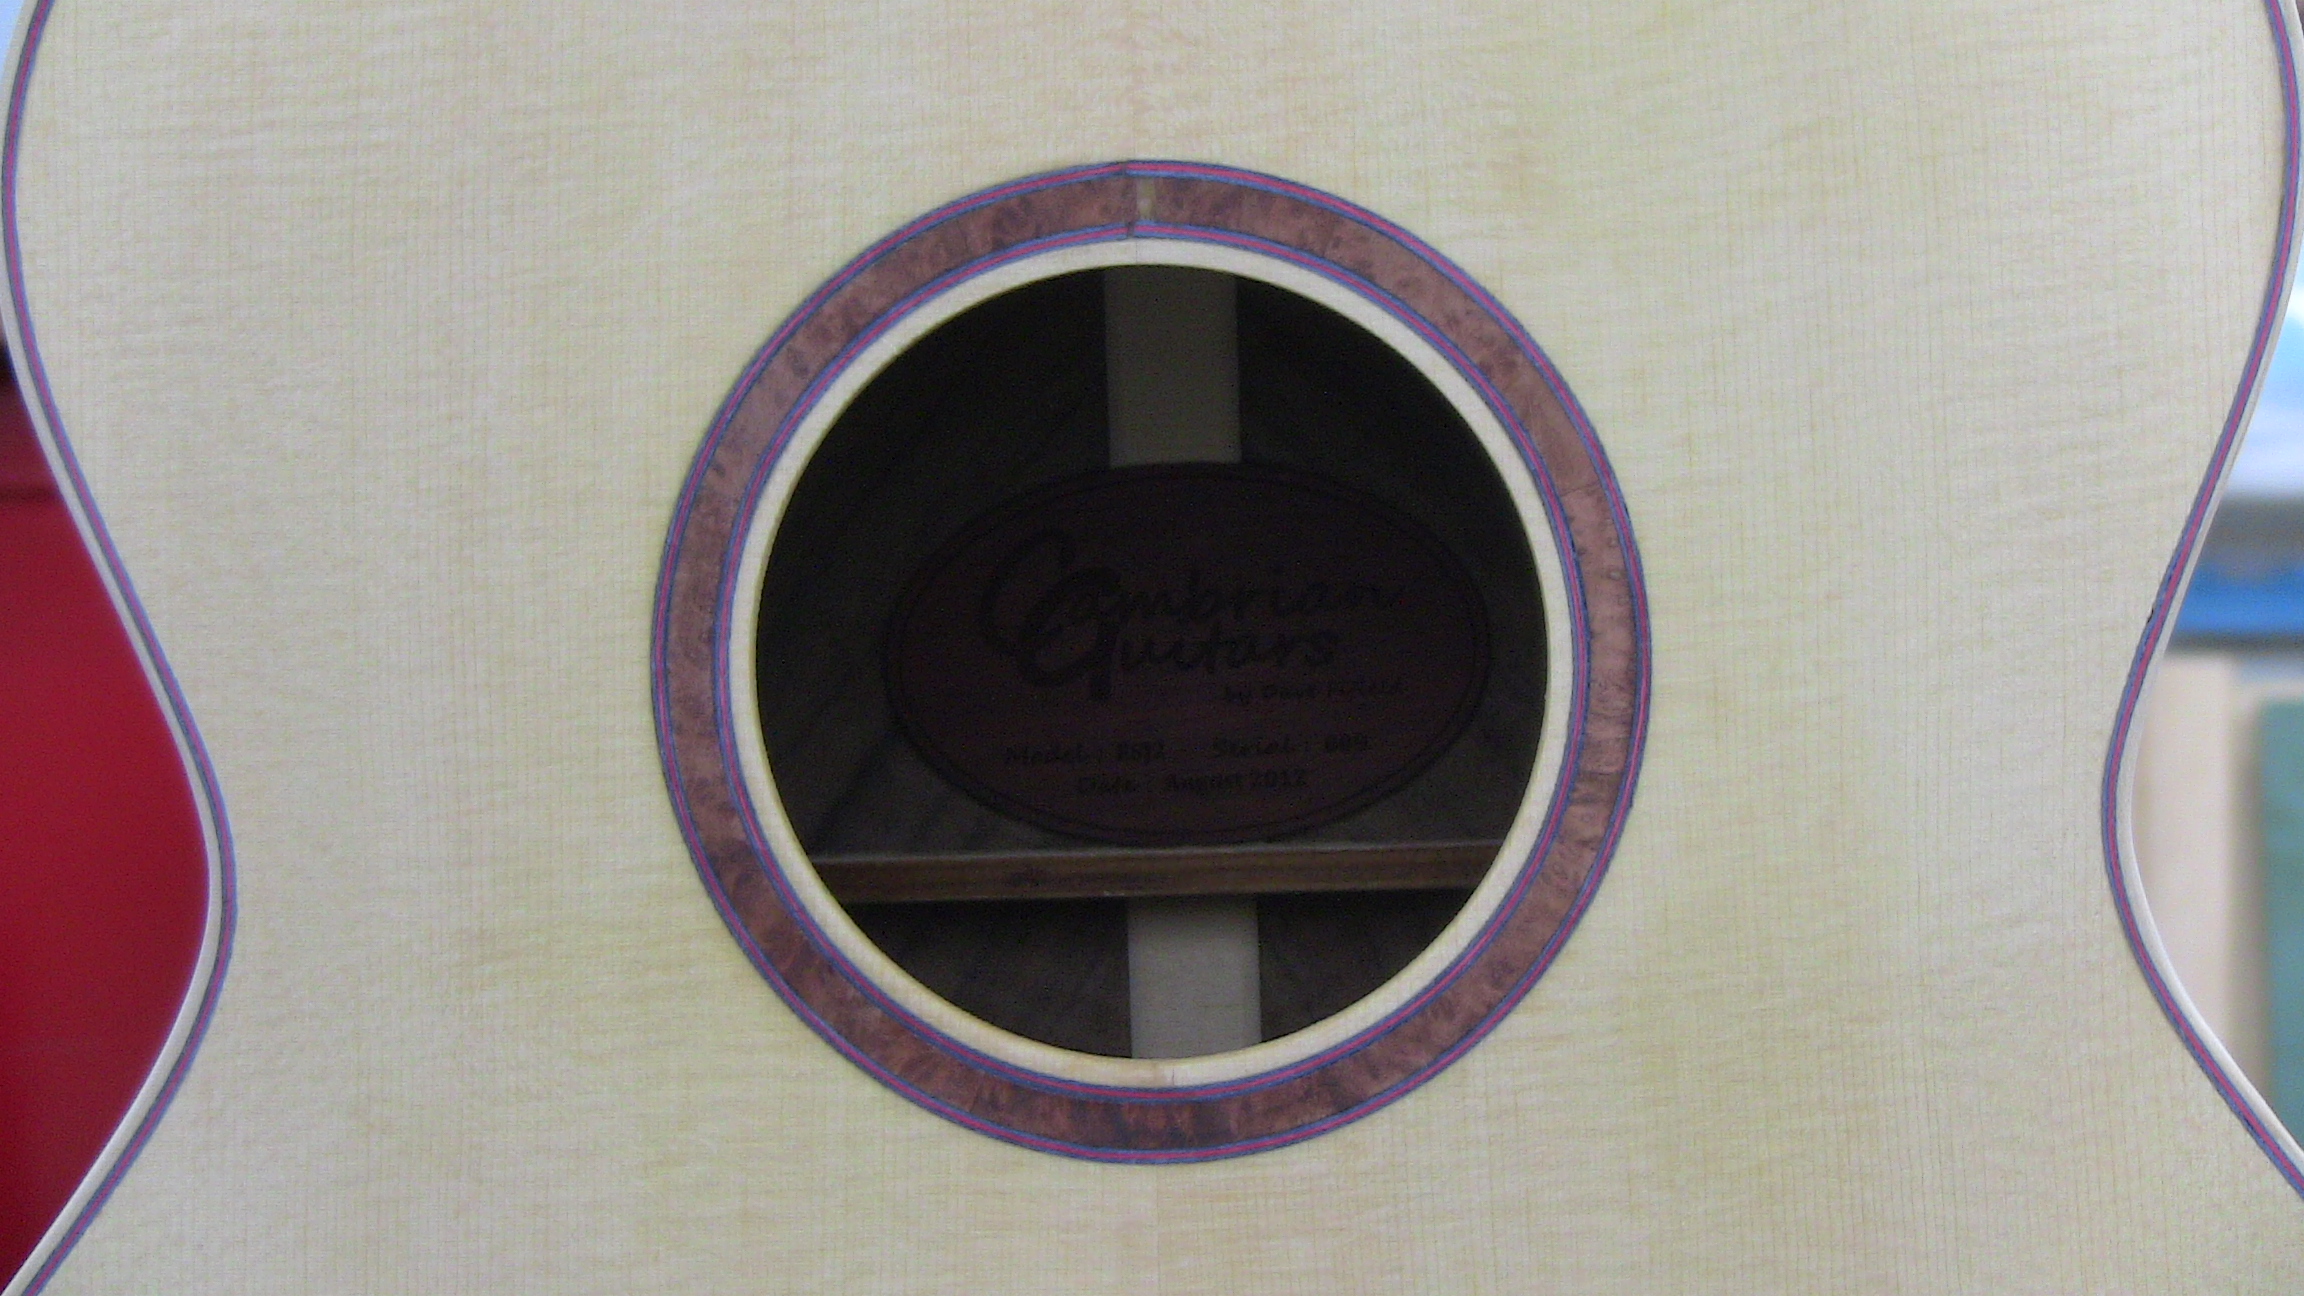 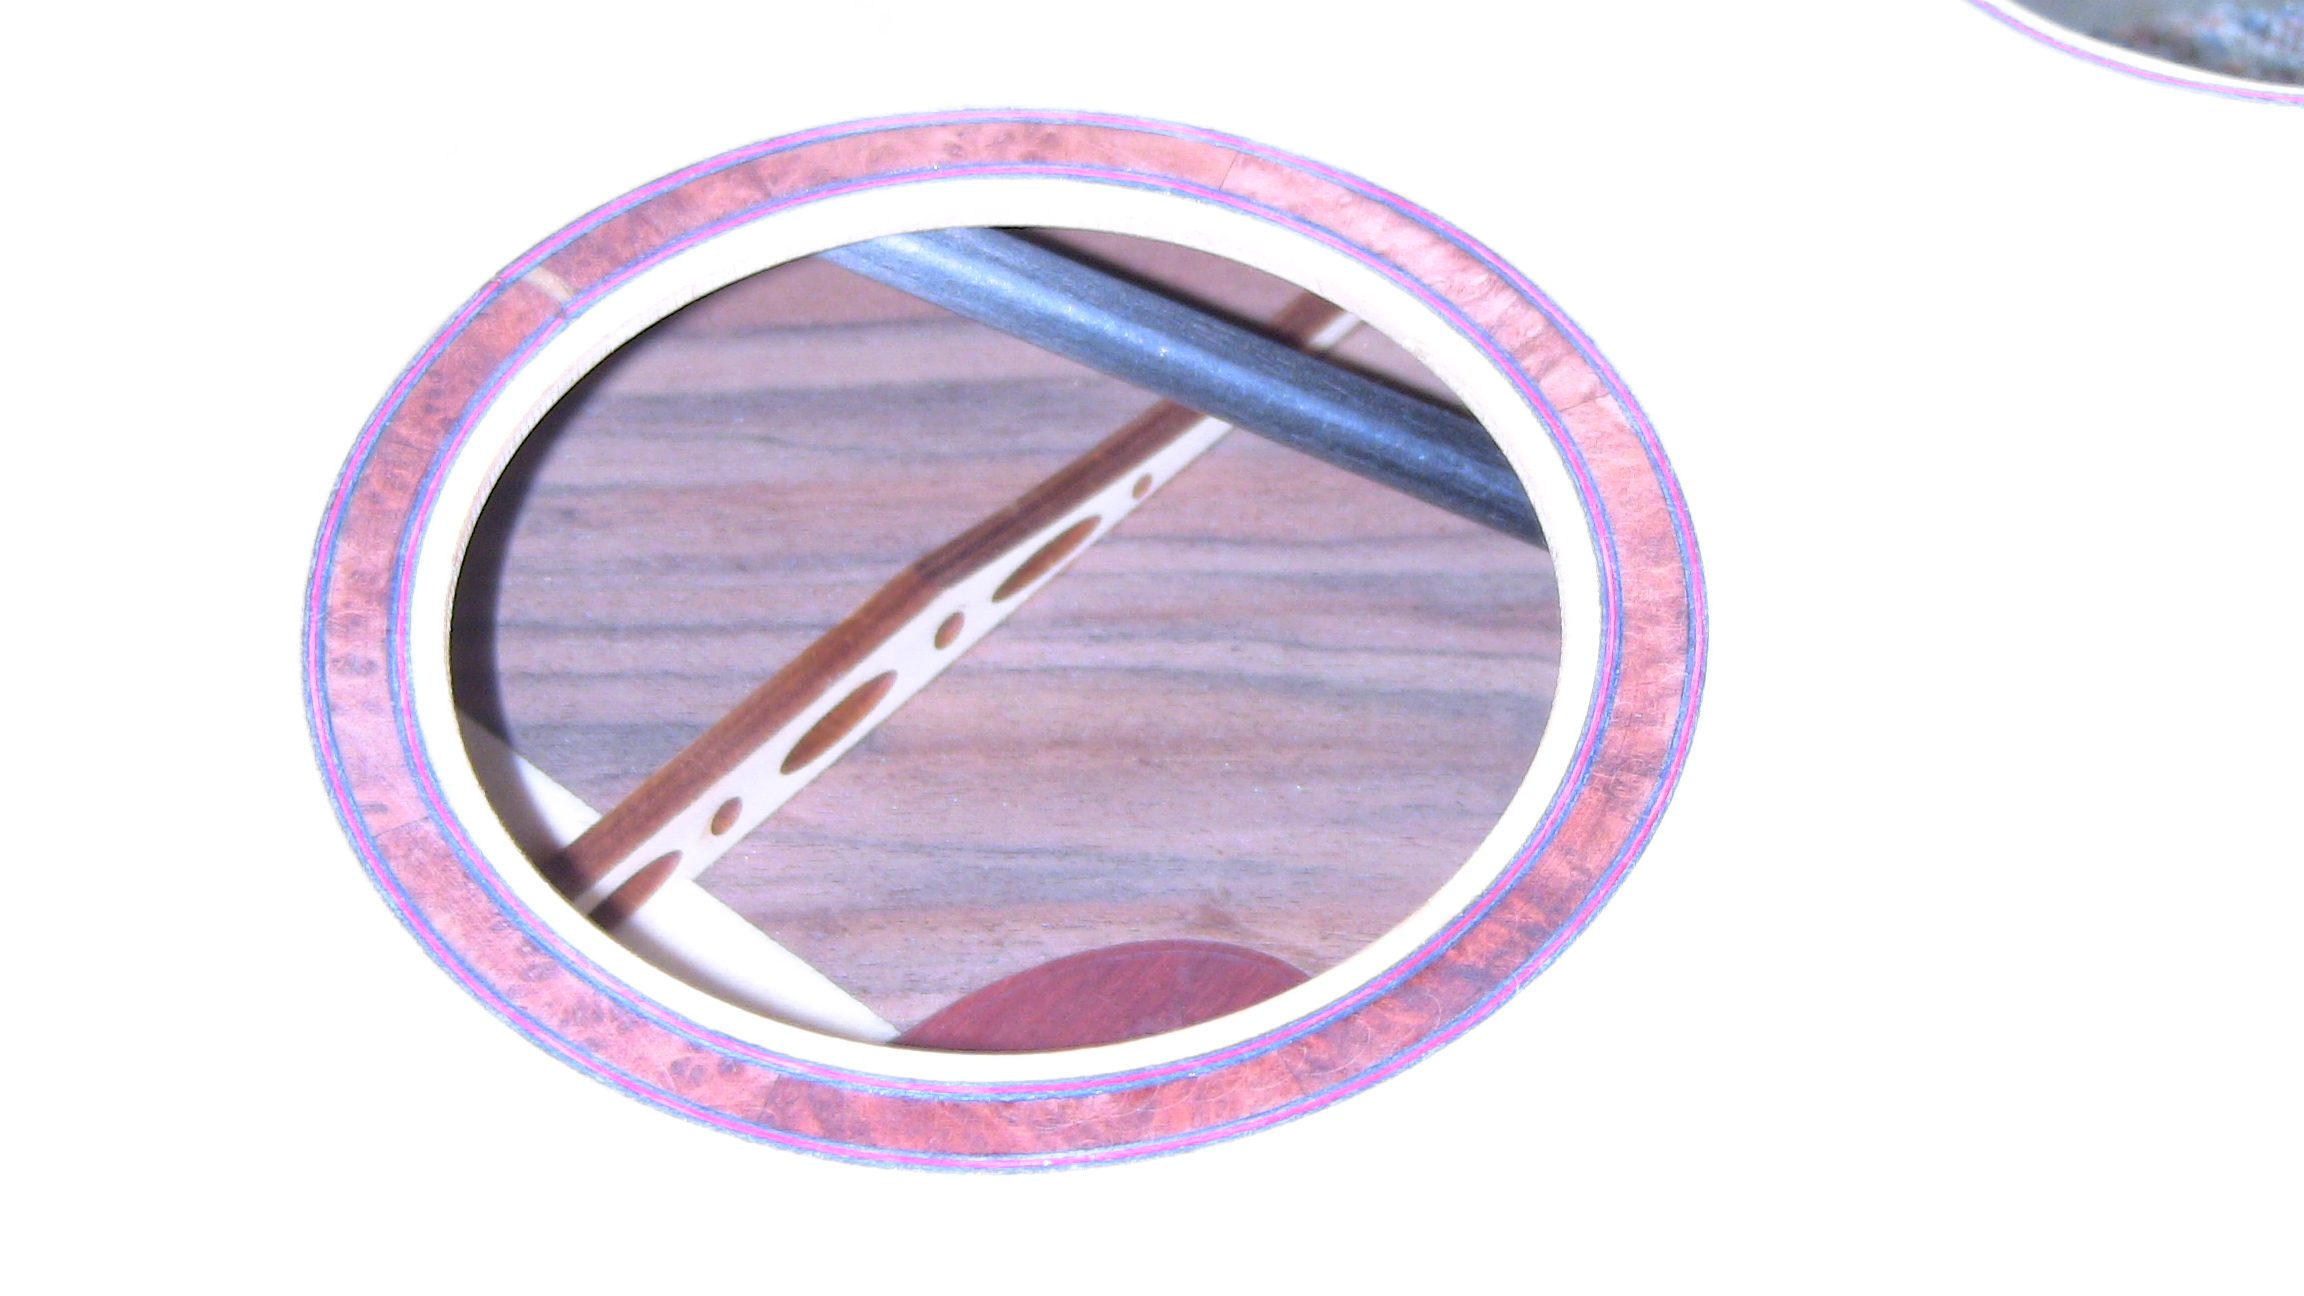 It's beginning to look a bit like a guitar-shaped object now..... Cheers, Dave F. |
|
| Author: | Bryan Bear [ Wed Sep 05, 2012 7:30 am ] |
| Post subject: | Re: Dave's Daft Experimental ESJ-2 Build |
That bevel looks really nice! It makes me want to wrap my arm around it. |
|
| Author: | Dave Fifield [ Sat Sep 22, 2012 2:33 am ] |
| Post subject: | Re: Dave's Daft Experimental ESJ-2 Build |
Where has Dave been? Skulking in a corner no doubt.....actually, I've been rather busy at work of late (and real work pays the bills around here...). Anyway, I've been getting on with thinking about, and building, the neck for this experimental guitar-shaped object thingy. Here's a short video showing how I cut my scarf joints on my small bandsaw. Enjoy: I've had an iPhone5 for a couple weeks now. The camera on it is excellent. All the following pictures were taken using it. These are pictures of the neck and my new experimental headstock shape/idea:      I decided to experiment with the headstock on this ESJ2 build also. I wanted the strings to be dead straight from the tuners to the nut, and I wanted the headstock to be light. I came up with a design that acheives both goals I think. I drew it in Corel Draw and then cut a test headplate in 1/4" acrylic, tweaked it a little bit, then made the final template. As you can see, it's a bit different than a normal 3L/3R headplate. It's actually 4L/2R! To do this, I had to sacrifice my second set of $9.99 tuners from China....all in a good cause. I'll update my costs in the first post of this thread. I'm left (pun intended) with a set of 2L/4R tuners which will be good for a lefty, but I'm not confident anyone will ever ask me to build such an instrument, so I'm writing the whole cost of two sets of the cheapo tuners down. Here are a couple pictures showing my new headstock idea. I'm sure someone else must have done it like this before.....so if you know who/when, please let me know so I can credit them. Thanks. Here you go:   OK, so that's where I'm at with the neck build right now. As you may know, the iPhone5 (actually, iOS6, so it'll work on iPhone4/4s also), has this awesome "panorama" mode for the camera. I took a few shots in my workshop using it. I wasn't in the best position, and will try to get some better shots later, but for now, this is what I have. Click on any of my photos to see them in full resolution. Let me know what you think....    More to come over the weekend.... Cheers for now, Dave F. |
|
| Author: | Jaybird840 [ Sat Sep 22, 2012 5:11 am ] |
| Post subject: | Re: Dave's Daft Experimental ESJ-2 Build |
"Click on any of my photos to see them in full resolution. Let me know what you think...." Dave, What I think is that I have too few tools in my shop.... P.S.--Did you get the email I sent? --Jay |
|
| Author: | Randy Jones [ Sun Sep 23, 2012 4:57 pm ] |
| Post subject: | Re: Dave's Daft Experimental ESJ-2 Build |
Nice phone Are you personally responsible for responding to antenna-gate with reception that thrashes the competition? My dad can never get the same reception on his fancy droid. |
|
| Author: | Jim Watts [ Sun Sep 23, 2012 7:23 pm ] |
| Post subject: | Re: Dave's Daft Experimental ESJ-2 Build |
Dave, this is coming along really nice, Your kerfings definately sound better than mine, maybe I should try some of Tony's. I always thought he was kind of expensive for them, but I suppose you get what you pay for. Keep up the good work! |
|
| Author: | Tony_in_NYC [ Sun Sep 23, 2012 10:51 pm ] |
| Post subject: | Re: Dave's Daft Experimental ESJ-2 Build |
Jim Watts wrote: Dave, this is coming along really nice, Your kerfings definately sound better than mine, maybe I should try some of Tony's. I always thought he was kind of expensive for them, but I suppose you get what you pay for. Keep up the good work! PM me. We can work something out. The guitar looks great Dave! |
|
| Author: | J.L.K. Vesa [ Mon Sep 24, 2012 11:52 am ] |
| Post subject: | Re: Dave's Daft Experimental ESJ-2 Build |
Dave, since it has been me in this thread, I continue. Brian Moore electrics have 4+2 configuration with tuners, reverse though compared to yours: http://www.iguitar.com/ And congrats of superb binding job at the bevel, it must be quite hard!!! |
|
| Author: | SteveSmith [ Mon Sep 24, 2012 1:23 pm ] |
| Post subject: | Re: Dave's Daft Experimental ESJ-2 Build |
I built one 4 + 2. I liked (and still like) the look but it's a bit awkward to tune in a hurry when you've been using 3 + 3 or 6 in line for 40+ years. Definitely enjoying this build. |
|
| Author: | Dave Fifield [ Tue Oct 02, 2012 2:27 am ] |
| Post subject: | Re: Dave's Daft Experimental ESJ-2 Build |
Thanks all! I've been busy at work, but have found time in the evenings and at the weekend to make some worthwhile progress on this build. Here's where I got to by the end of last weekend: Sawed the neck shape (freehand on a bandsaw):  Then pieced together a decent looking headplate from 3 pieces of the free redwood burl:  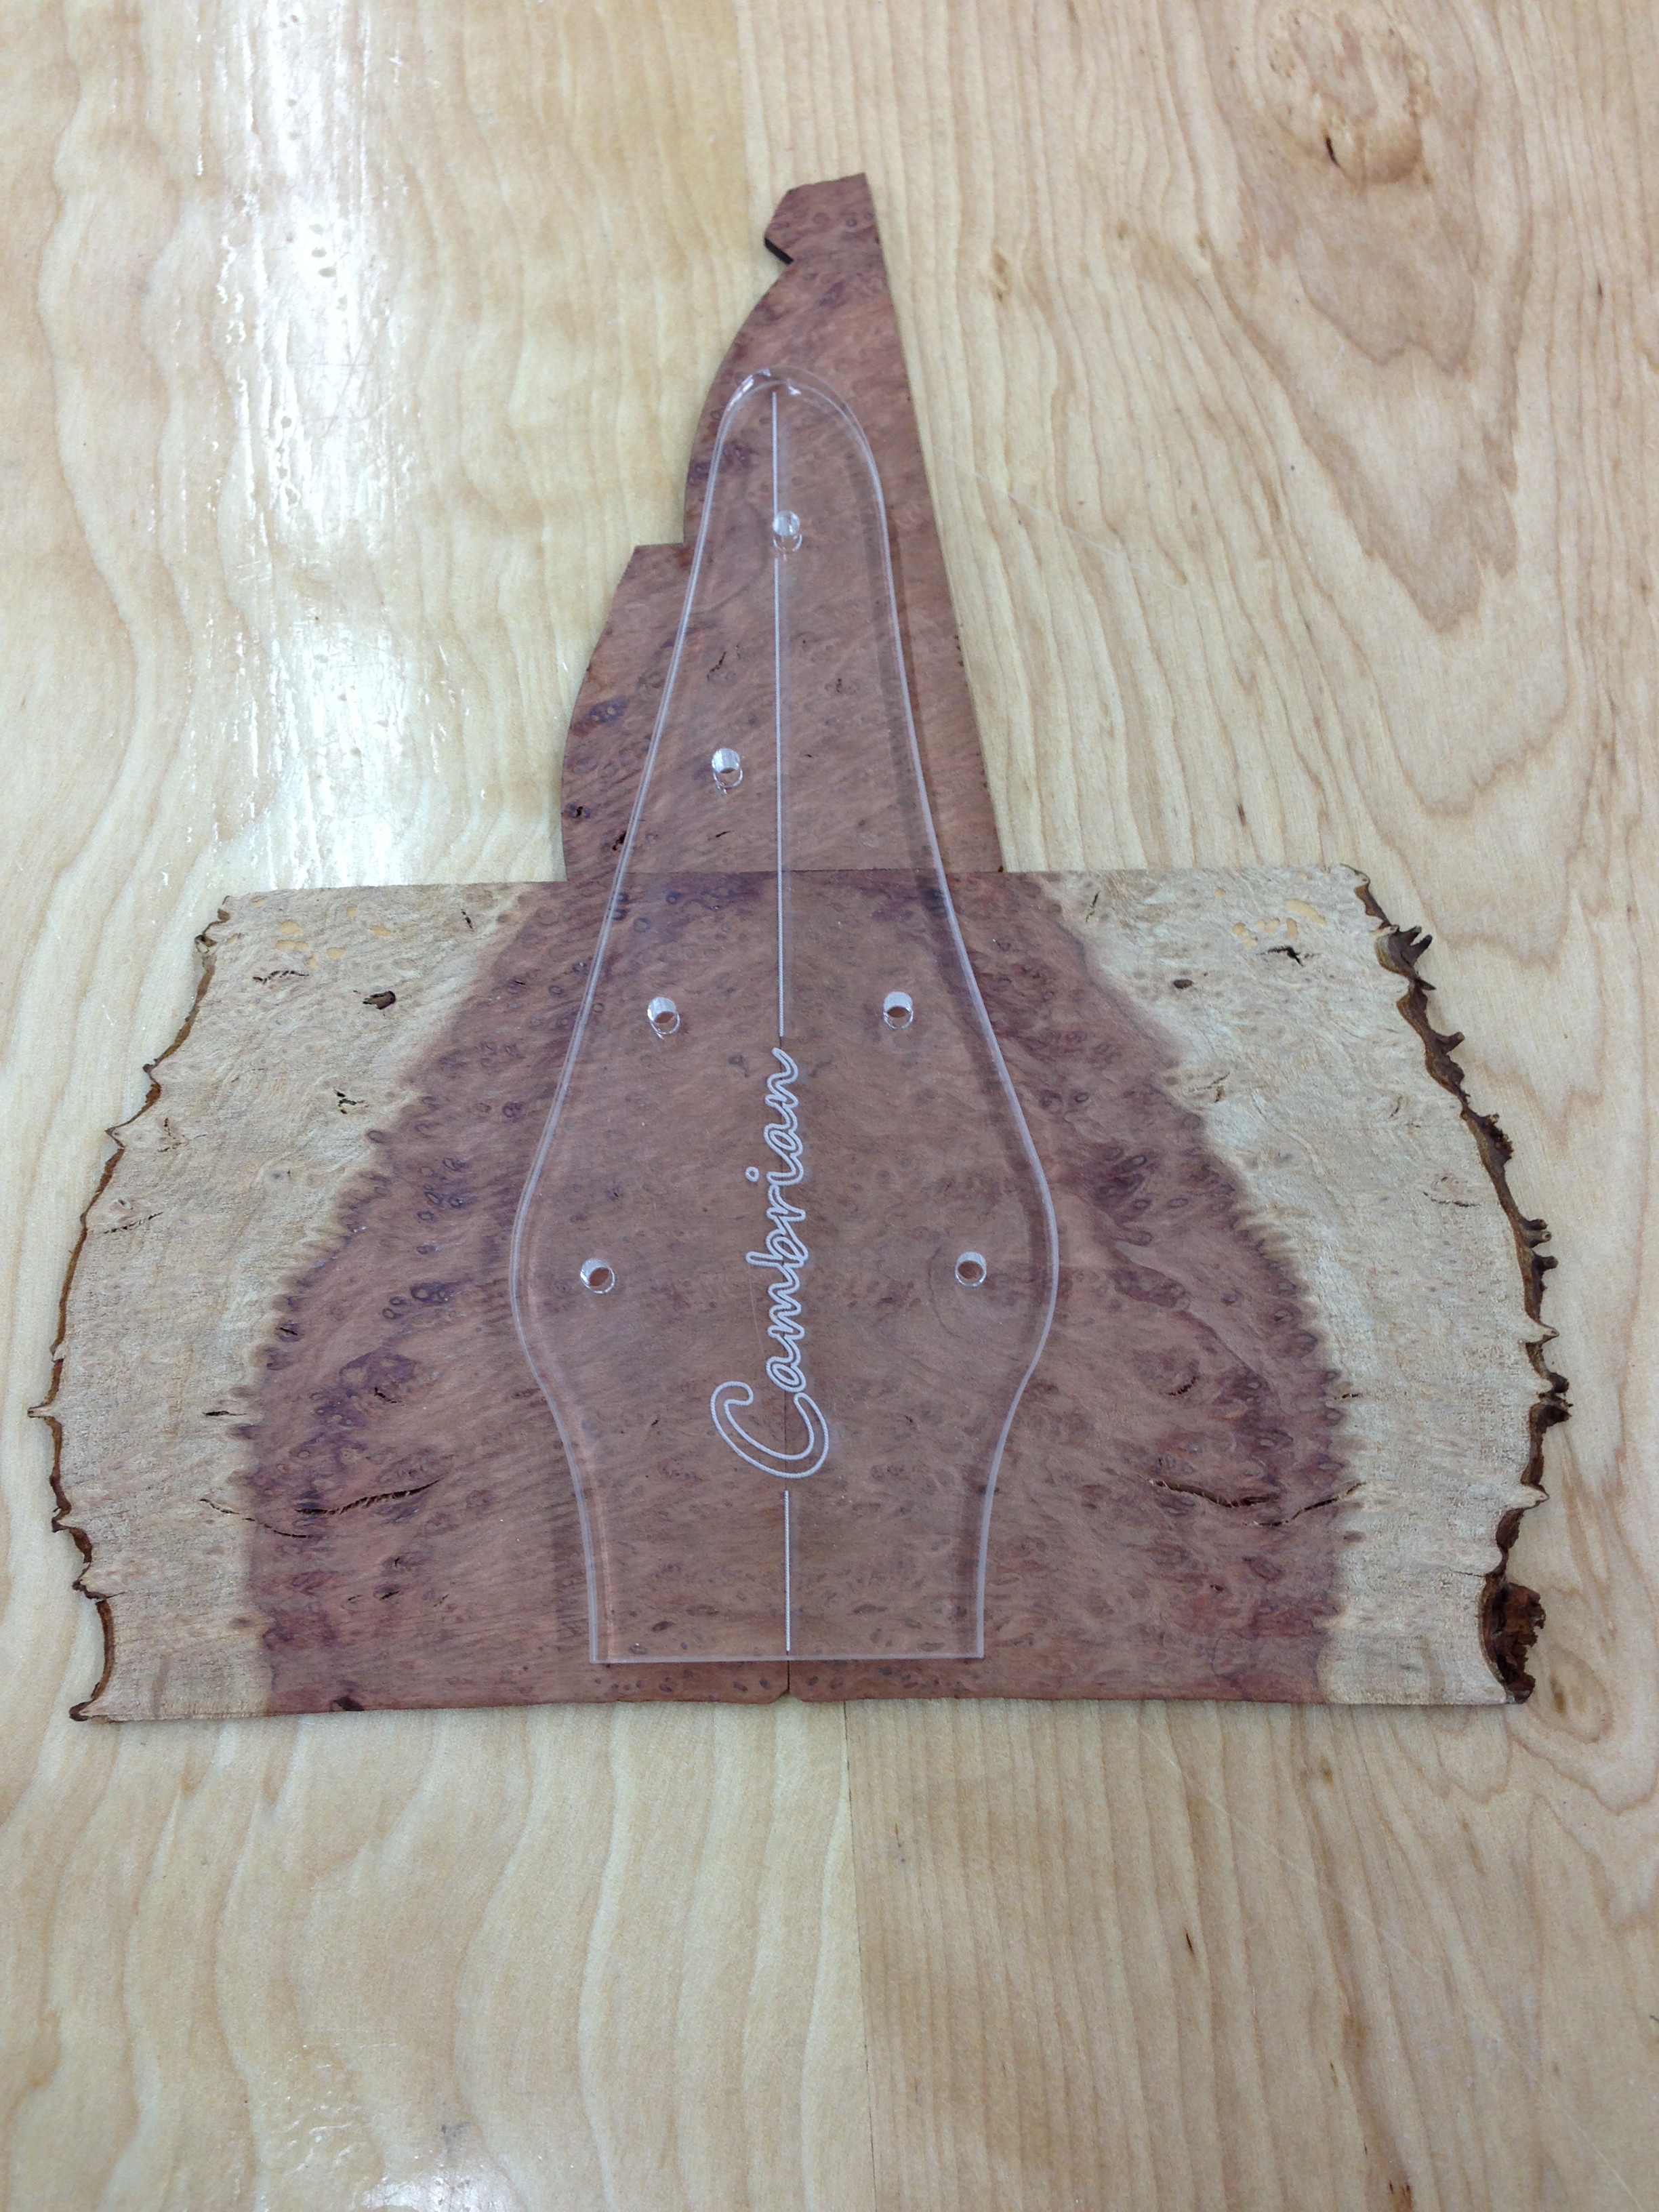 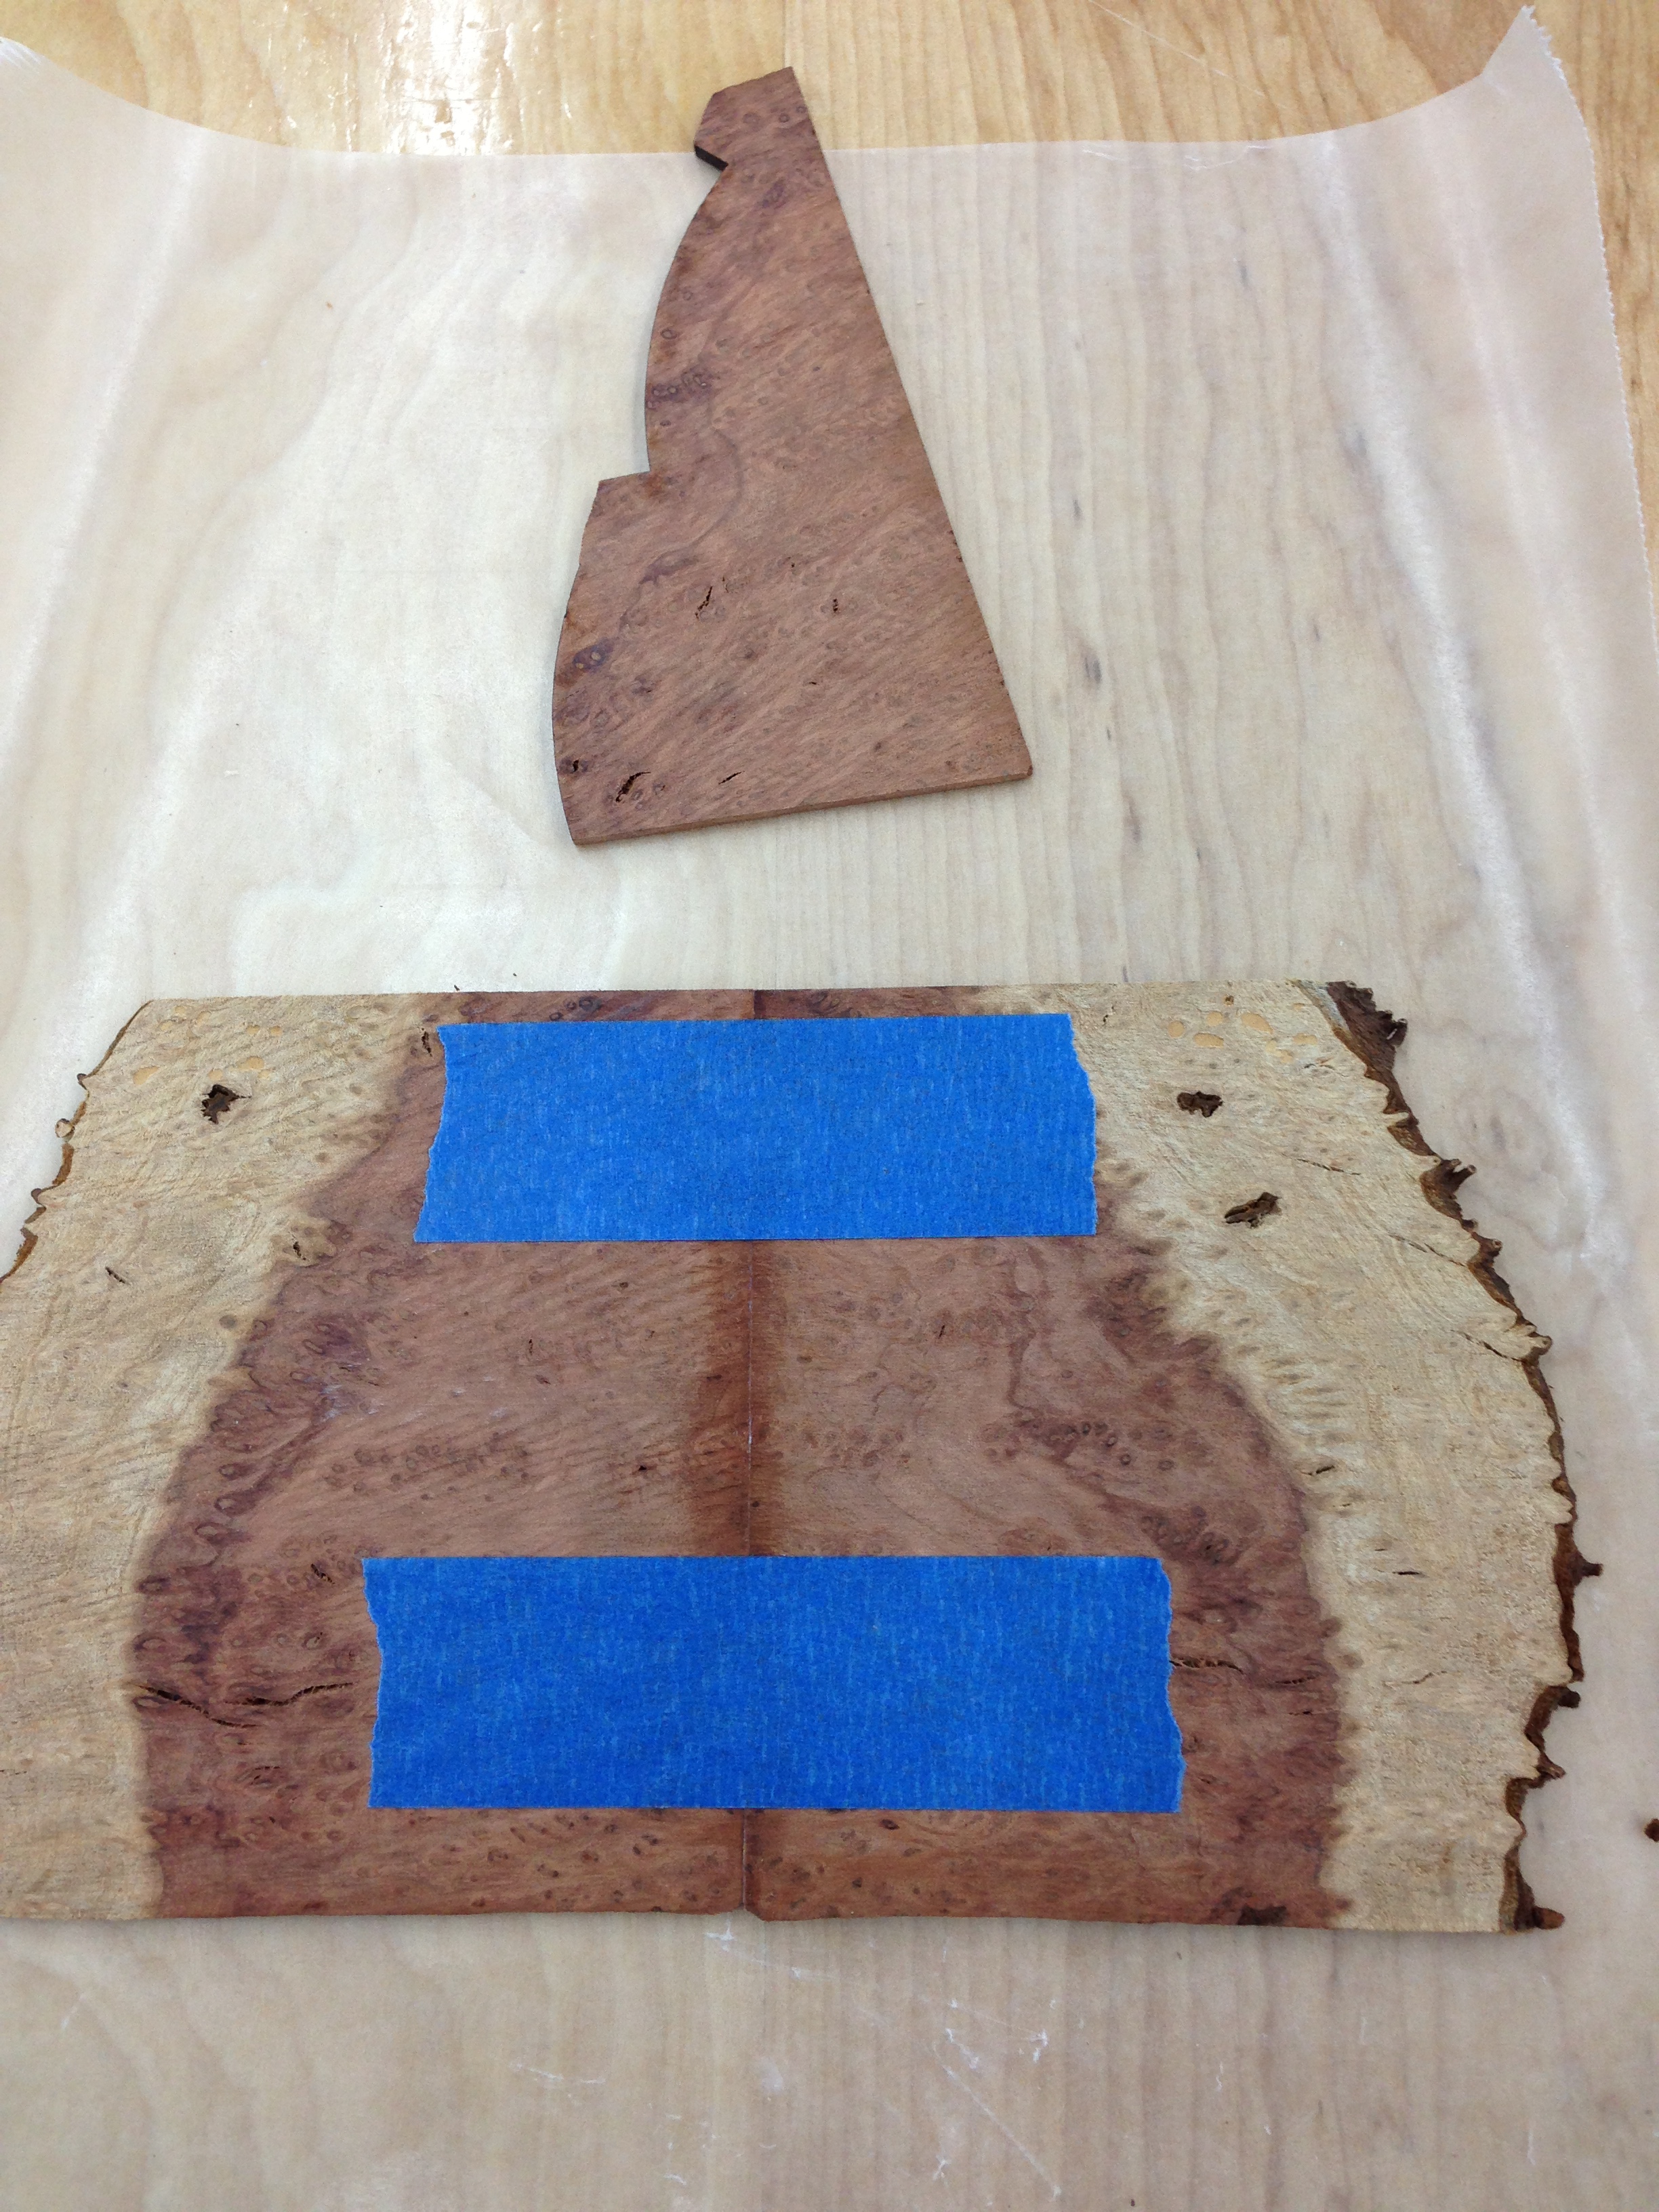 Then, while the headplate was being glued up, cut the M&T, drilled a large hole into the heel, and glued in a 0.5" dowel (yeah, I know I should have put the dowel in BEFORE I routed the truss rod channel....doh!), then used the cheapest neck connectors I could find.....some 1/4-20 hanger bolts from Woodcraft! I'd estimate about 30 cents worth of dowel, plus 65 cents for the two hanger bolts, plus 20 cents for the 1/4-20 nuts and washers = $1.15 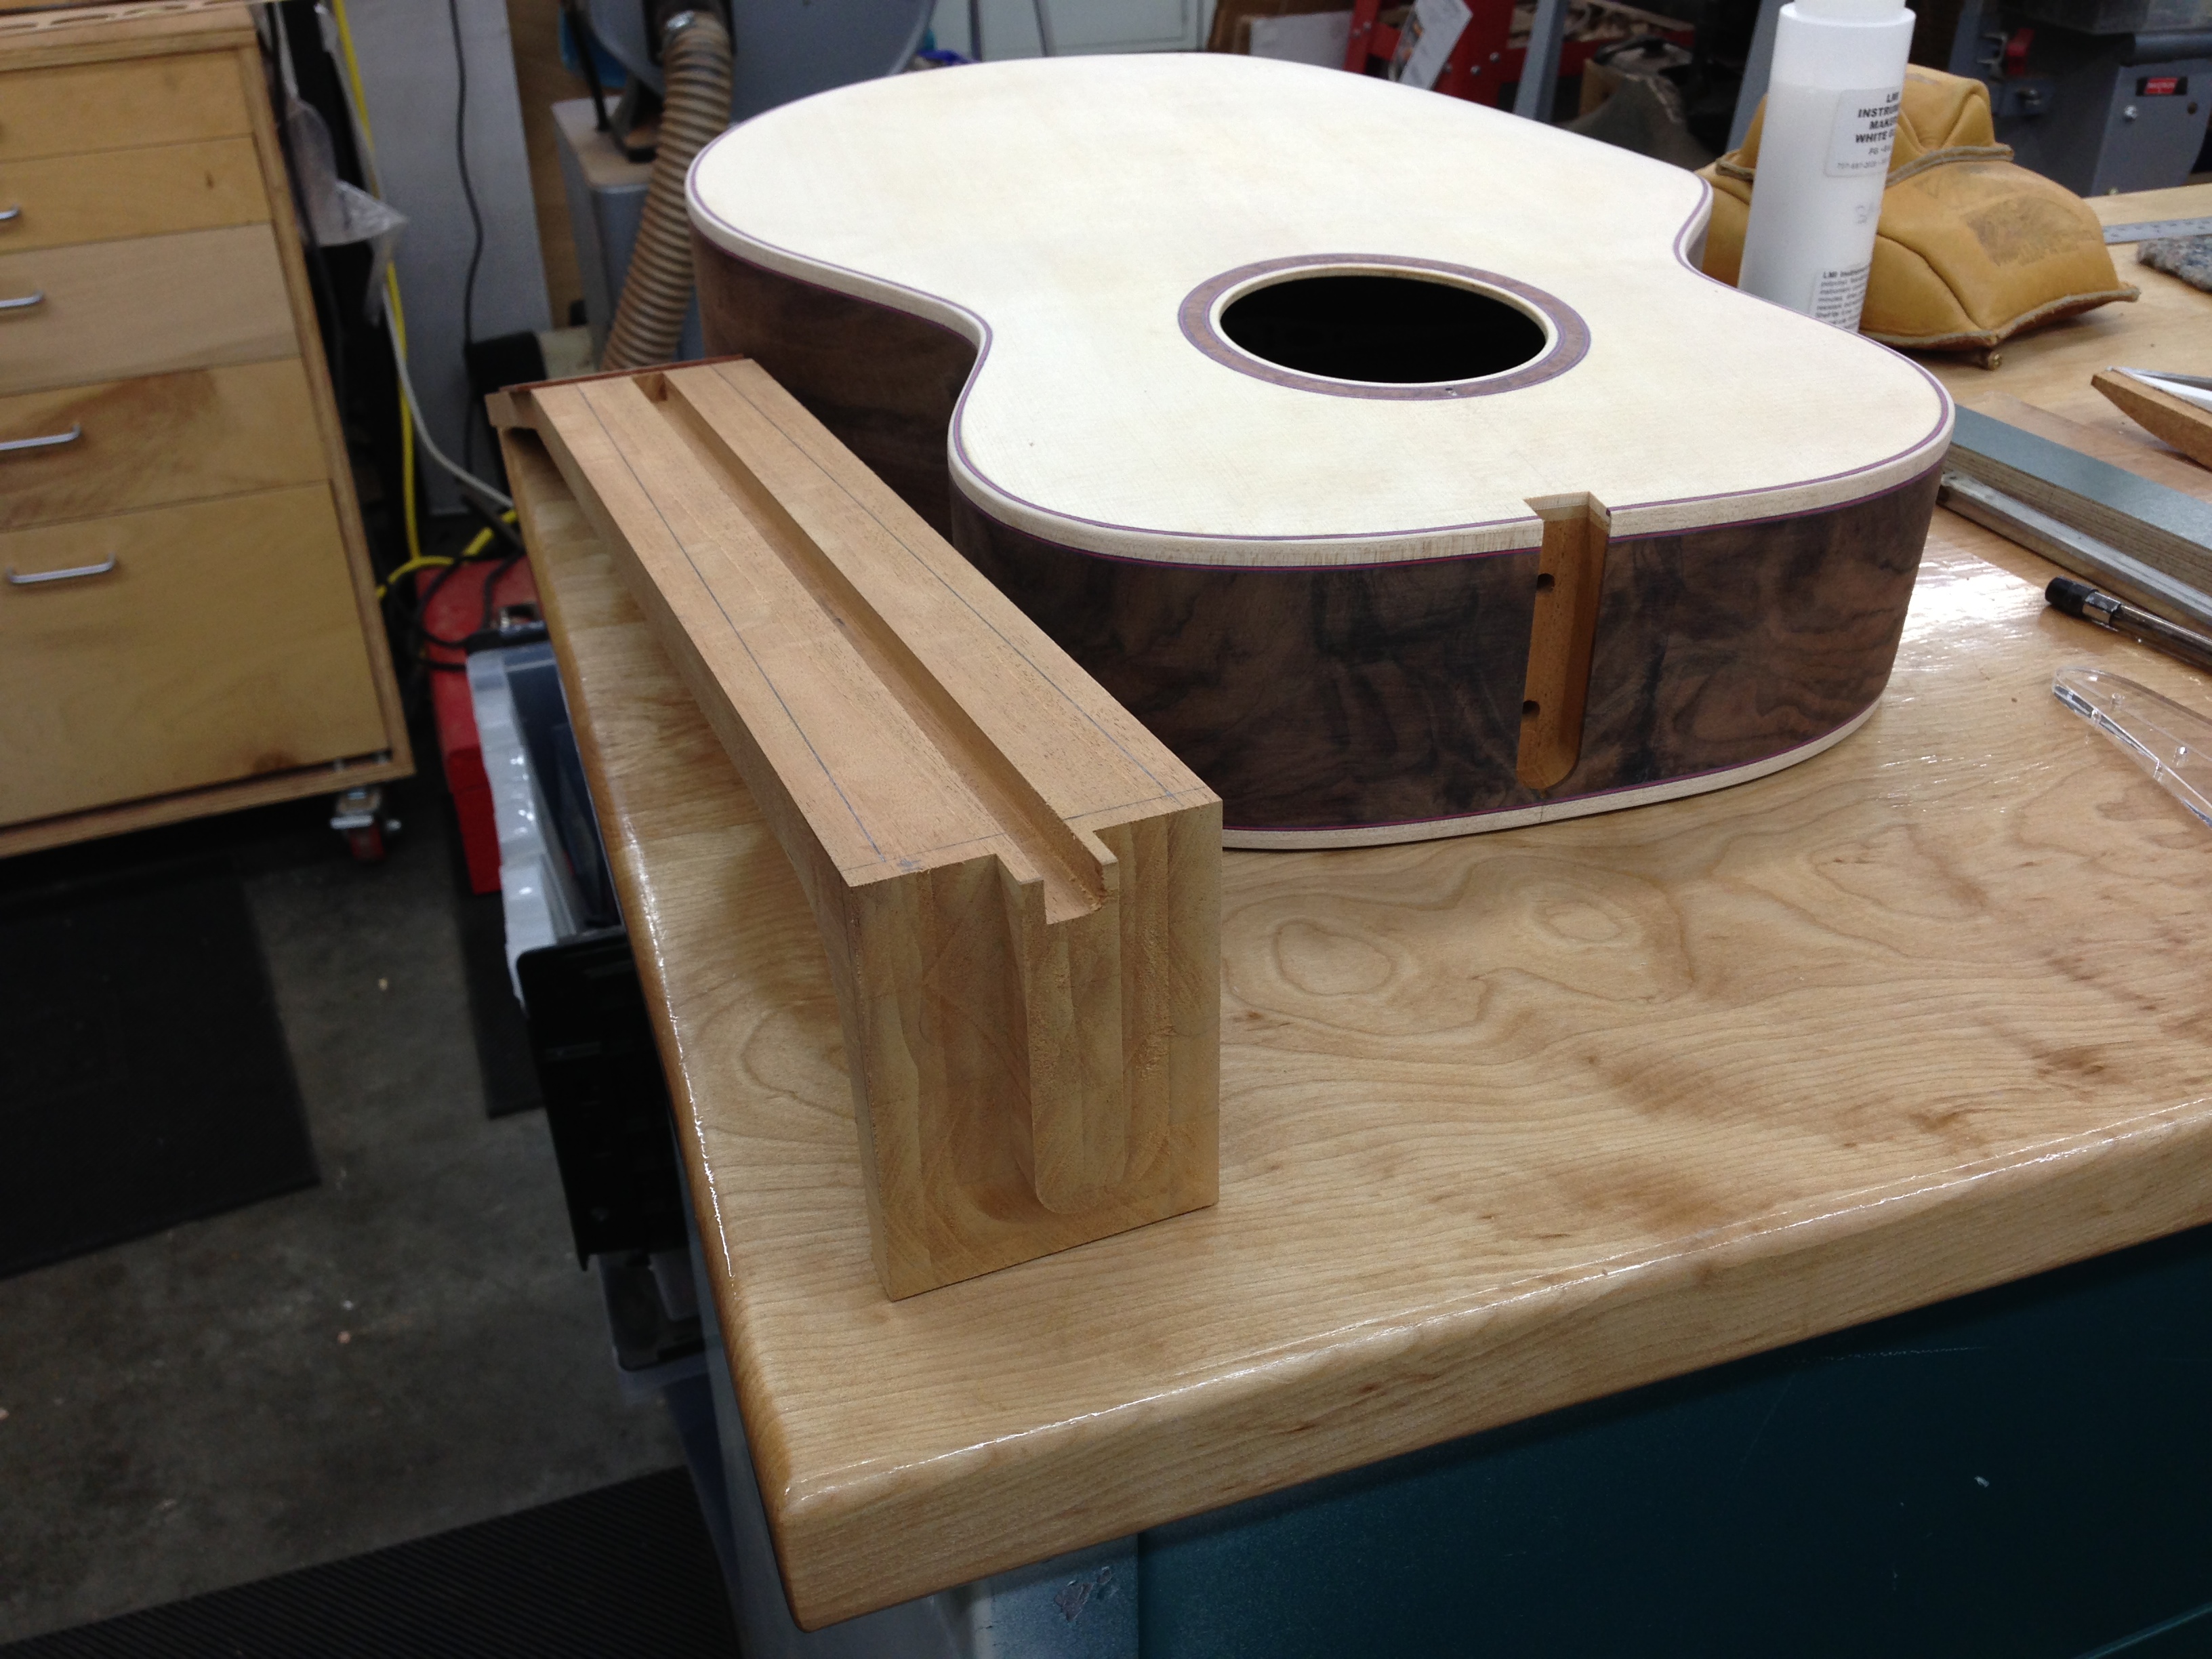 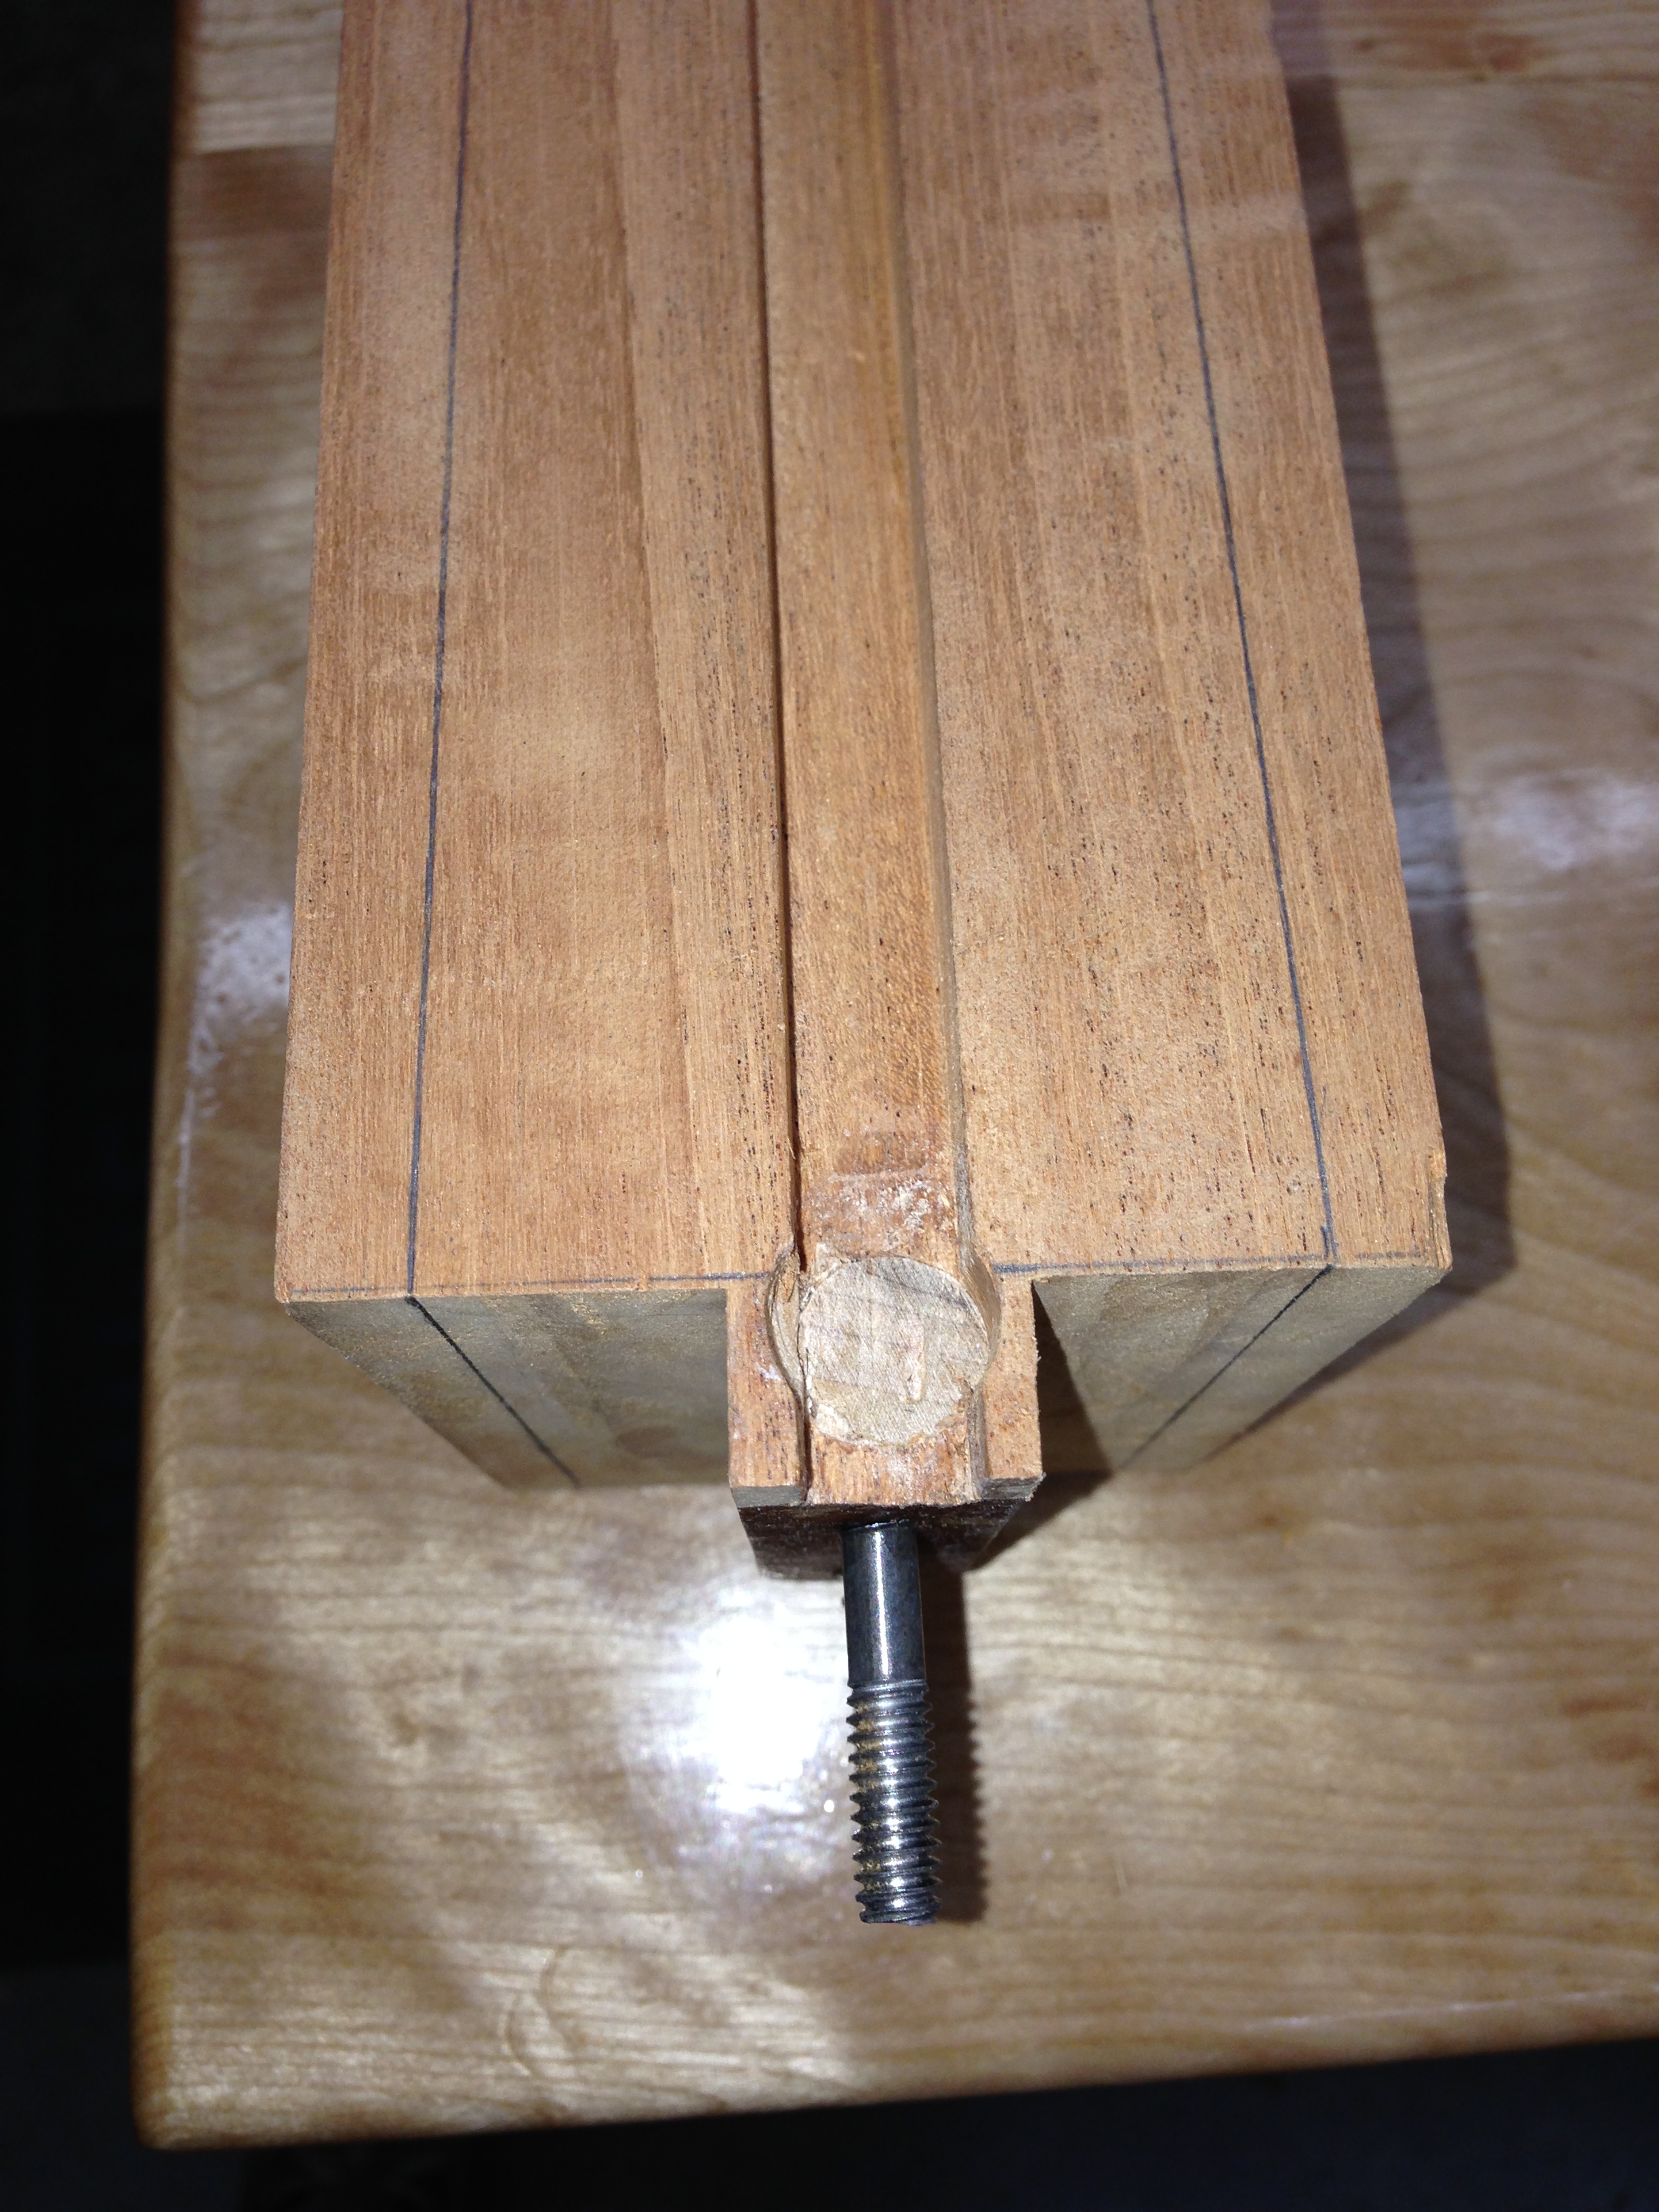  Once the headplate was dry, I sanded it flat both sides and then inlaid my logo into it (with the laser, of course) using a scrap of clear maple that I found in my scraps bin ($0, really!). Here's the headplate and maple ready for cutting - the screen shows the mirrored version of my logo. I cut the pocket face up and the inlay pieces face down: 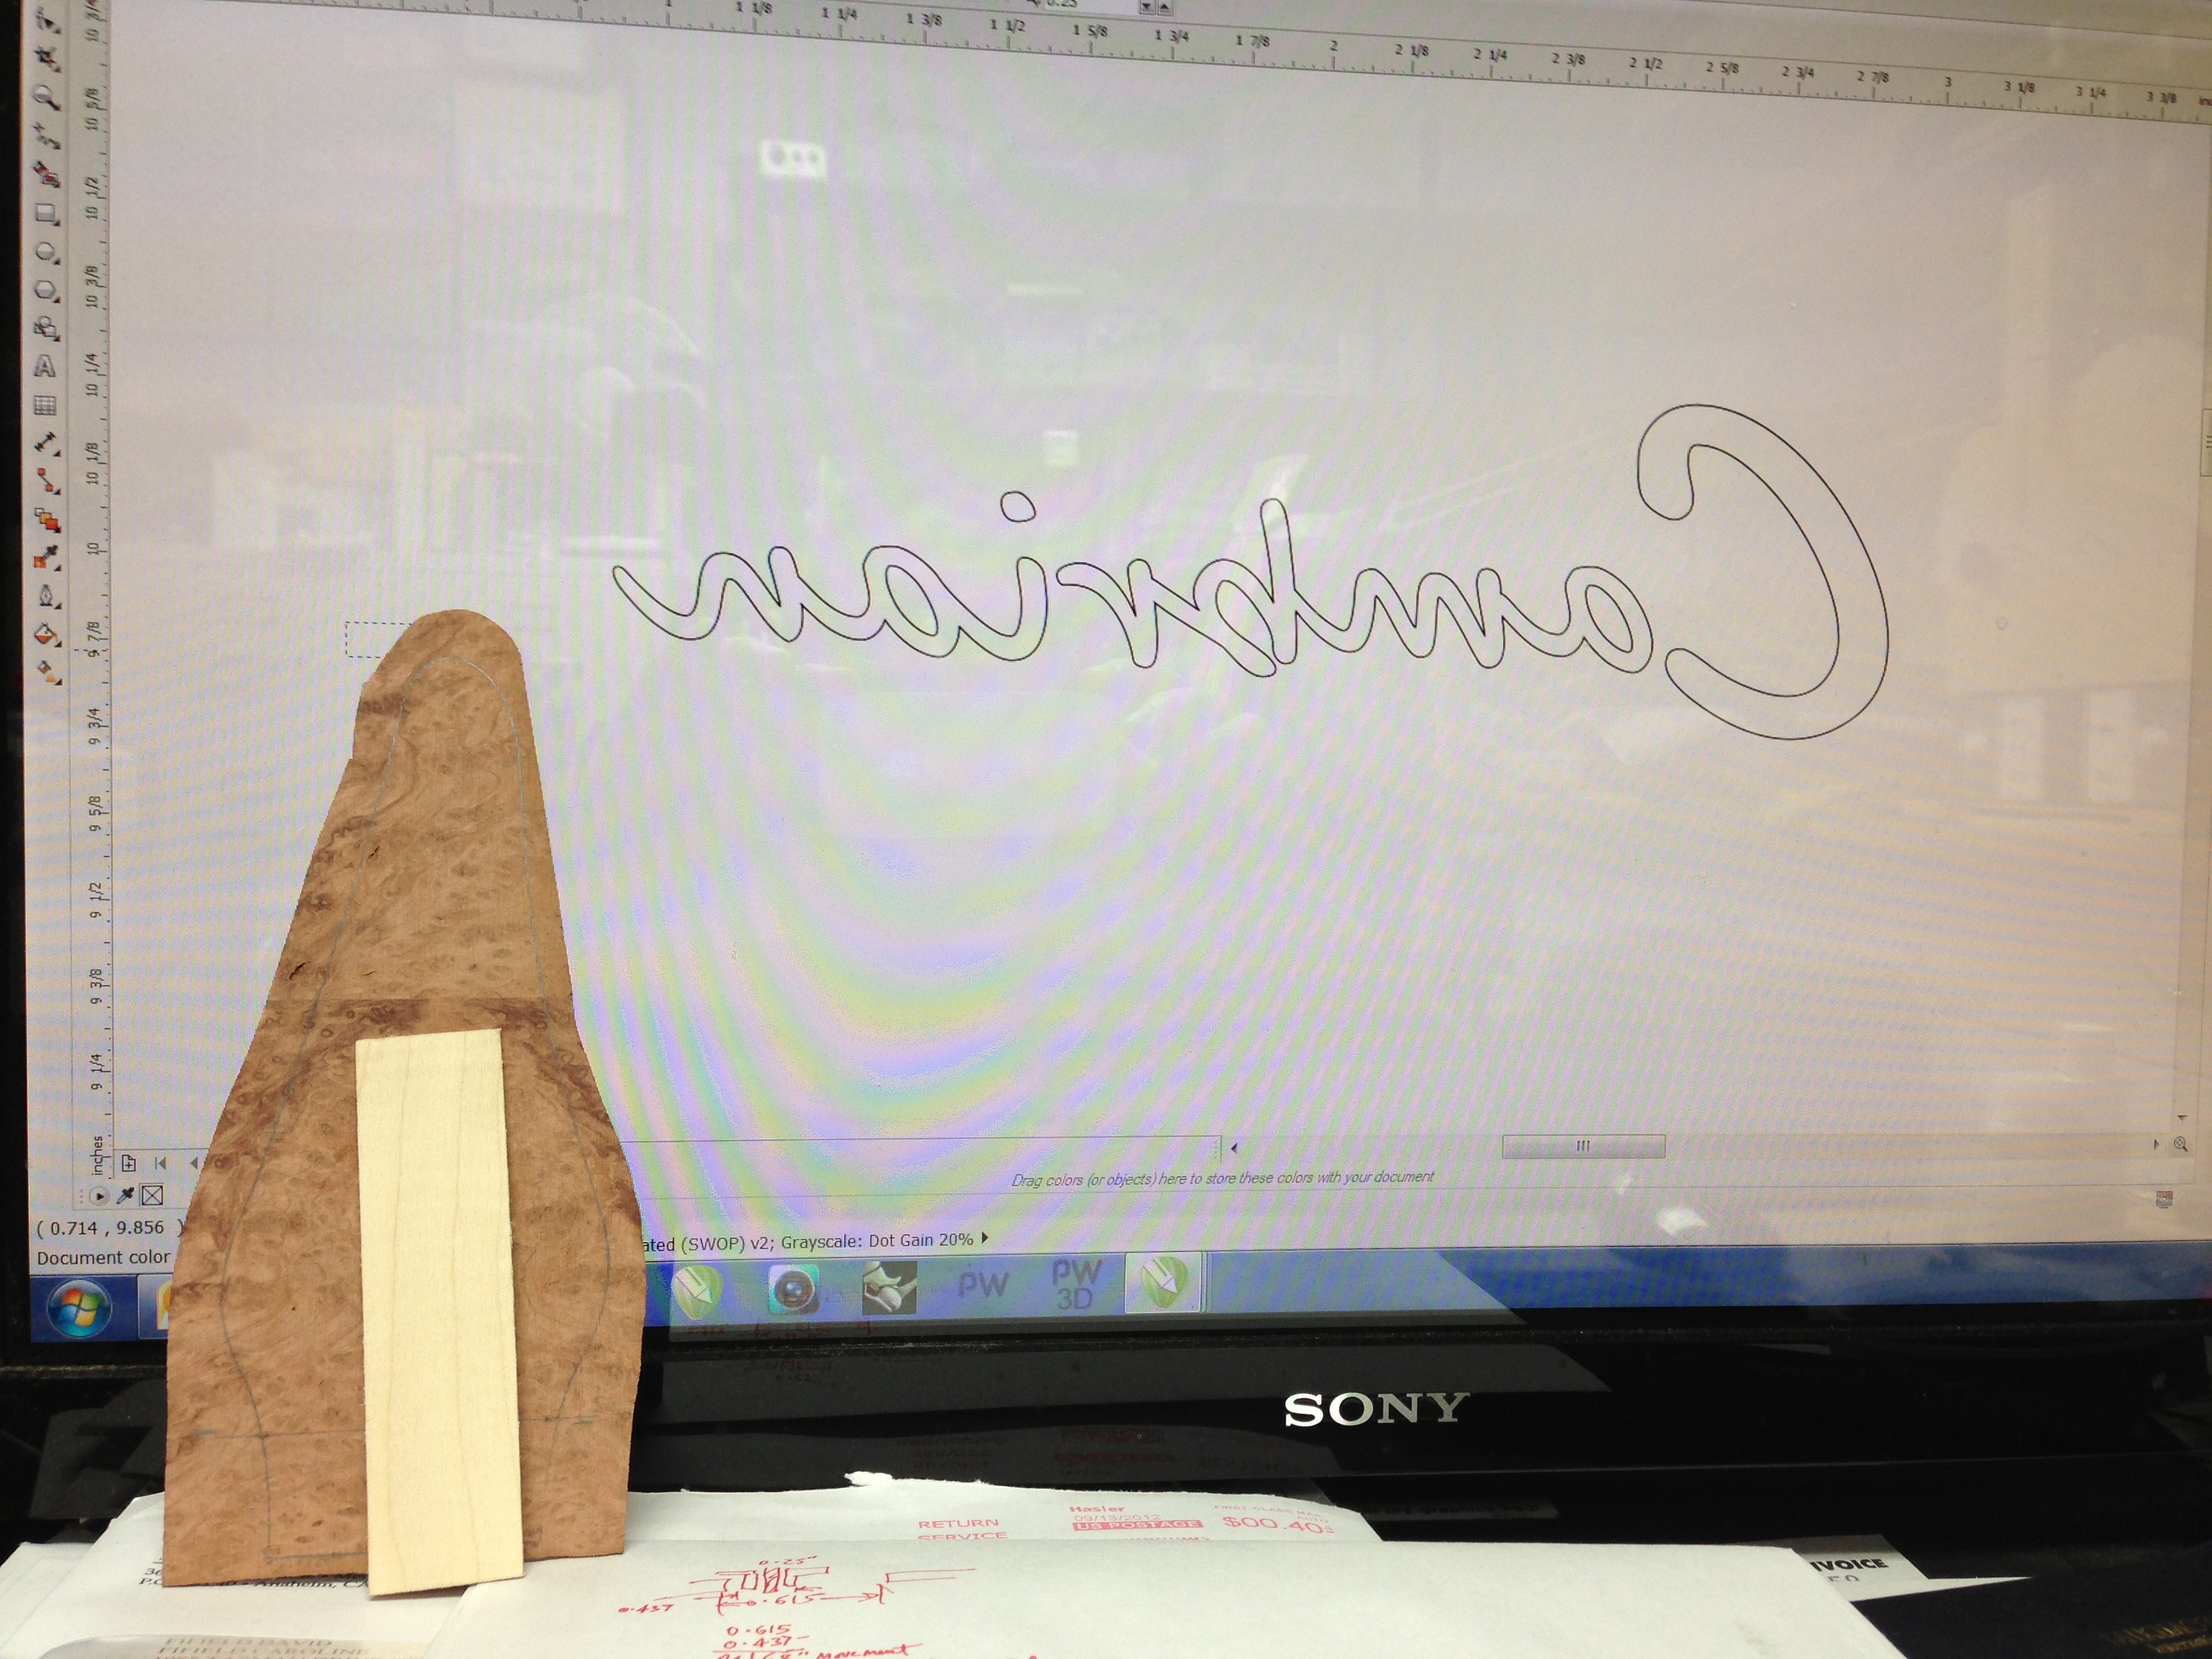 I trimmed up the sides of the neck on the small bandsaw: 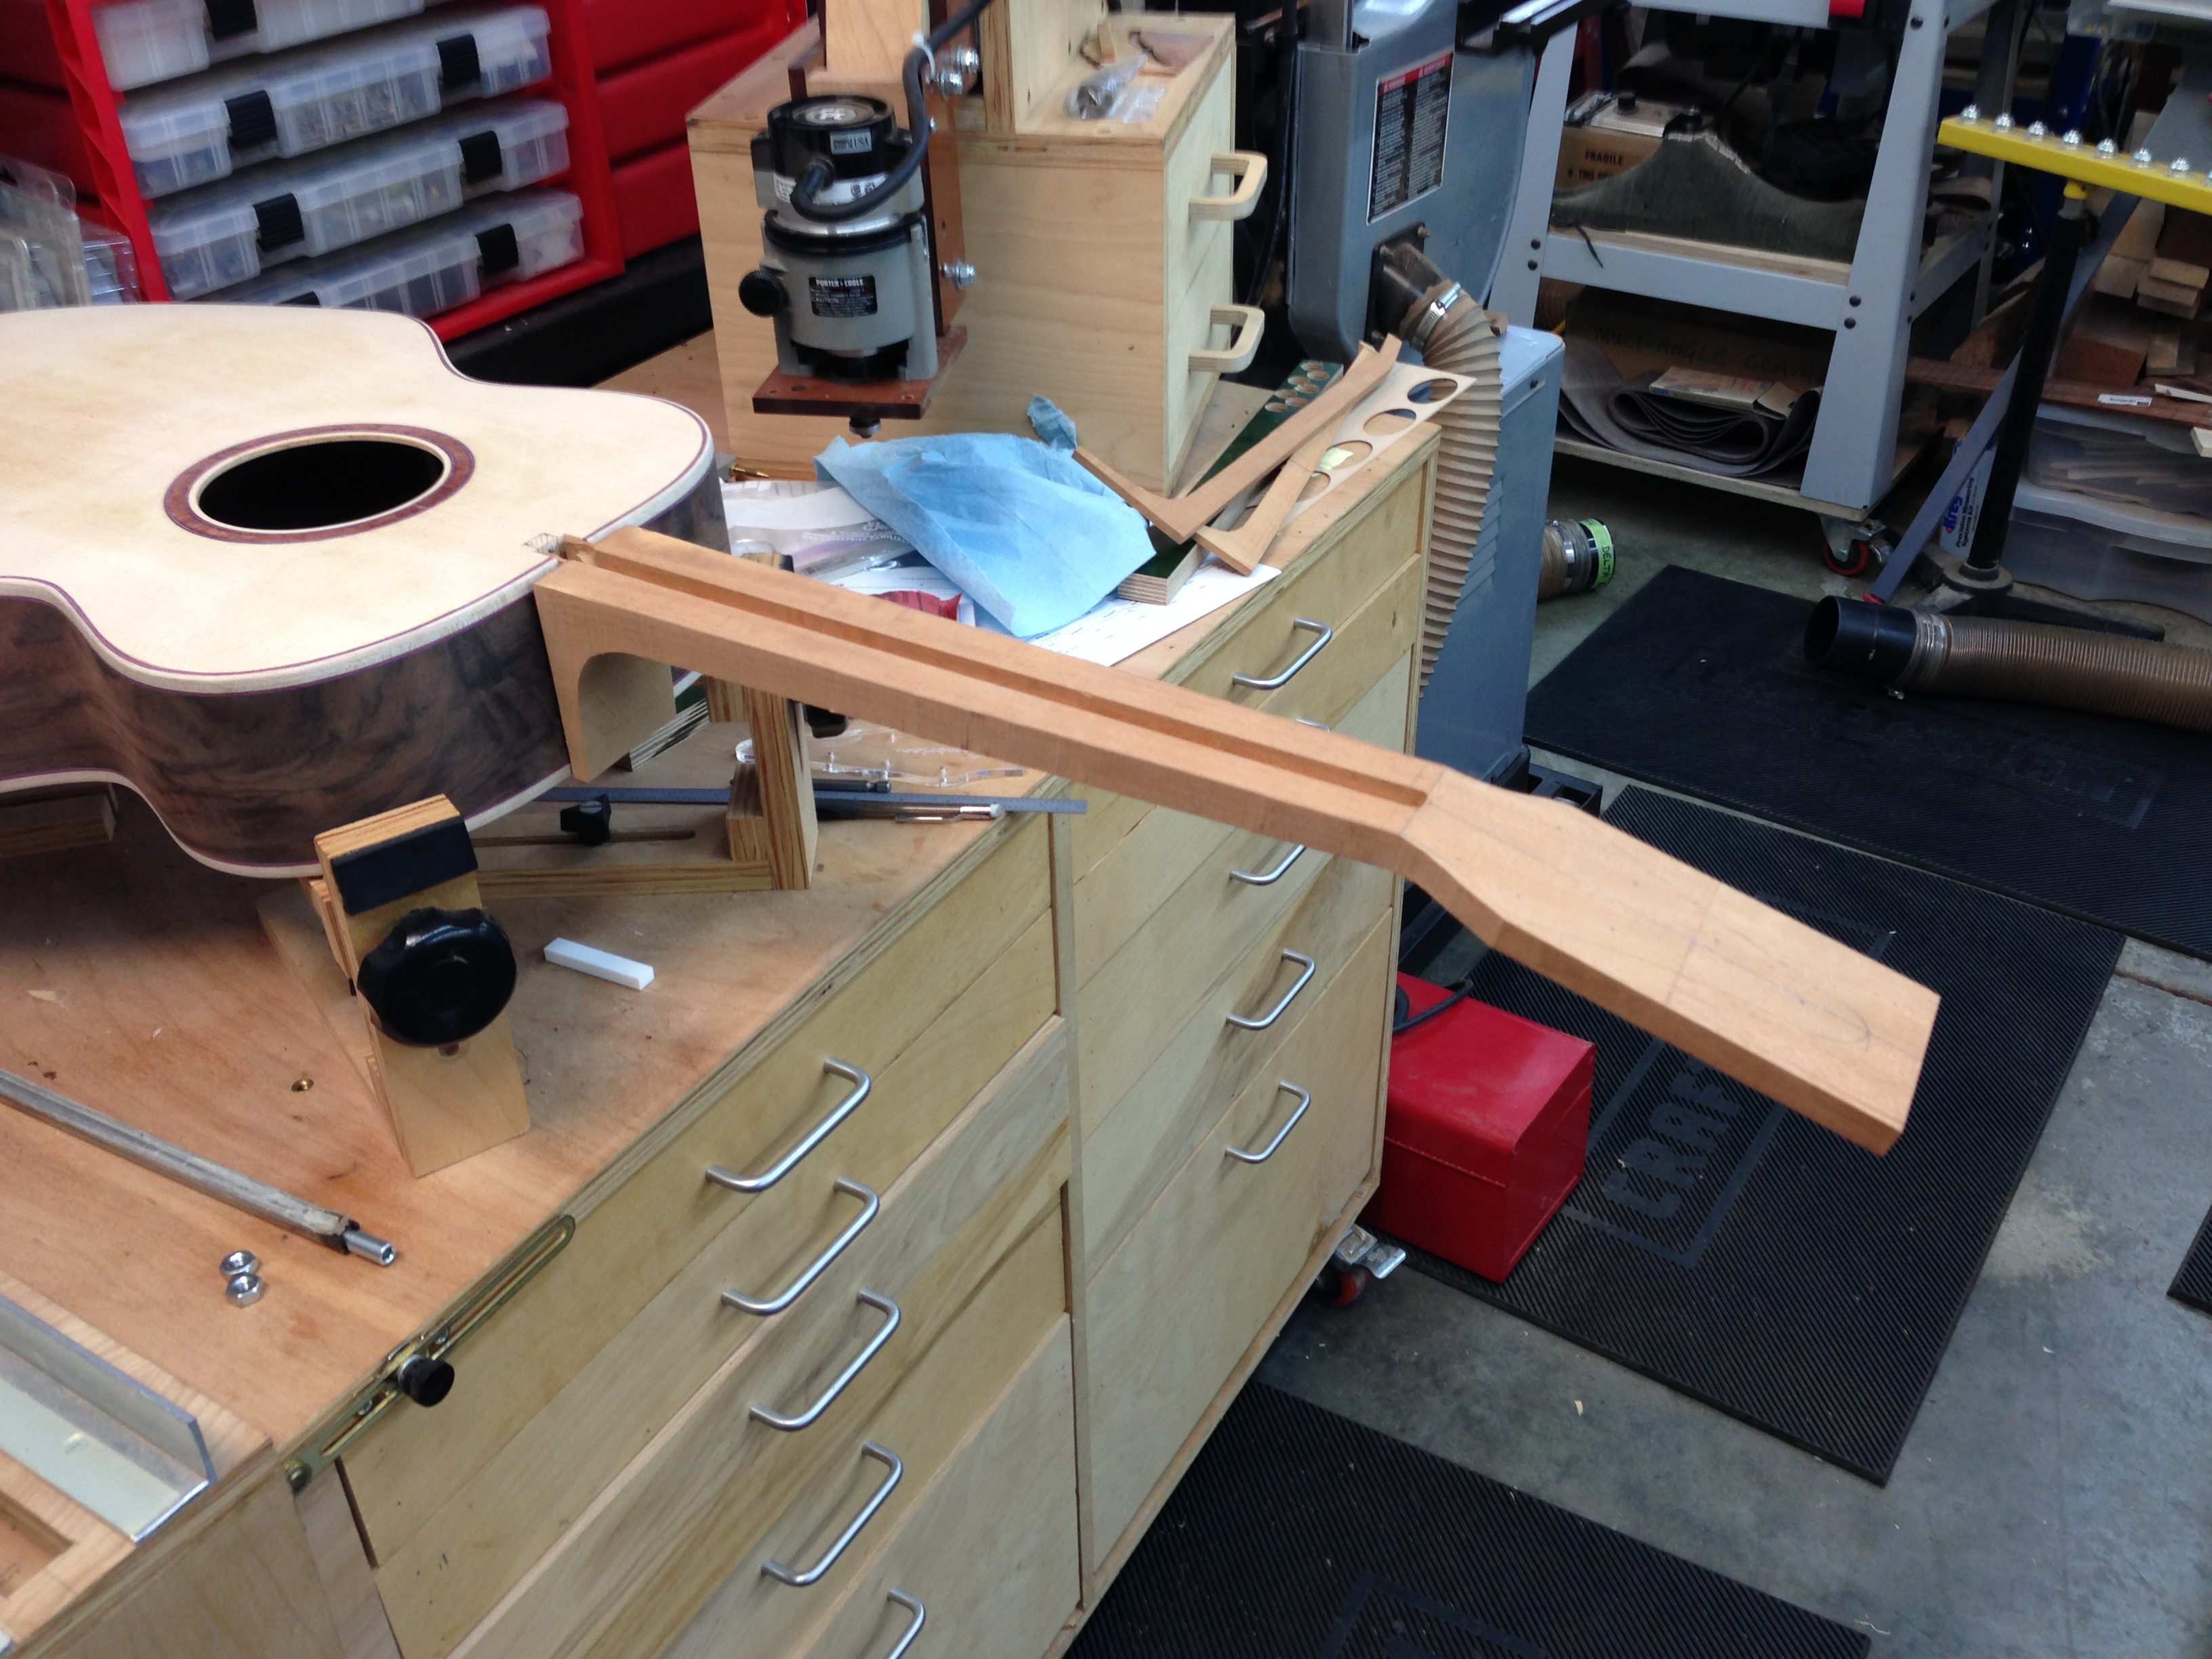 Then glued the headplate with an offcut piece of my blue-red-blue purfling veneer glue-up underneath it. I need to add a bit onto the budget for this....we'll do the math later: 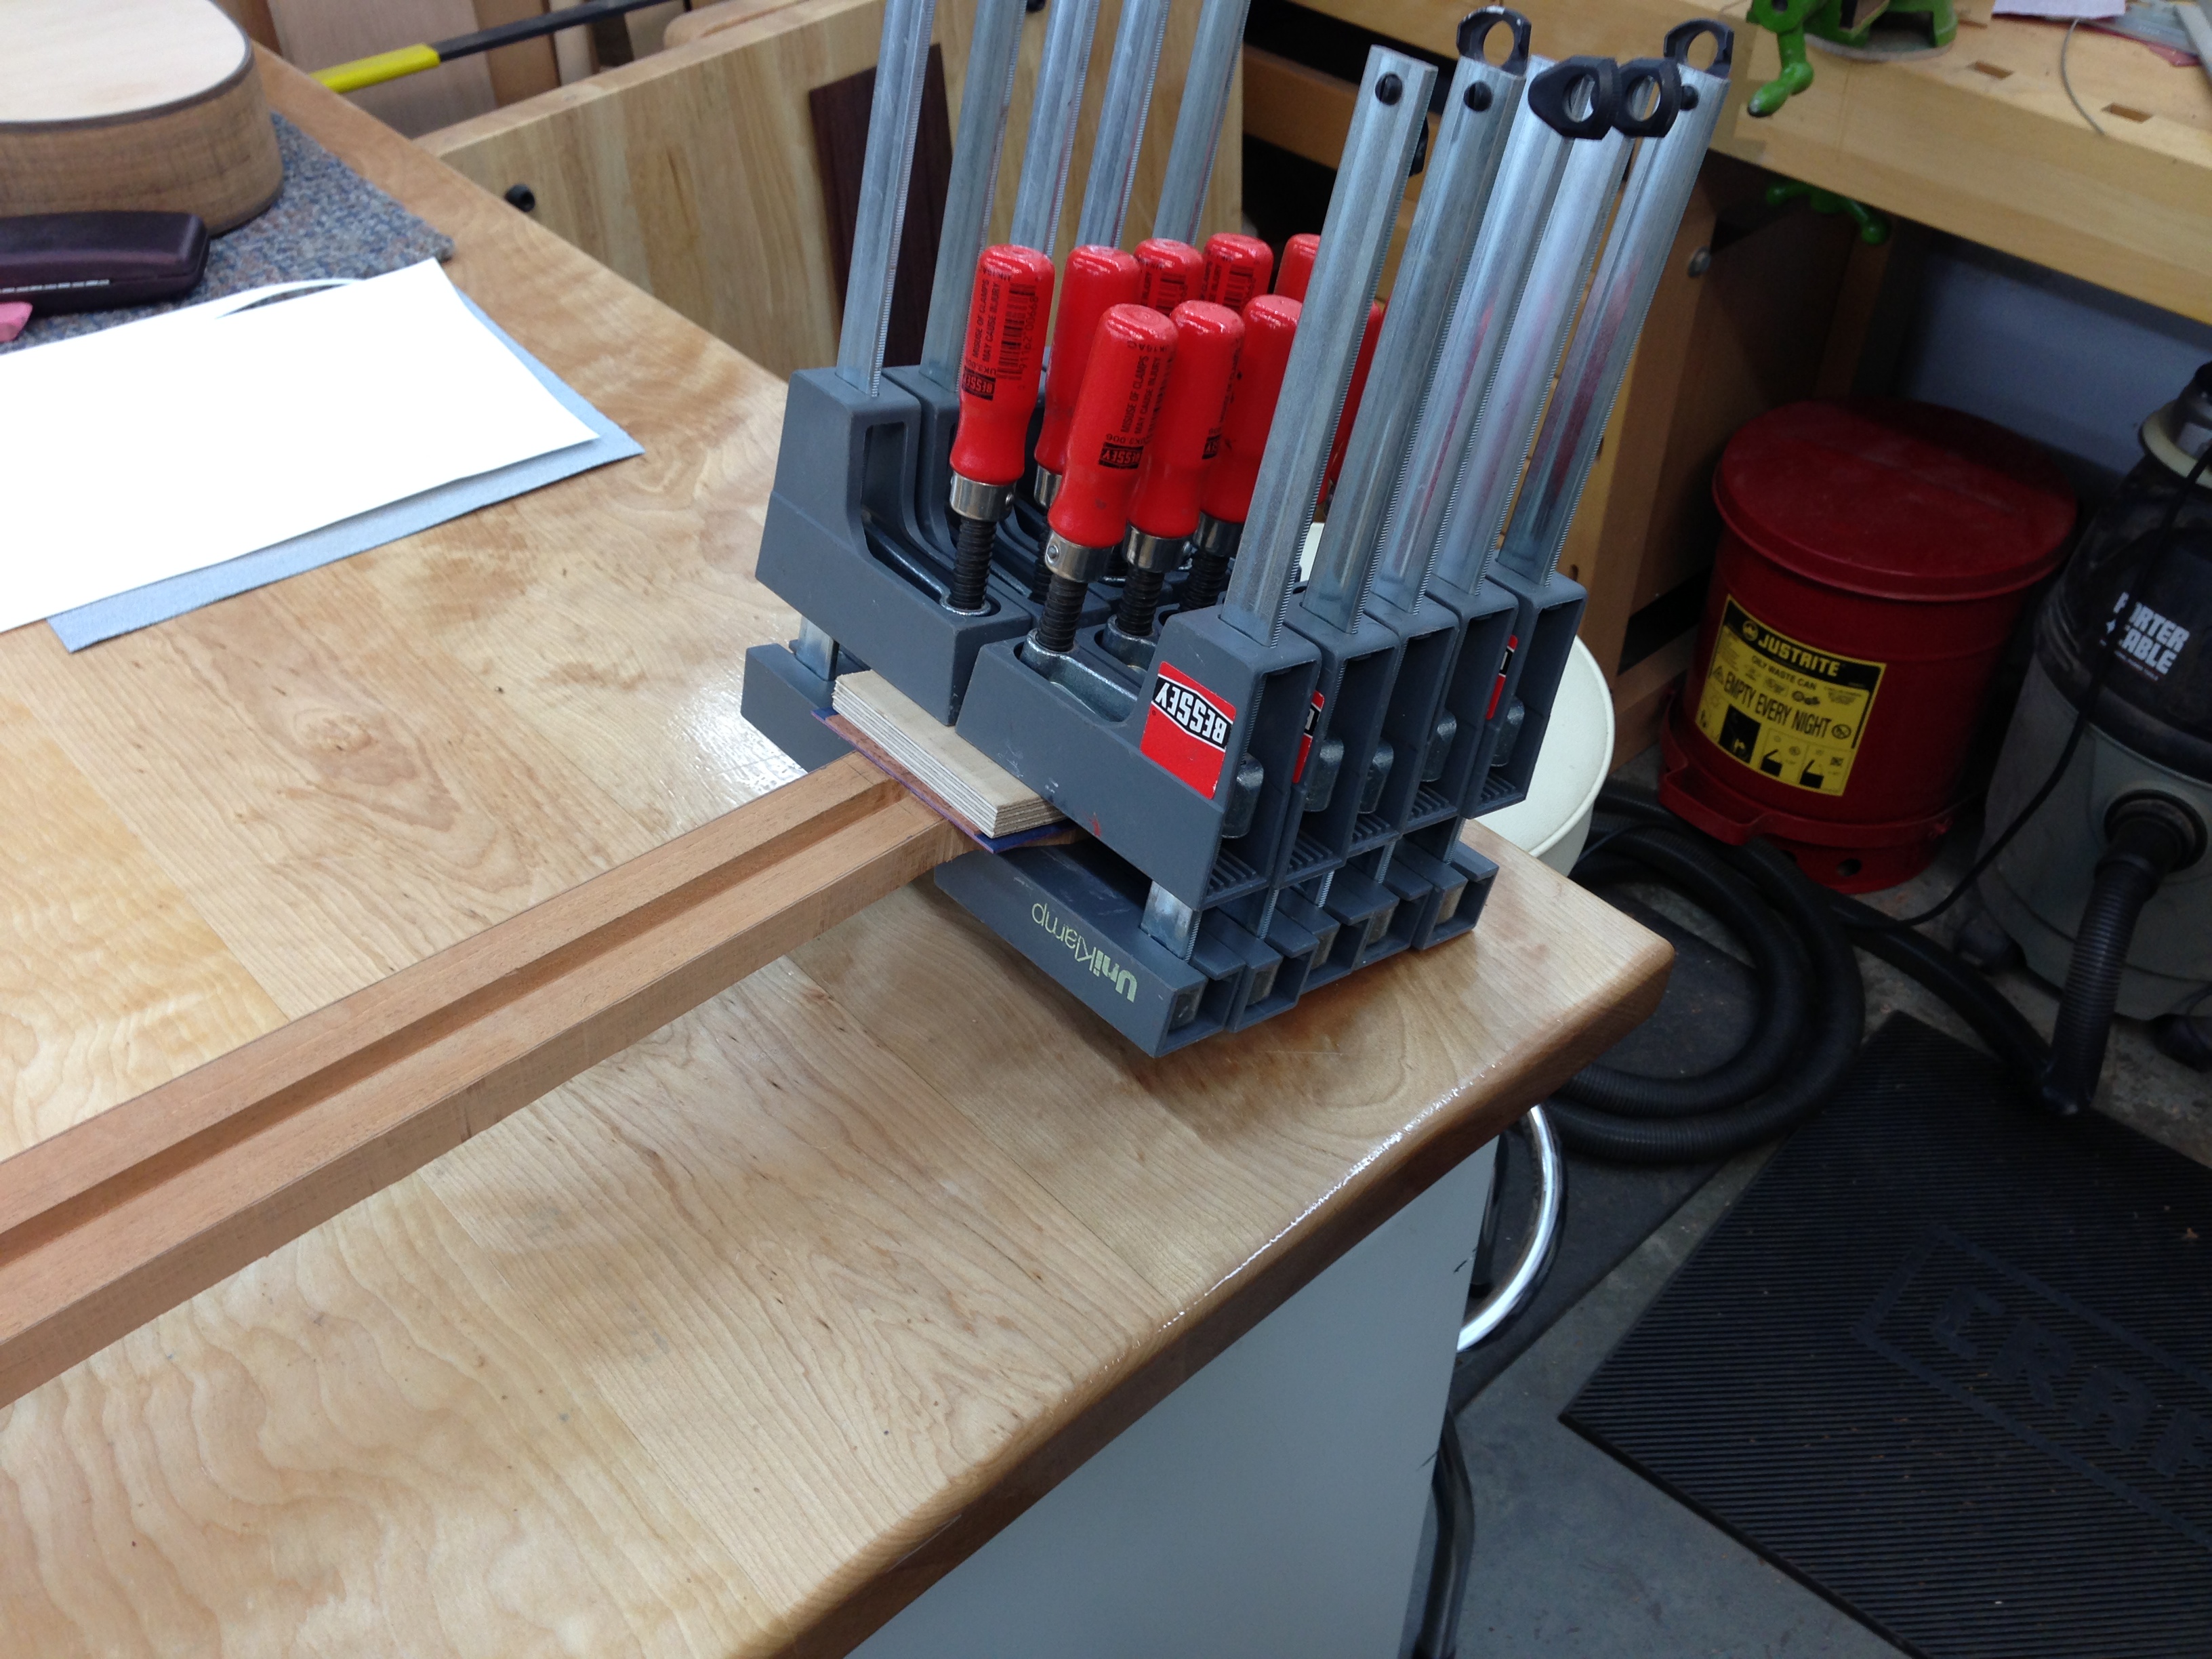 While the headplate assembly was drying, I carved out the back of the heel so that it only touches the guitar on its edges: 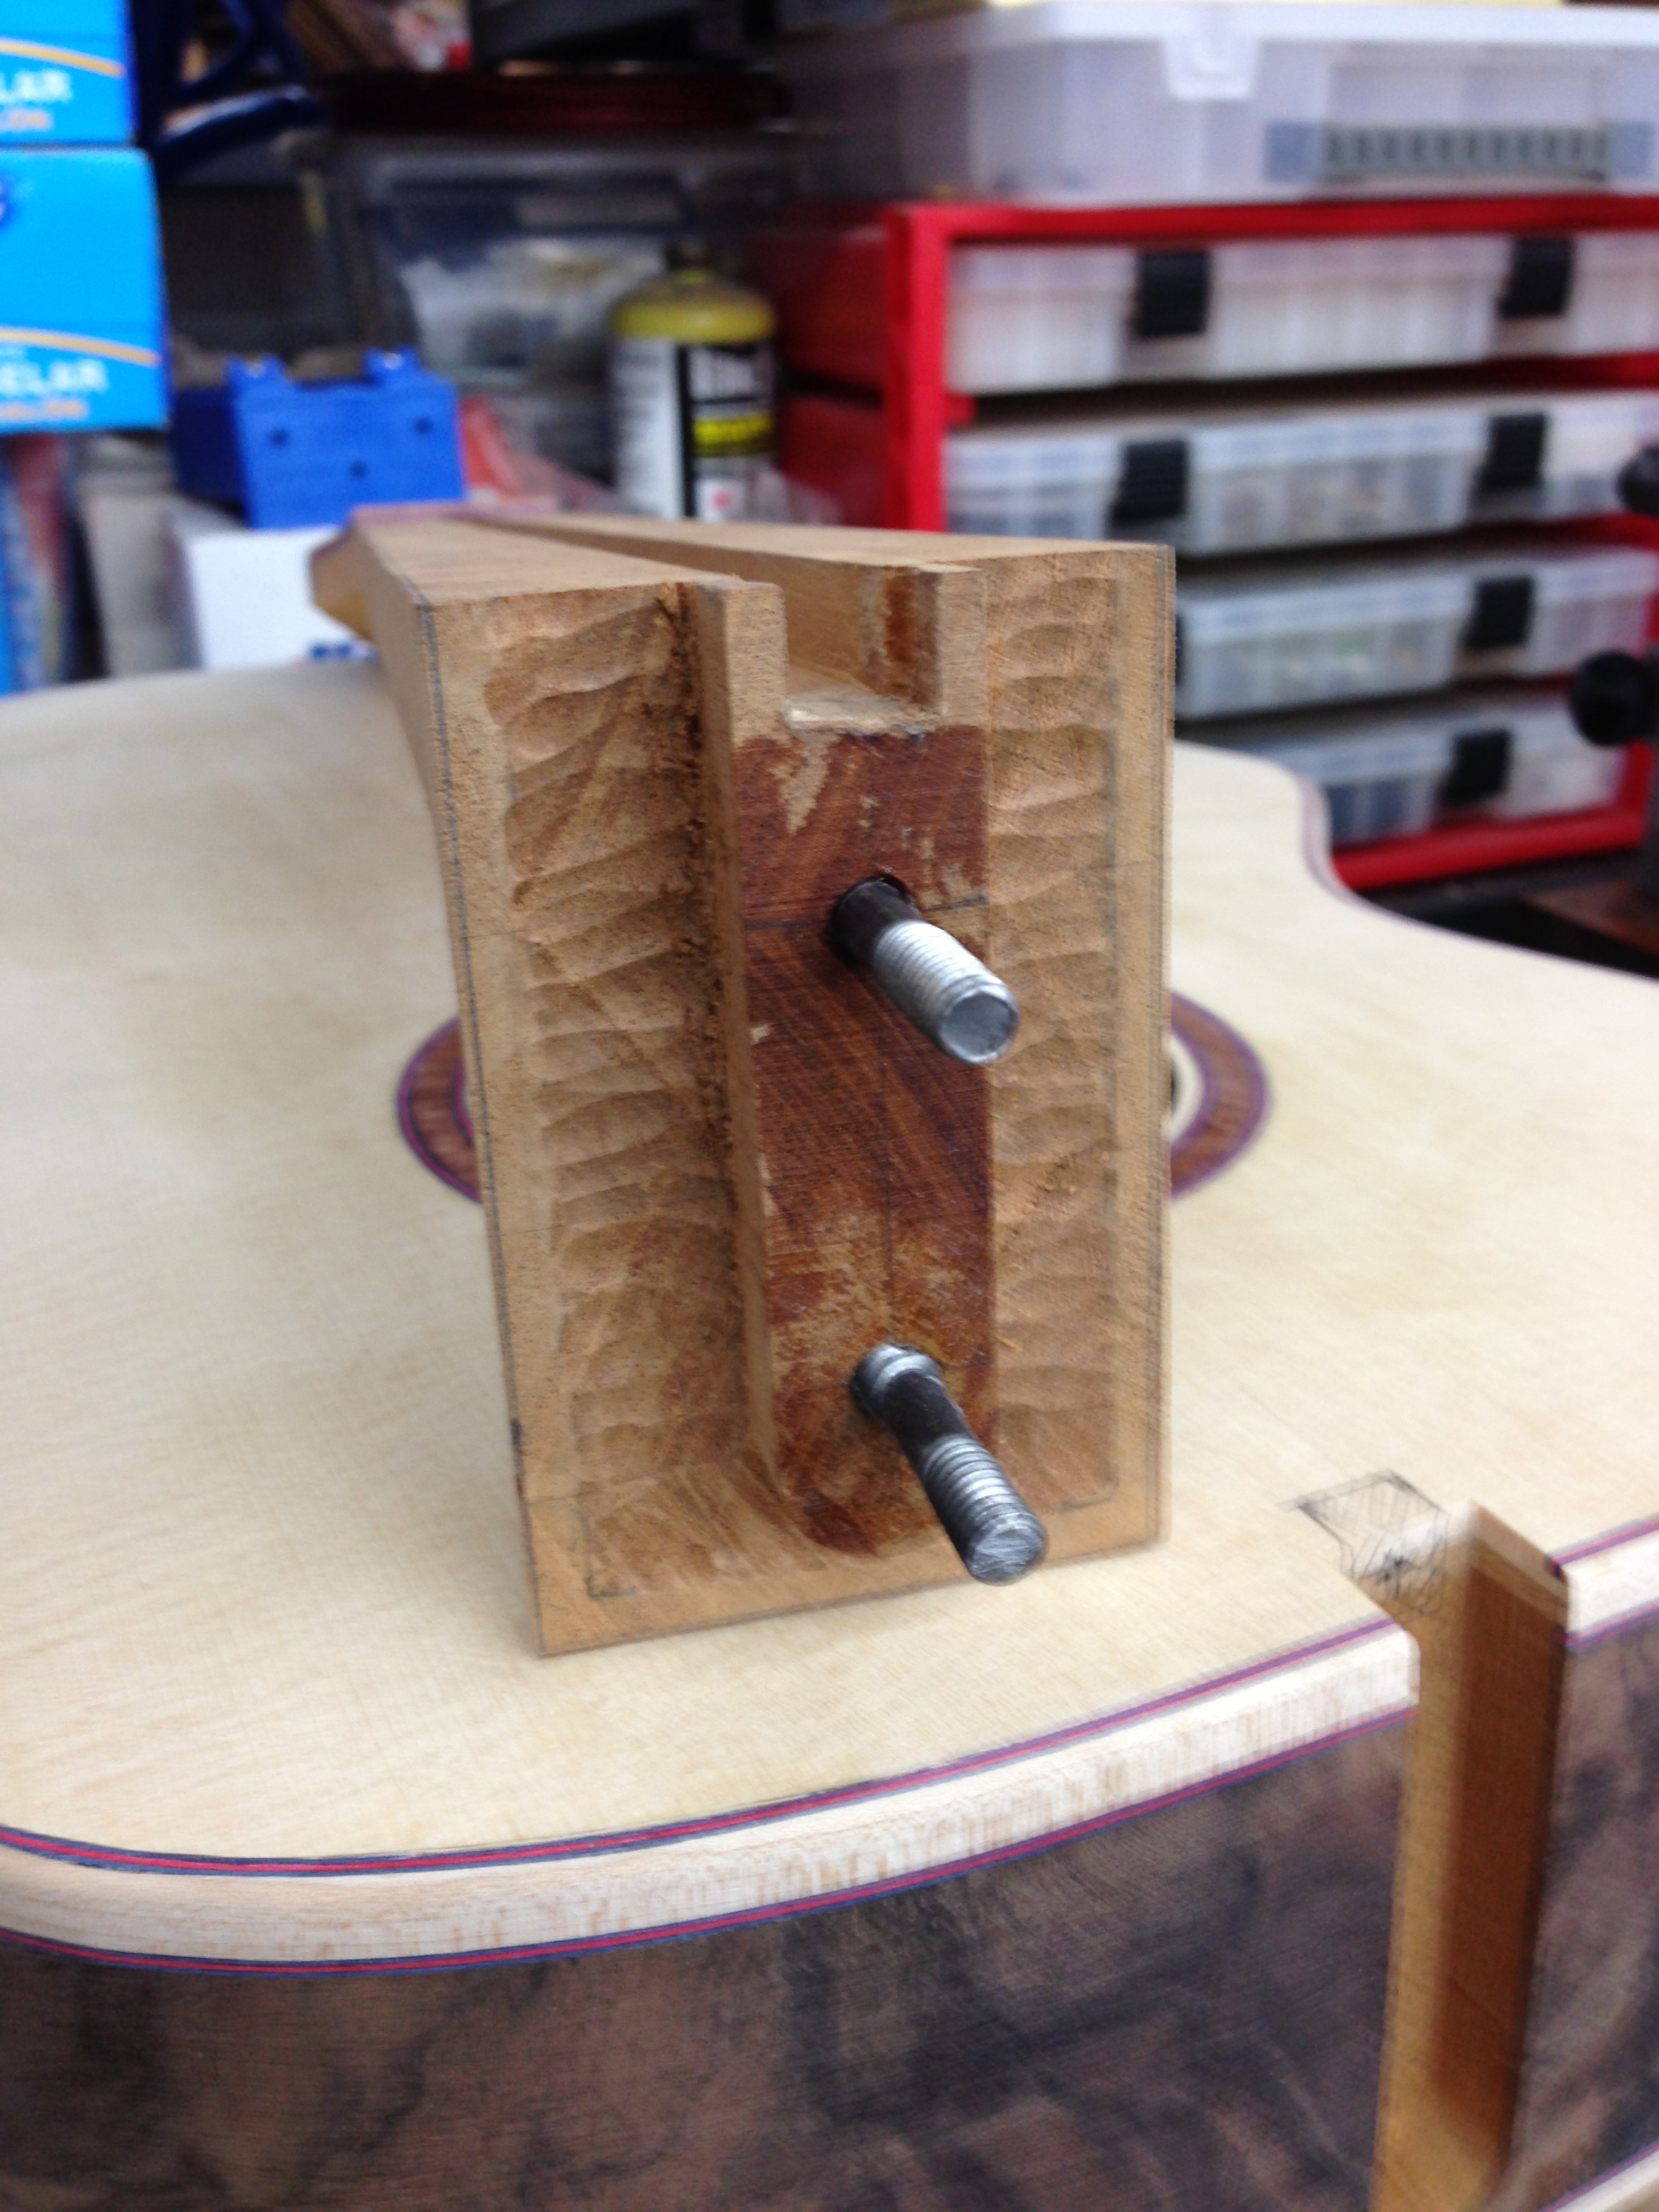 Headplate glue up was now dry, so I trimmed it up on the small bandsaw: 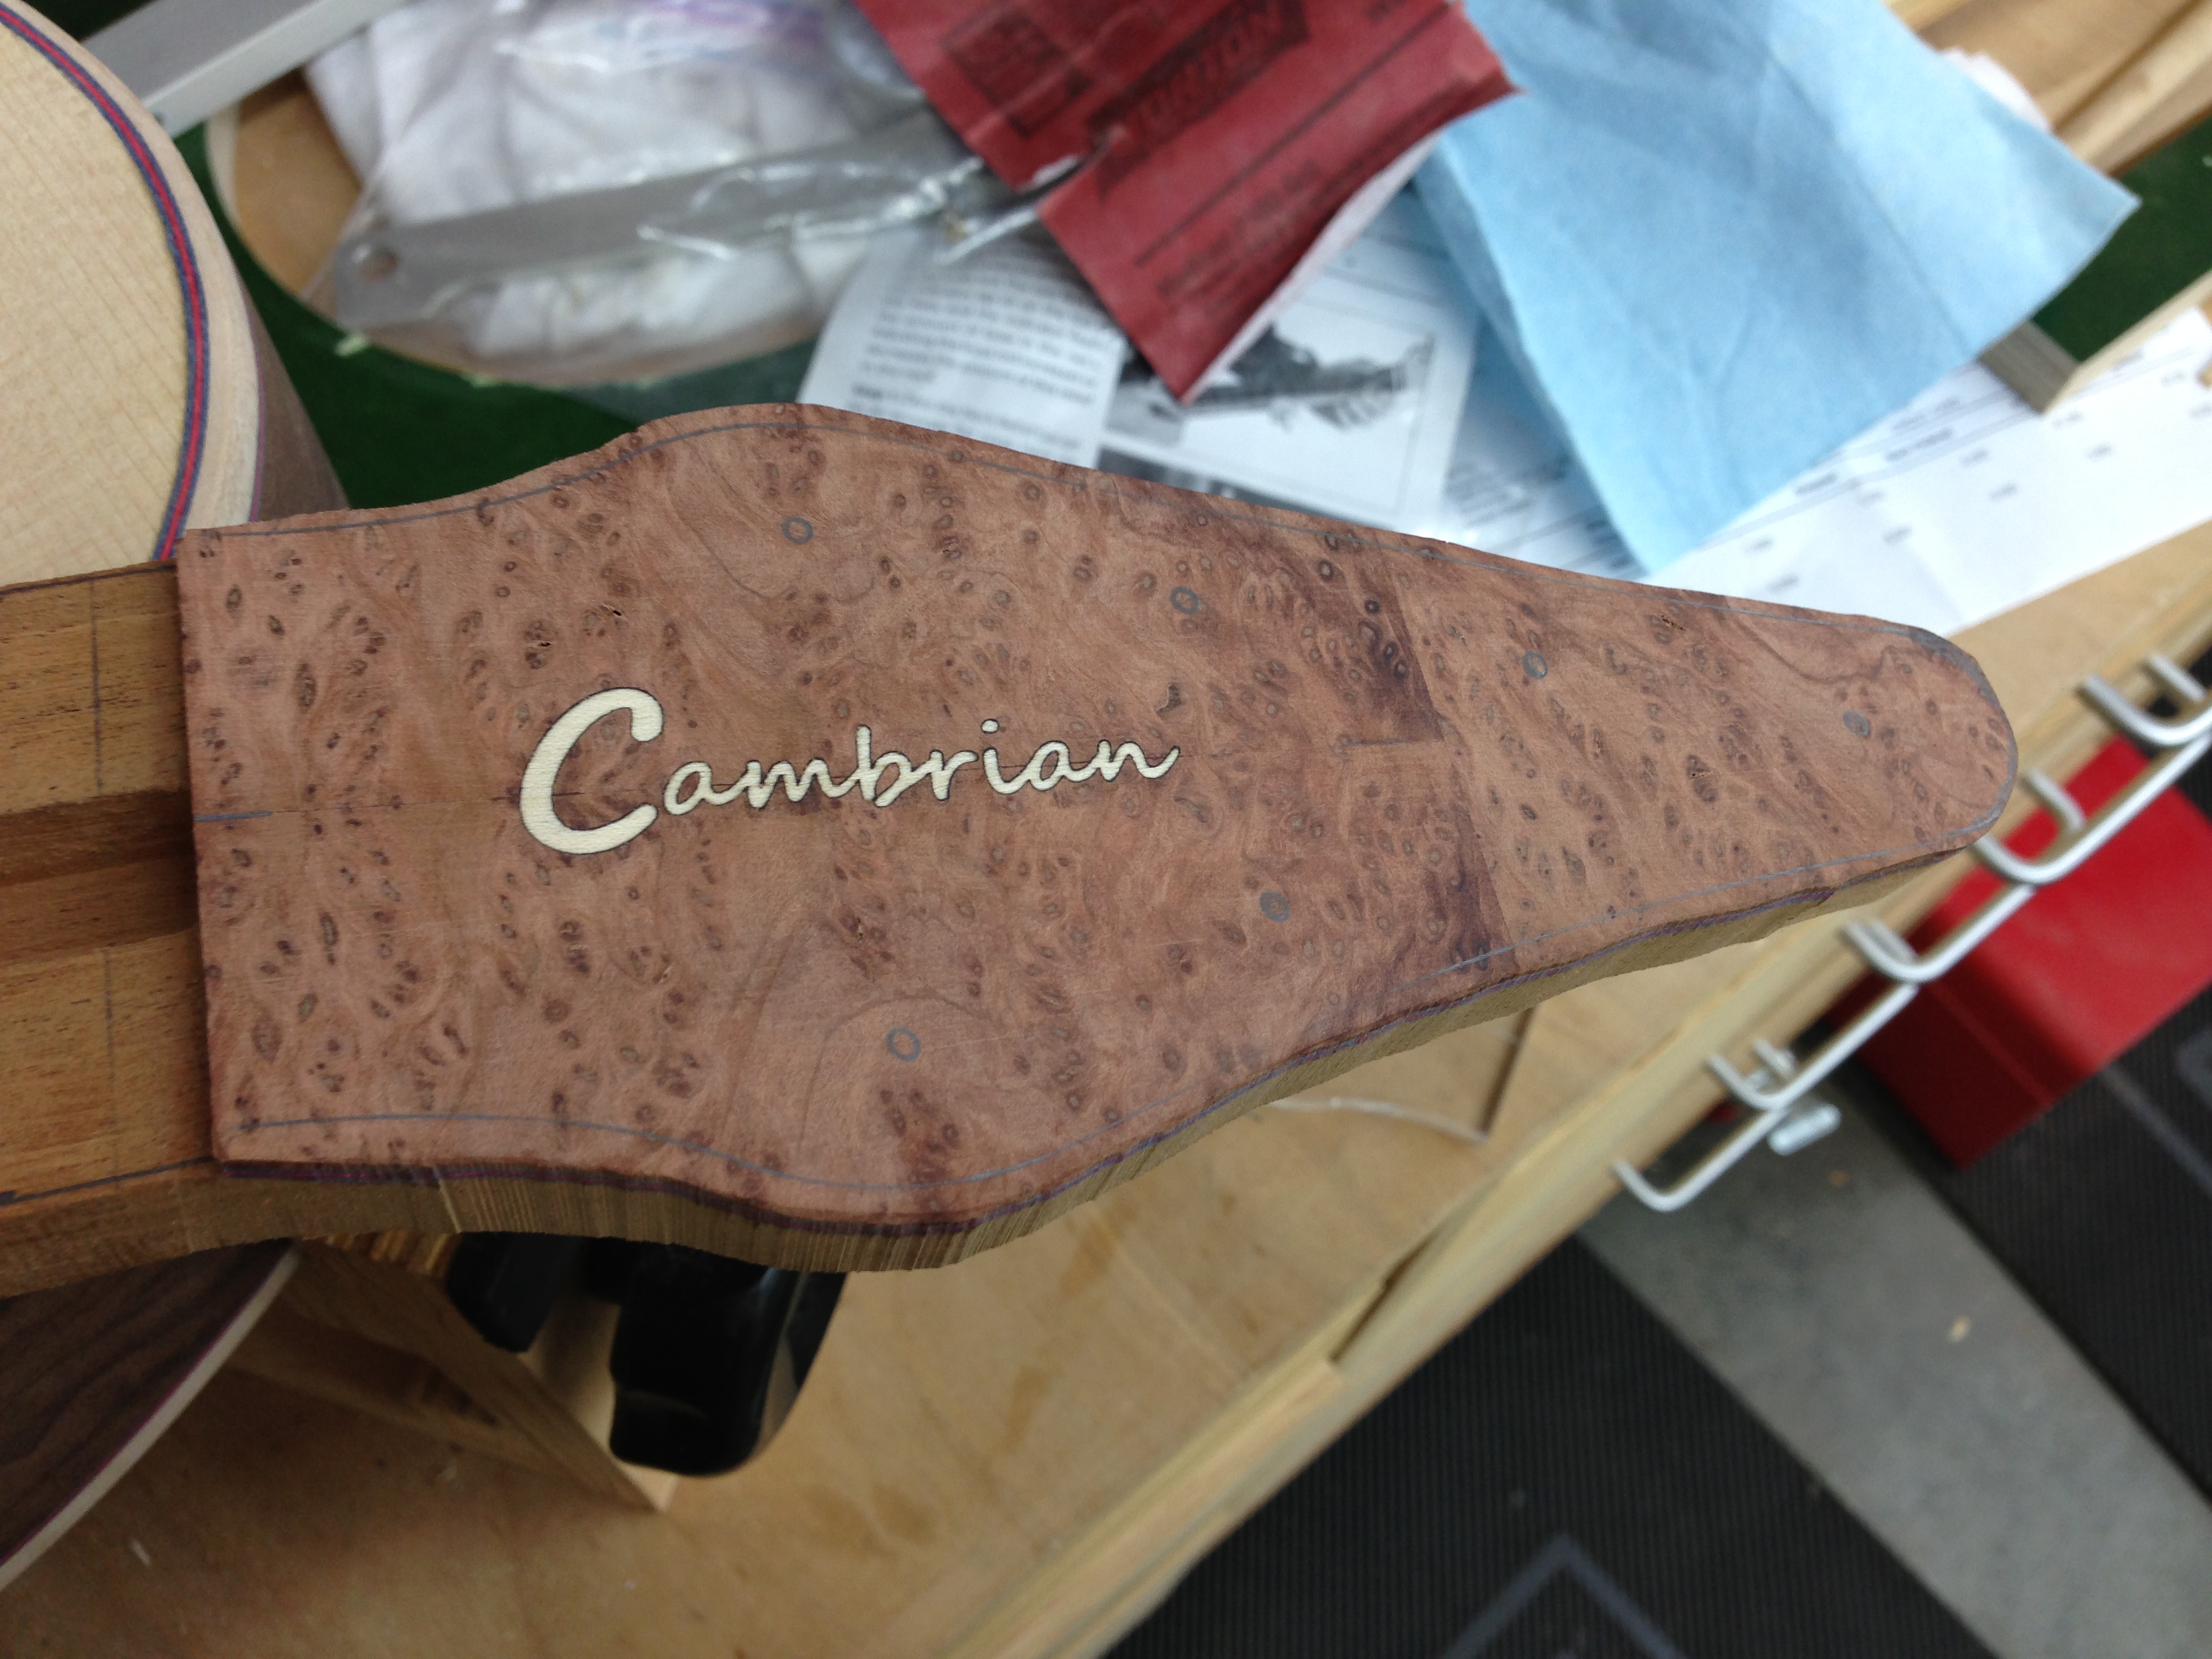 Then I drilled the whopping great big 3/8" hole needed for the cheapo truss rod (remind me never to use one like this ever again!), and carved out a bit of the neck block to accept the end of the truss rod: 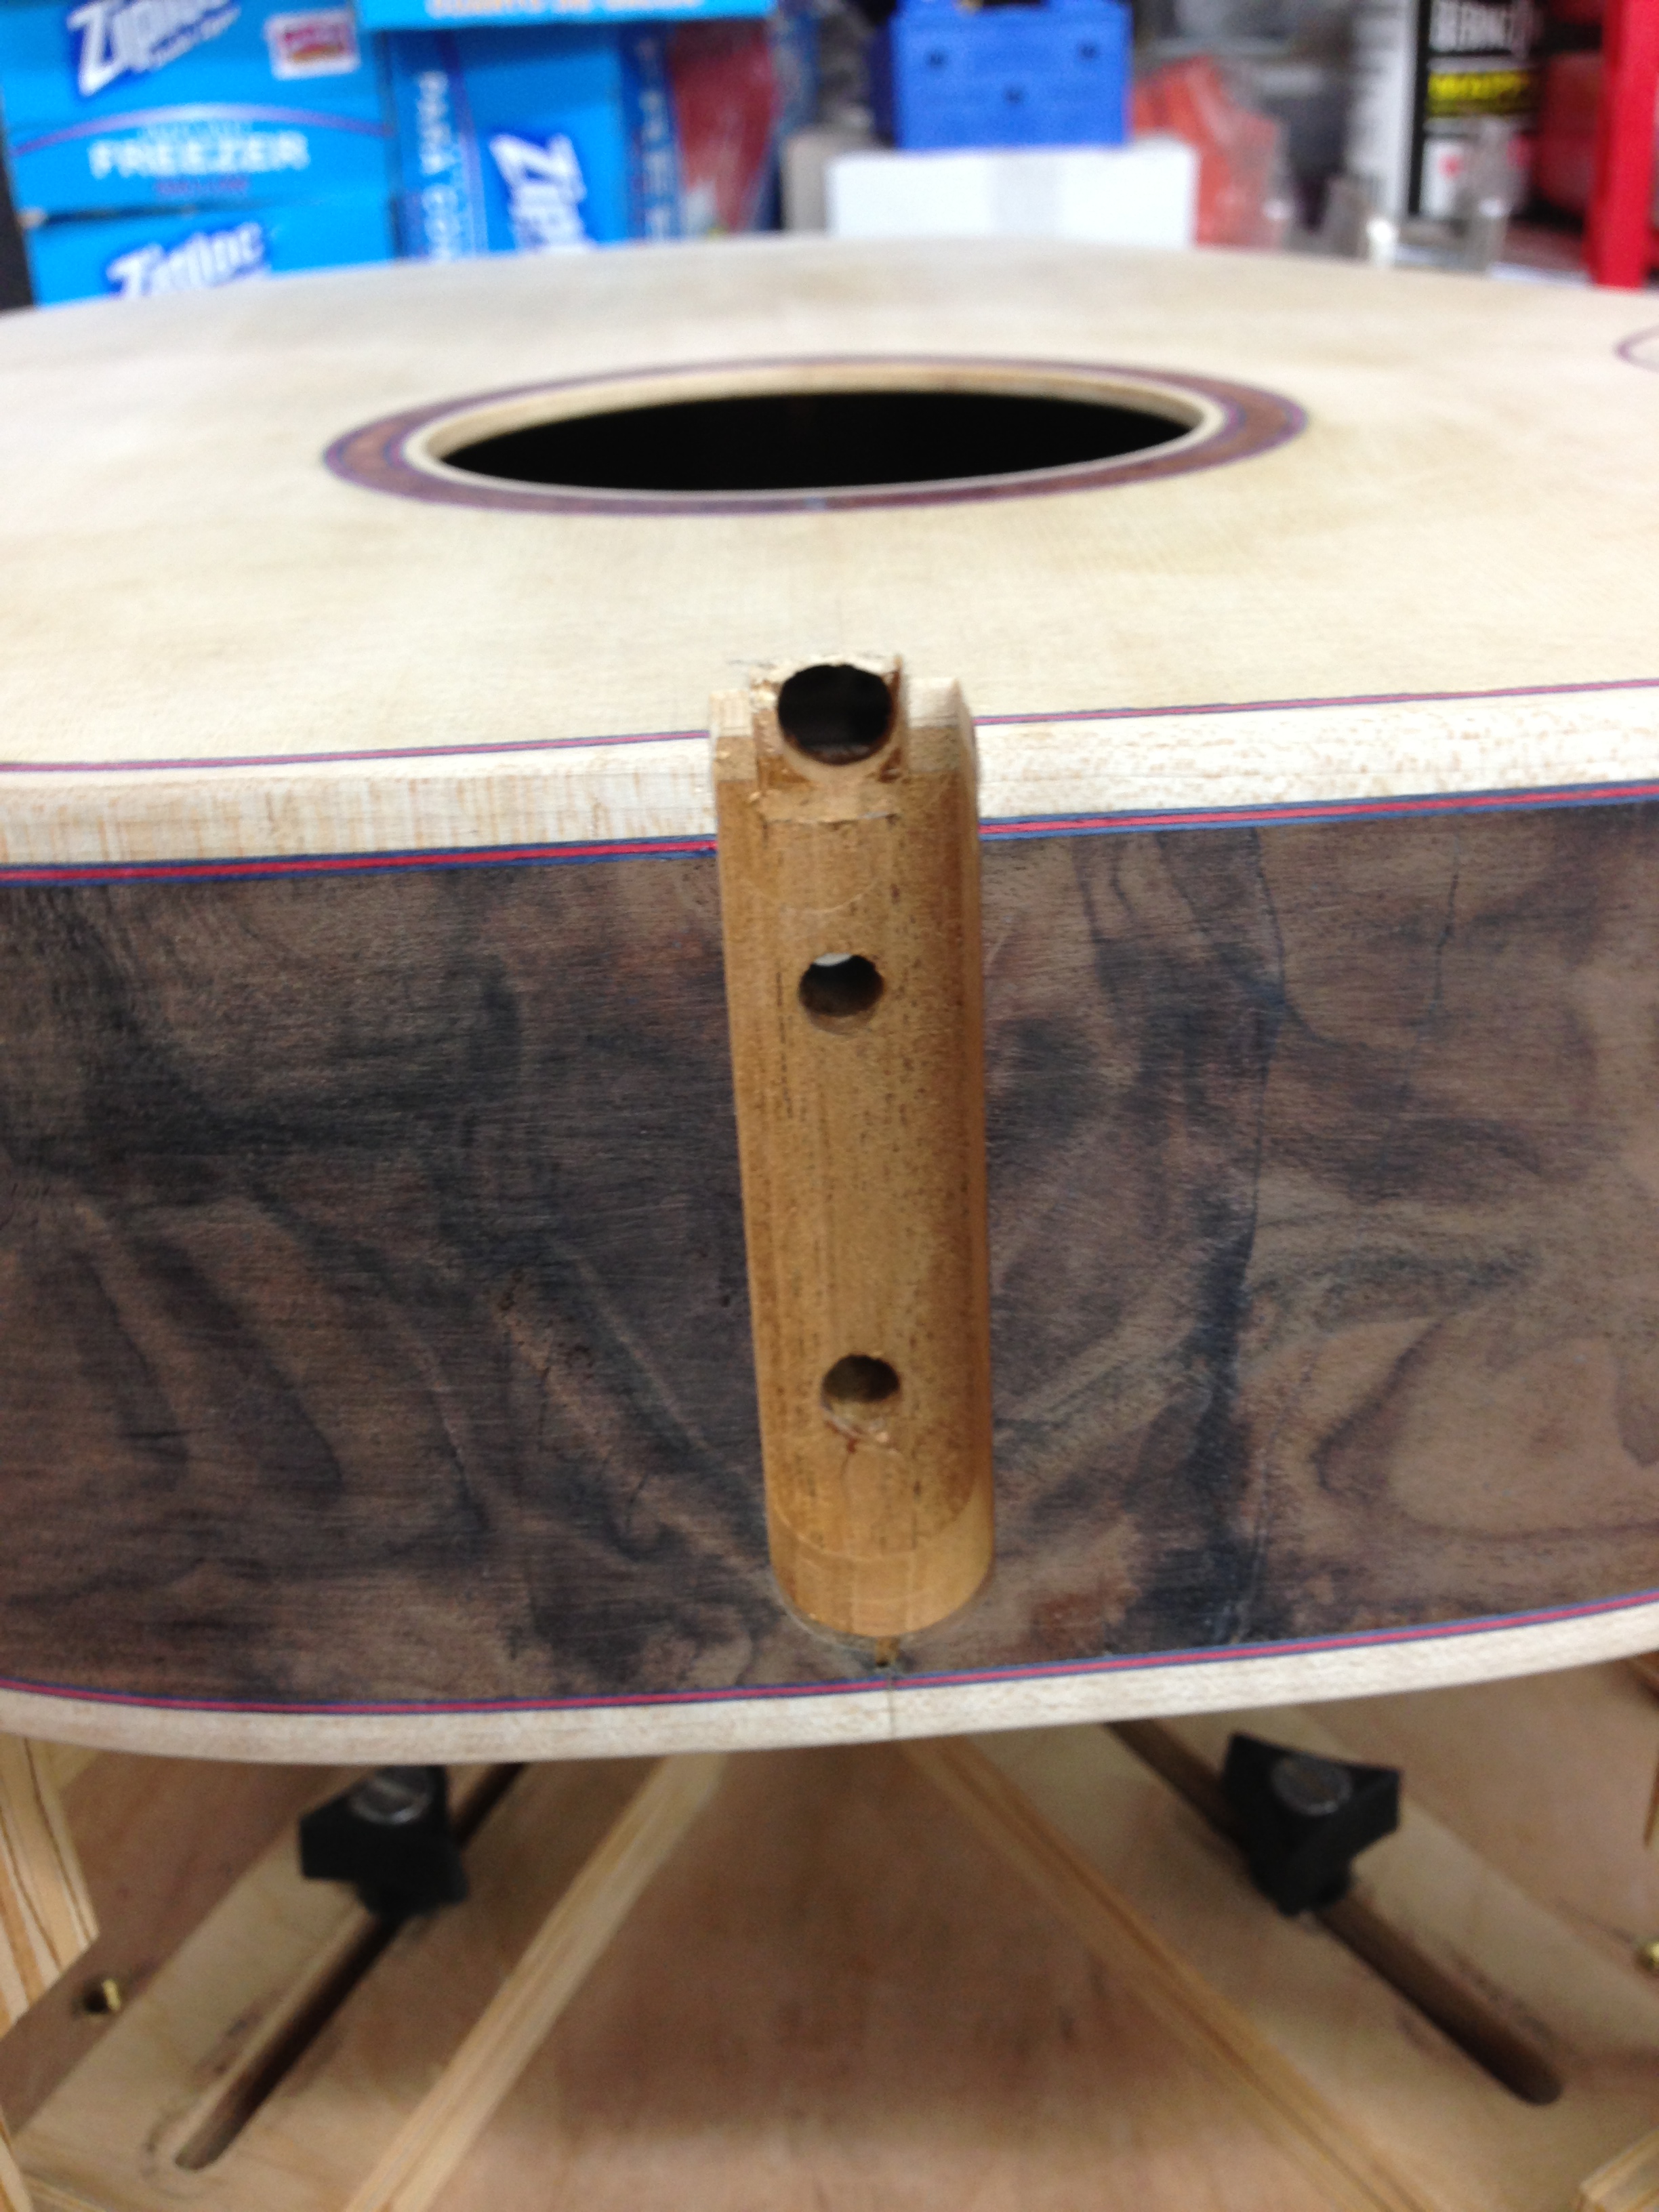 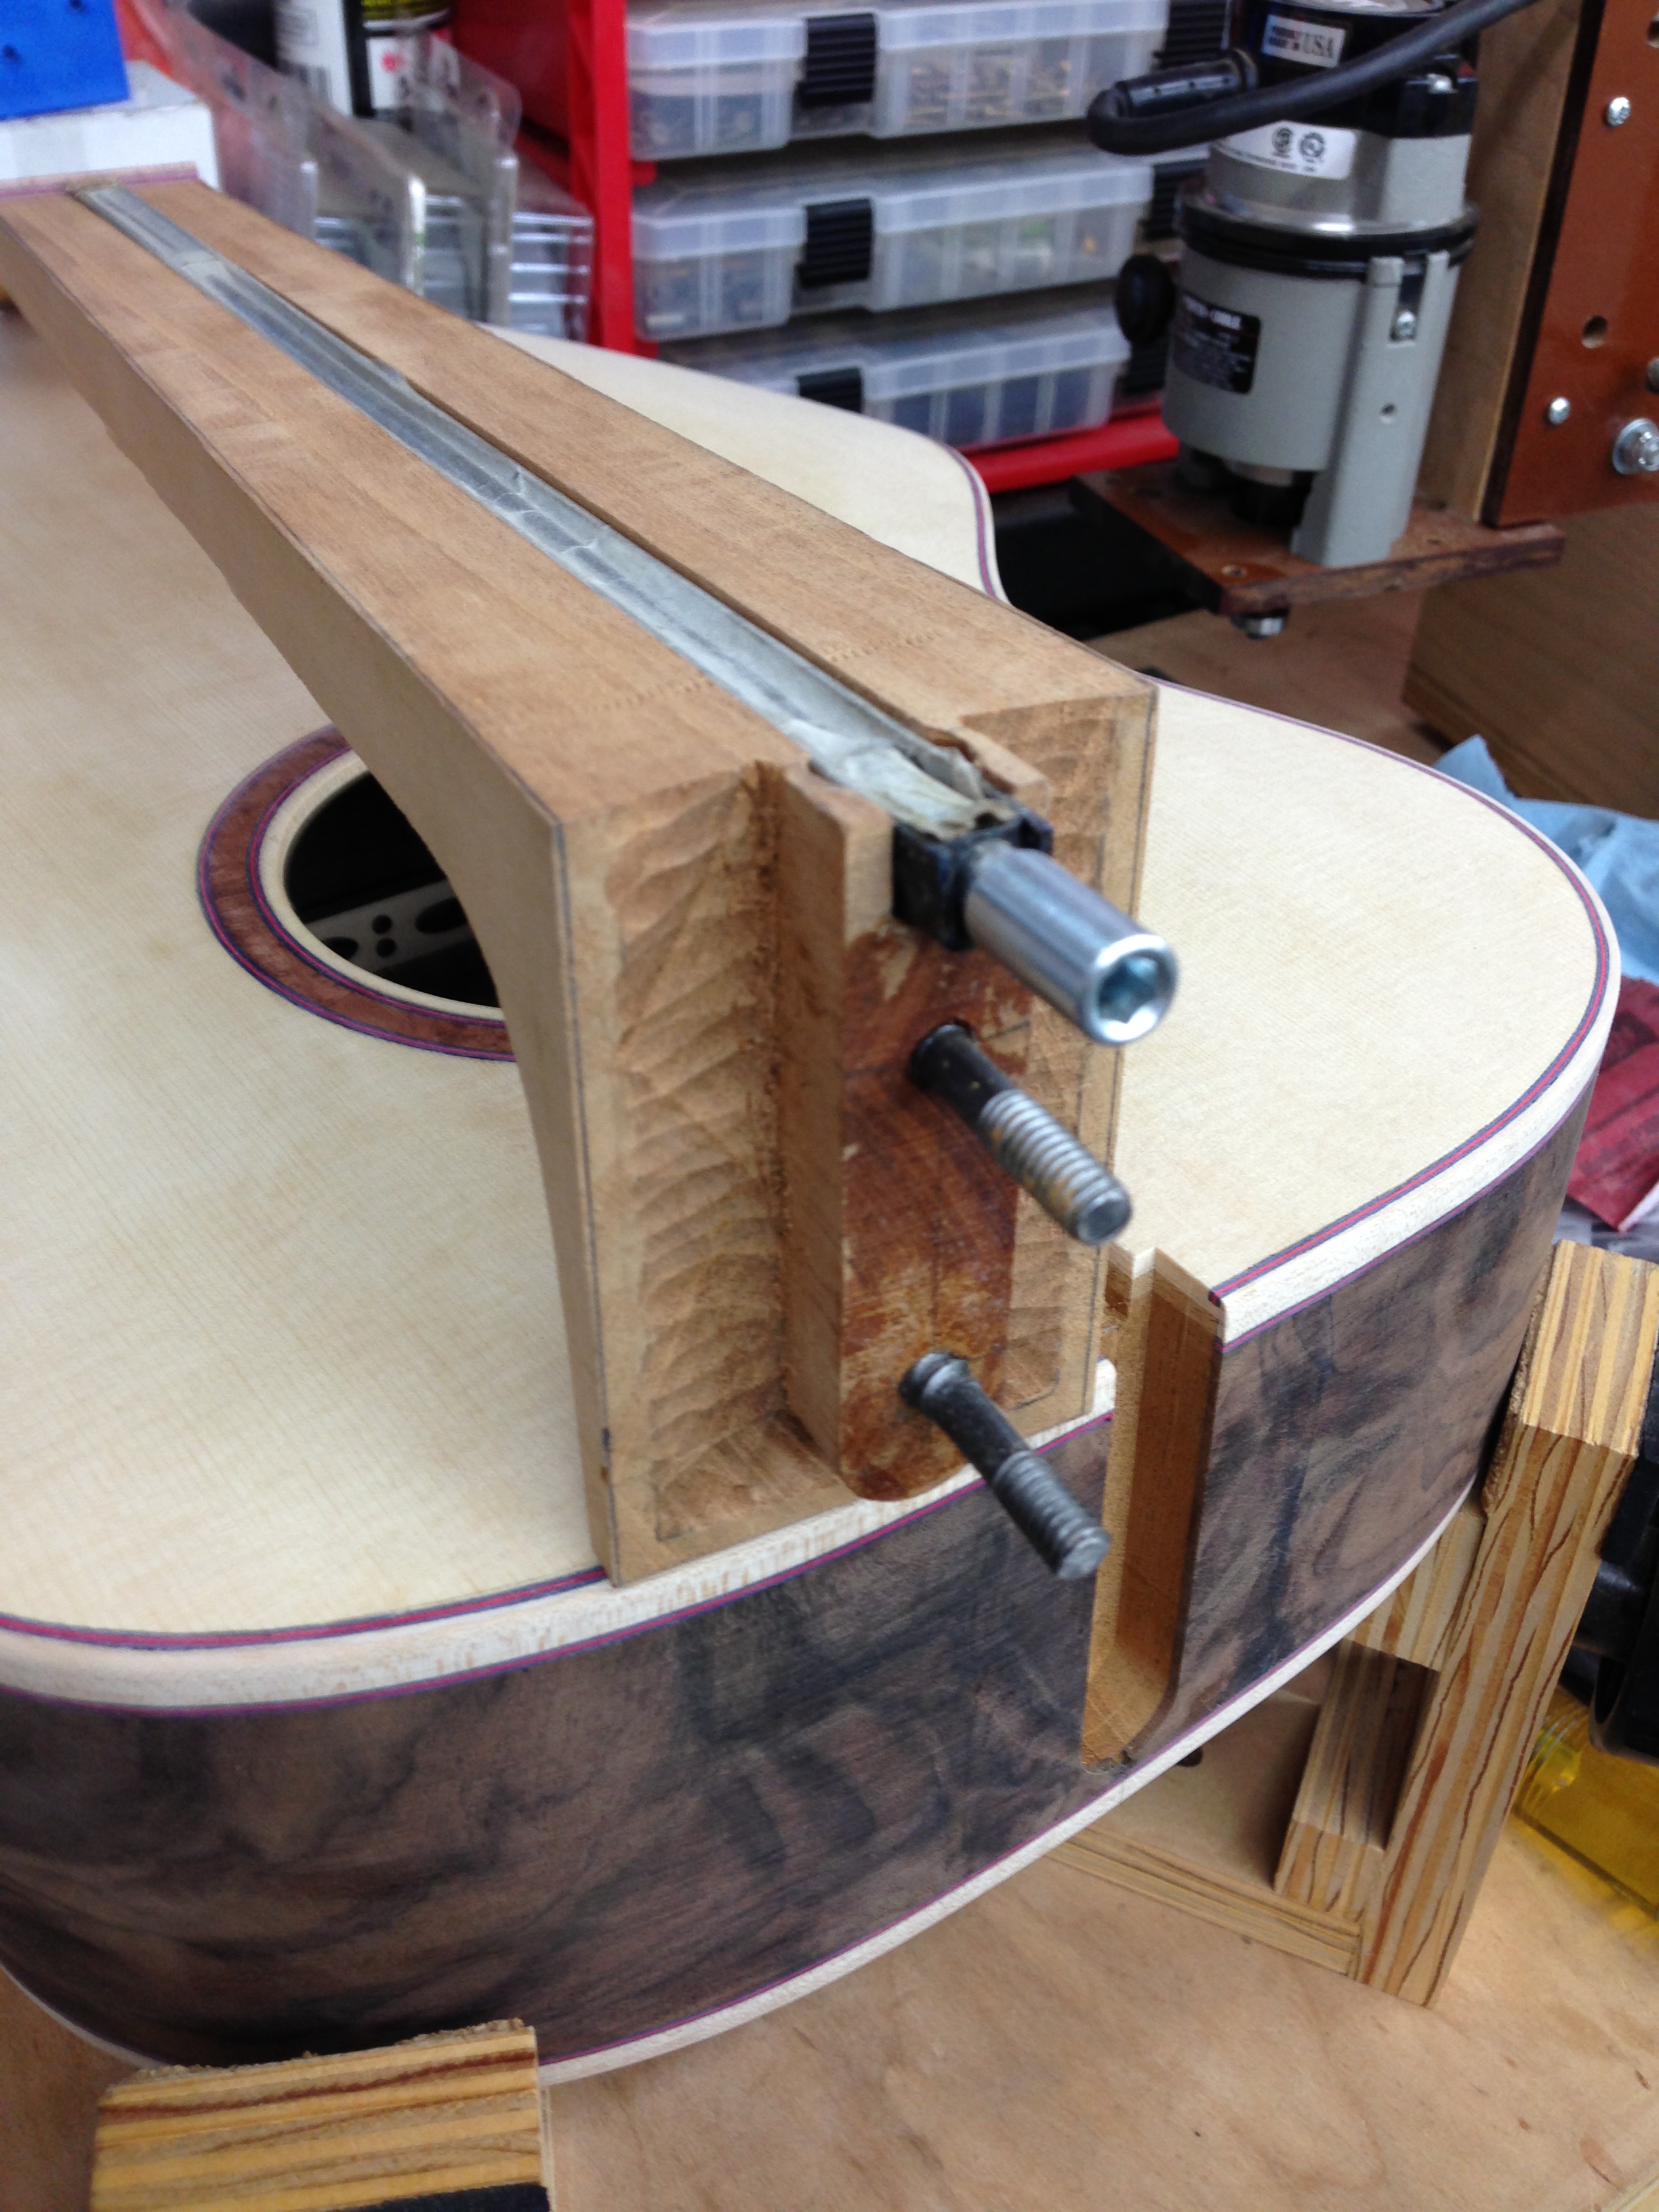 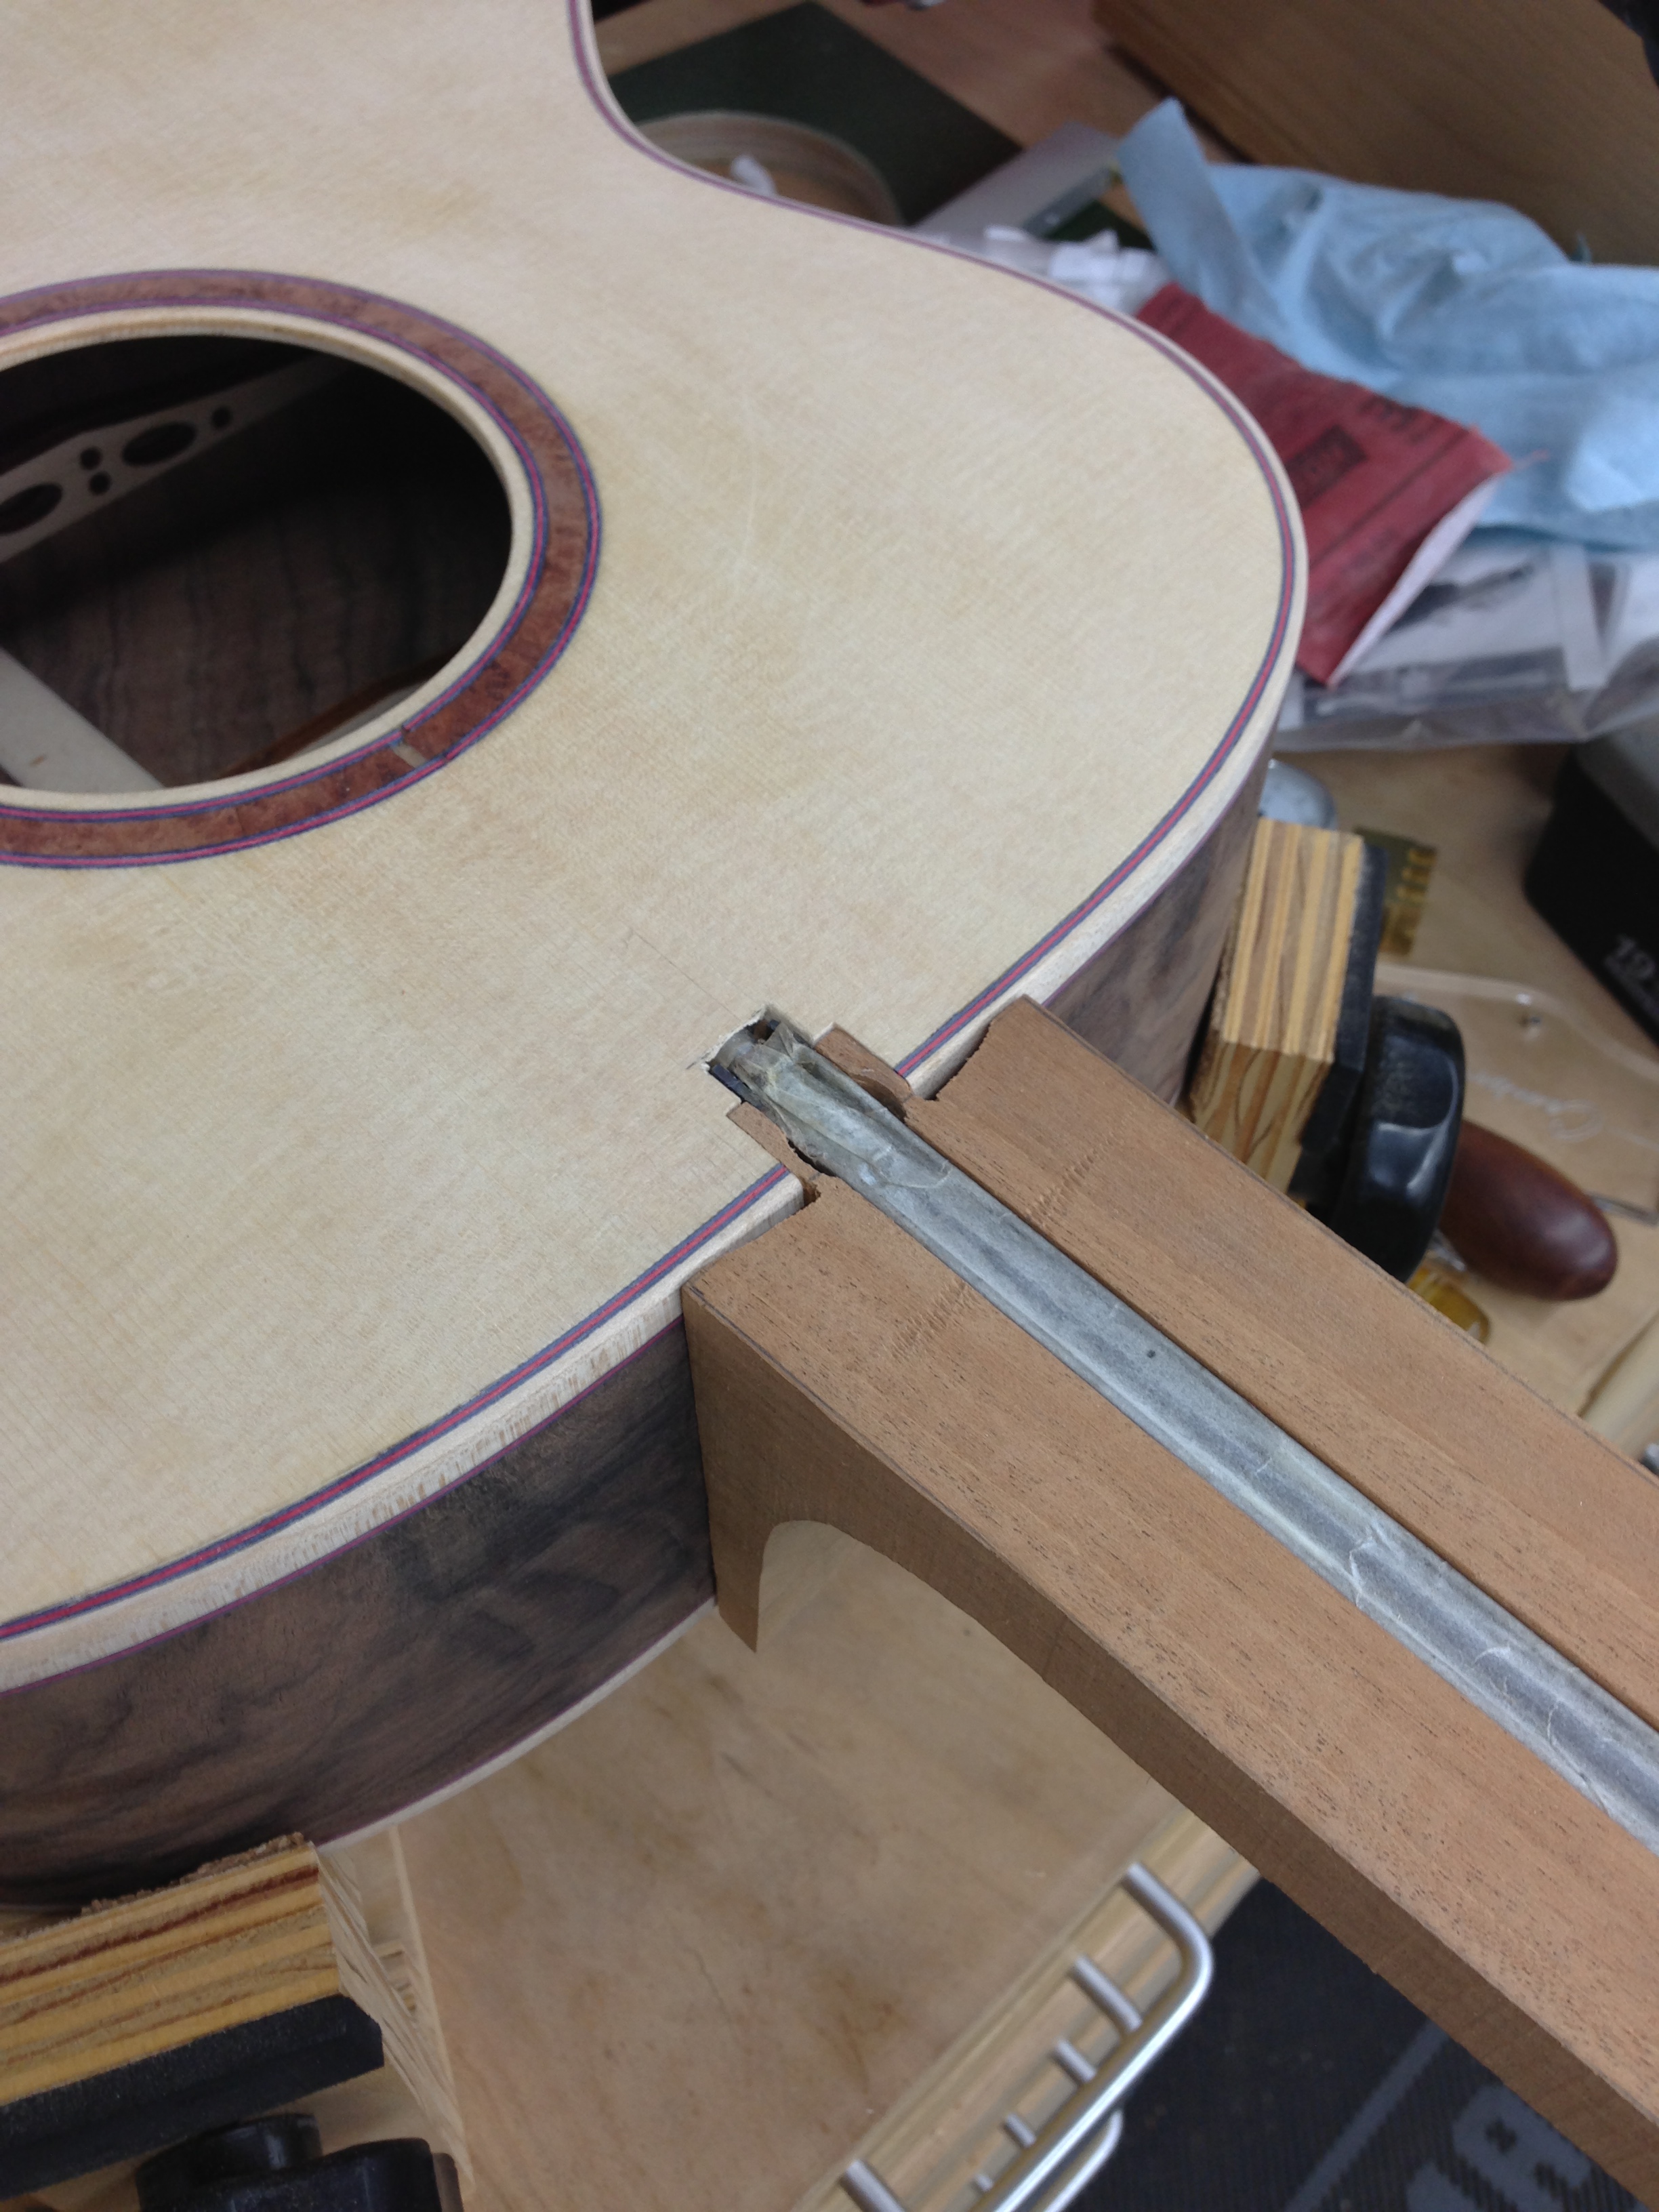 I then drilled out the tuner holes and tried the tuners for fit.....they didn't!  Their threads aren't deep enough. So, it was either a) get some big fat ugly washers to put under the tuner nuts, or b) add a rear headplate to make the headstock up to the required thickness. I chose b). I didn't have any of the freebie redwood burl left, so I had to take a slice off another block of the stuff that I had lying around. The block was 2.2" thick and cost $30 (many years ago!), and I took a 0.1" slice off it, so allowing for the bandsaw kerf, let's say 1/15th of $30 = $2......fair? The two blue-red-blue veneer layers were 7" x 3" each, so 2 x 7 x 3 = 42 square inches, which, at the rate I worked out earlier, cost me (42/566)*$48 = $3.56. Here's the headstock all done, with redwood burl and b-r-b veneers each side, the edges routed using the acrylic template, and then sanded all over: Their threads aren't deep enough. So, it was either a) get some big fat ugly washers to put under the tuner nuts, or b) add a rear headplate to make the headstock up to the required thickness. I chose b). I didn't have any of the freebie redwood burl left, so I had to take a slice off another block of the stuff that I had lying around. The block was 2.2" thick and cost $30 (many years ago!), and I took a 0.1" slice off it, so allowing for the bandsaw kerf, let's say 1/15th of $30 = $2......fair? The two blue-red-blue veneer layers were 7" x 3" each, so 2 x 7 x 3 = 42 square inches, which, at the rate I worked out earlier, cost me (42/566)*$48 = $3.56. Here's the headstock all done, with redwood burl and b-r-b veneers each side, the edges routed using the acrylic template, and then sanded all over: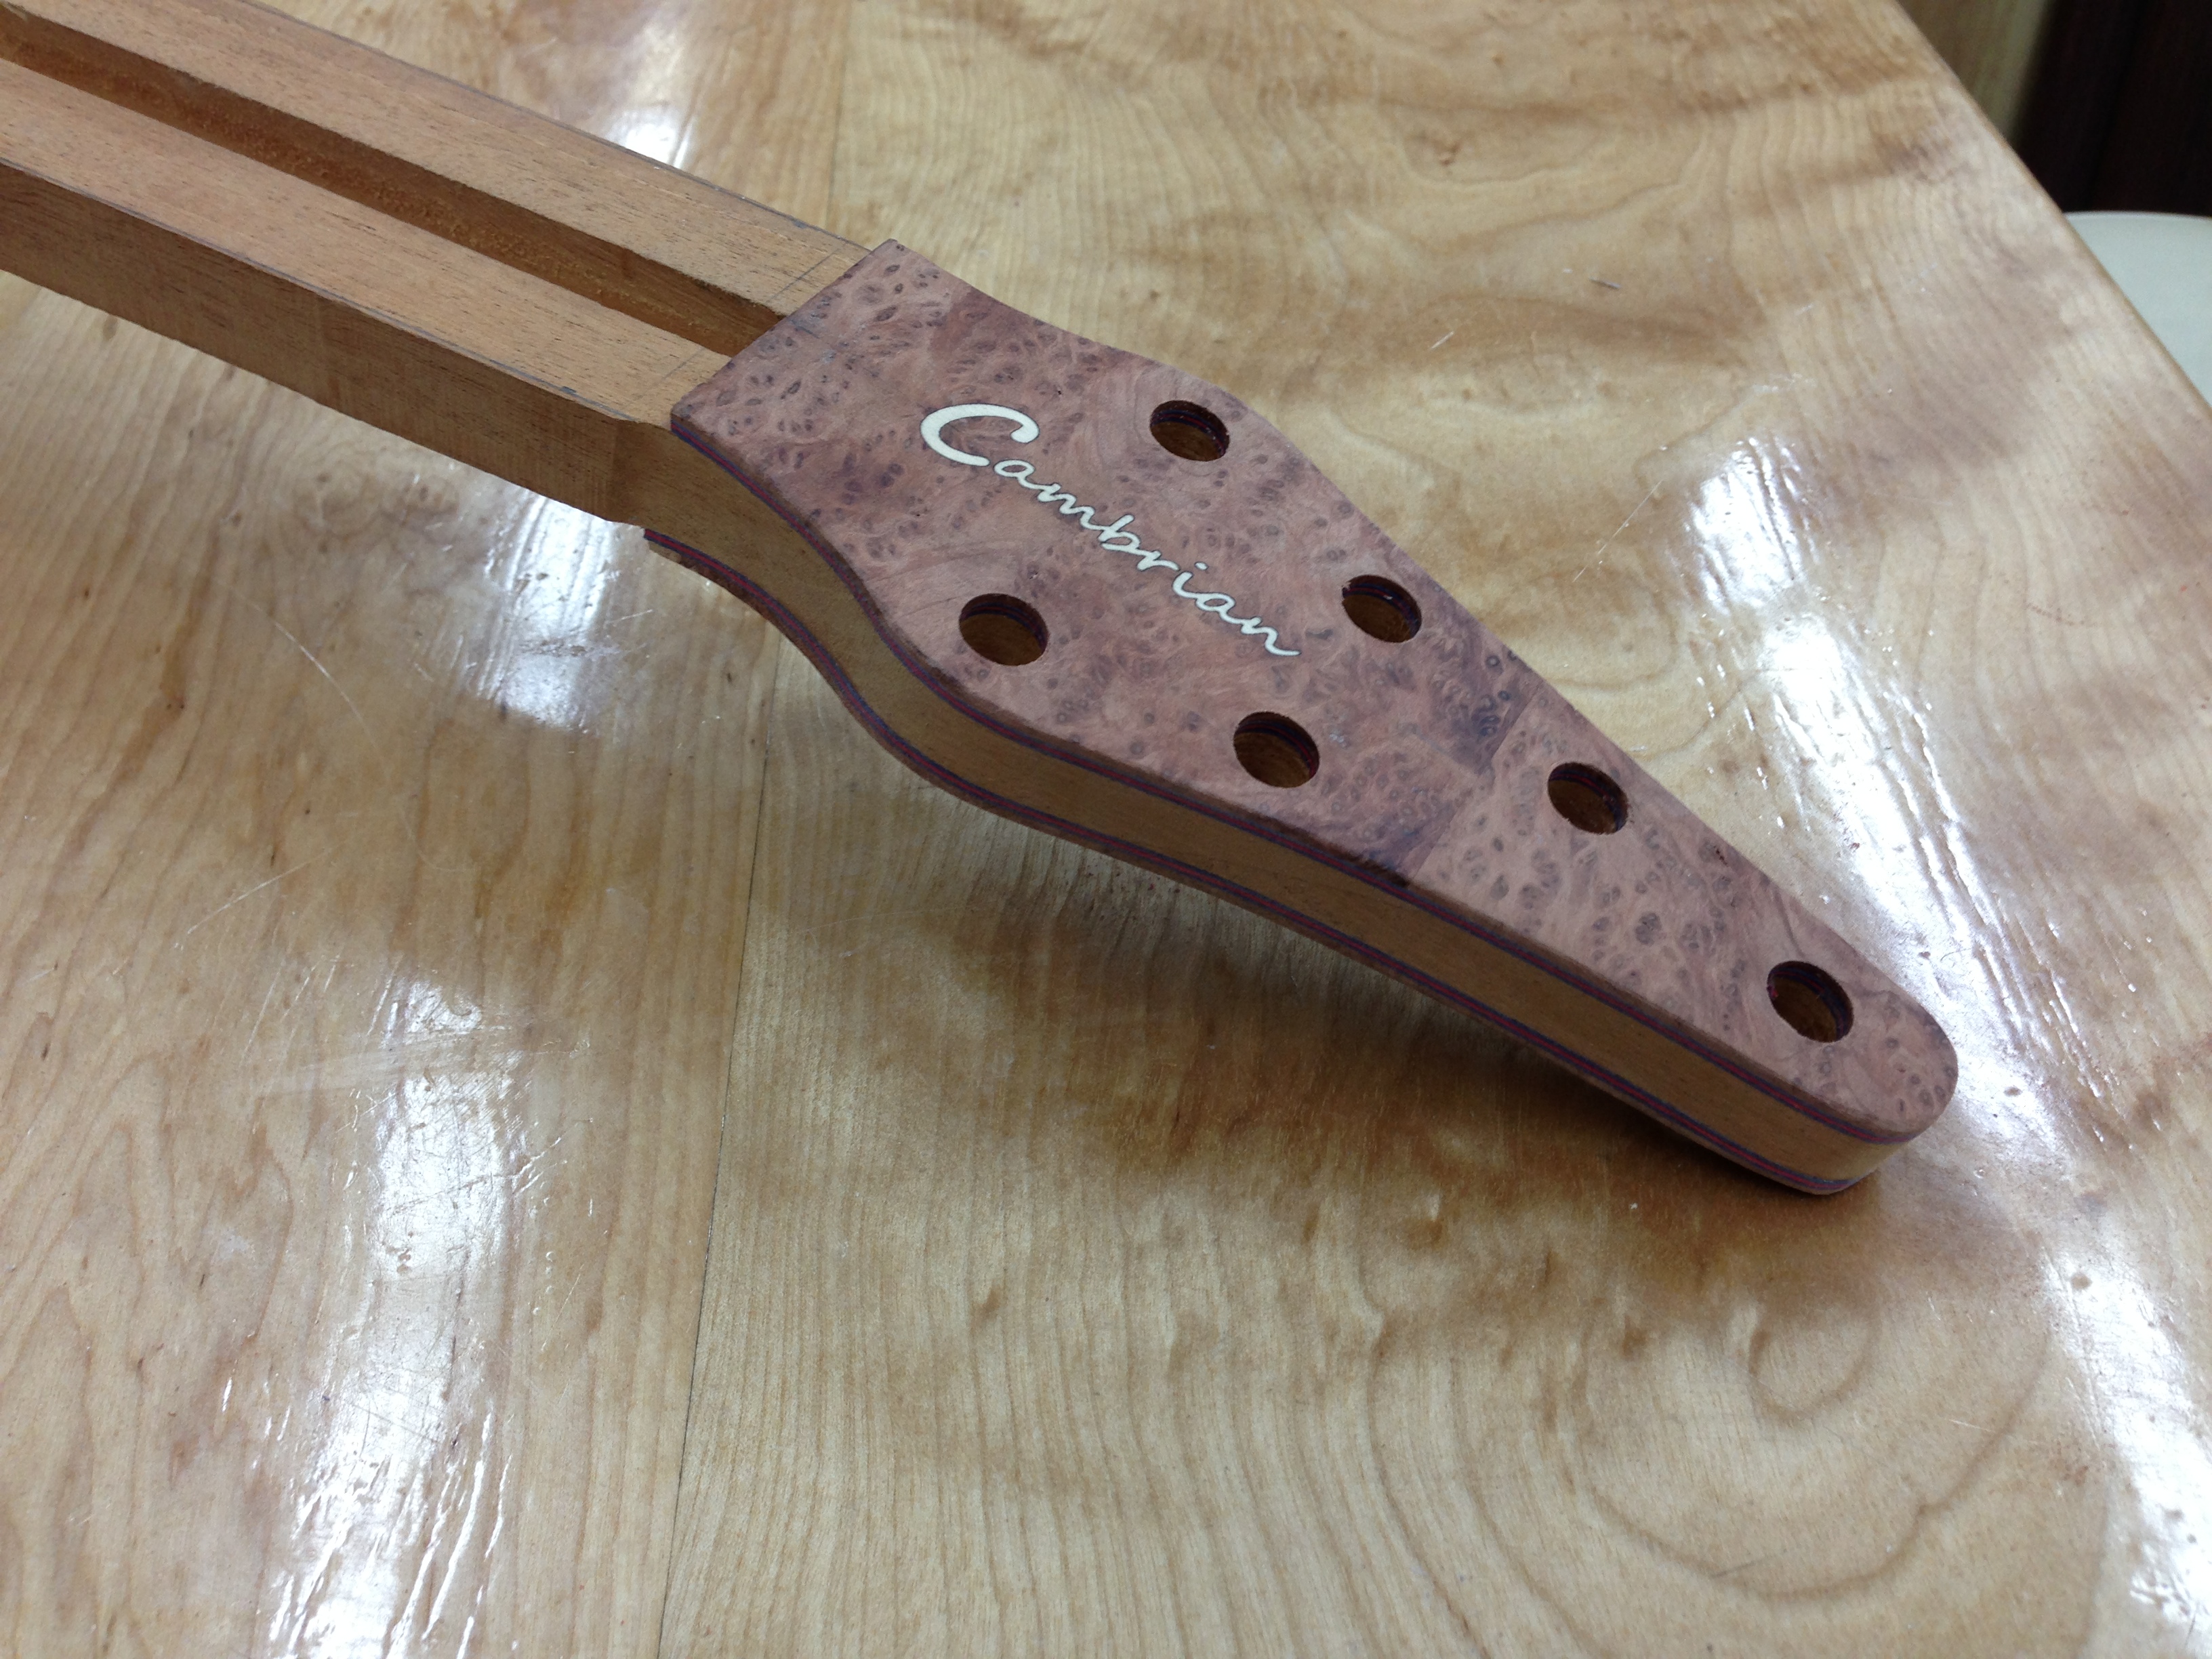 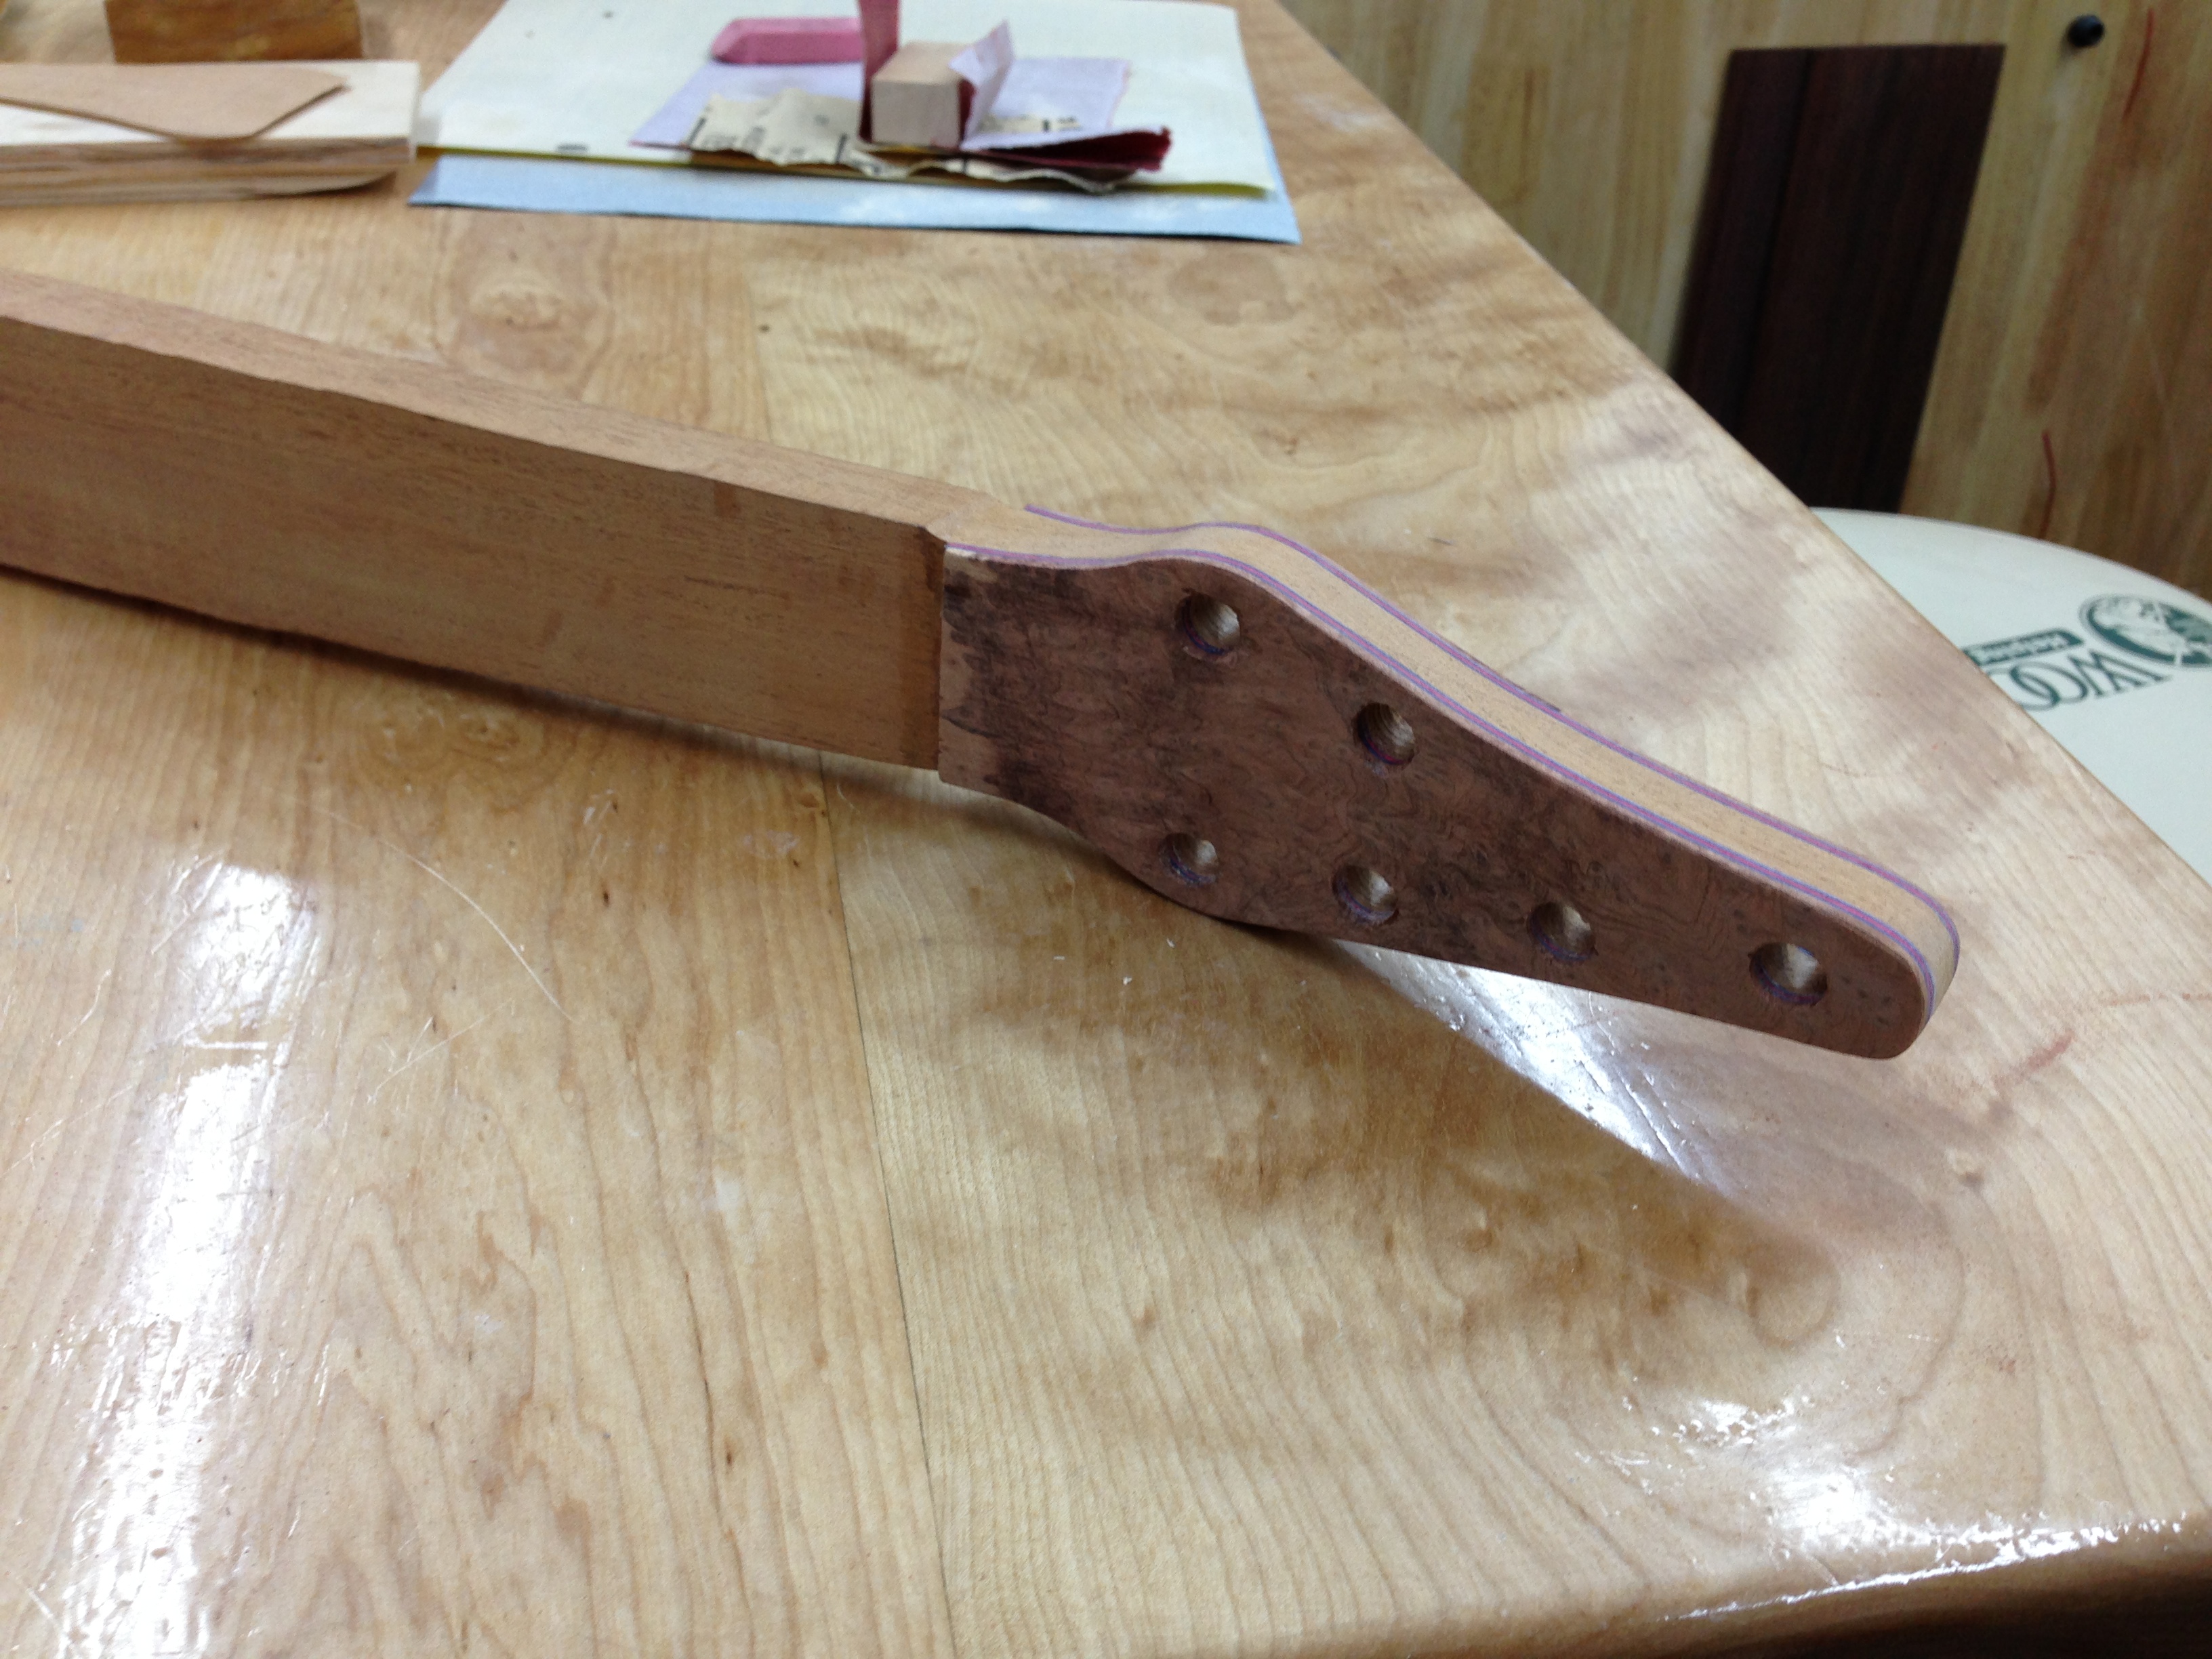 Followed by a trial fitting of the cheapo tuners.....they fit! 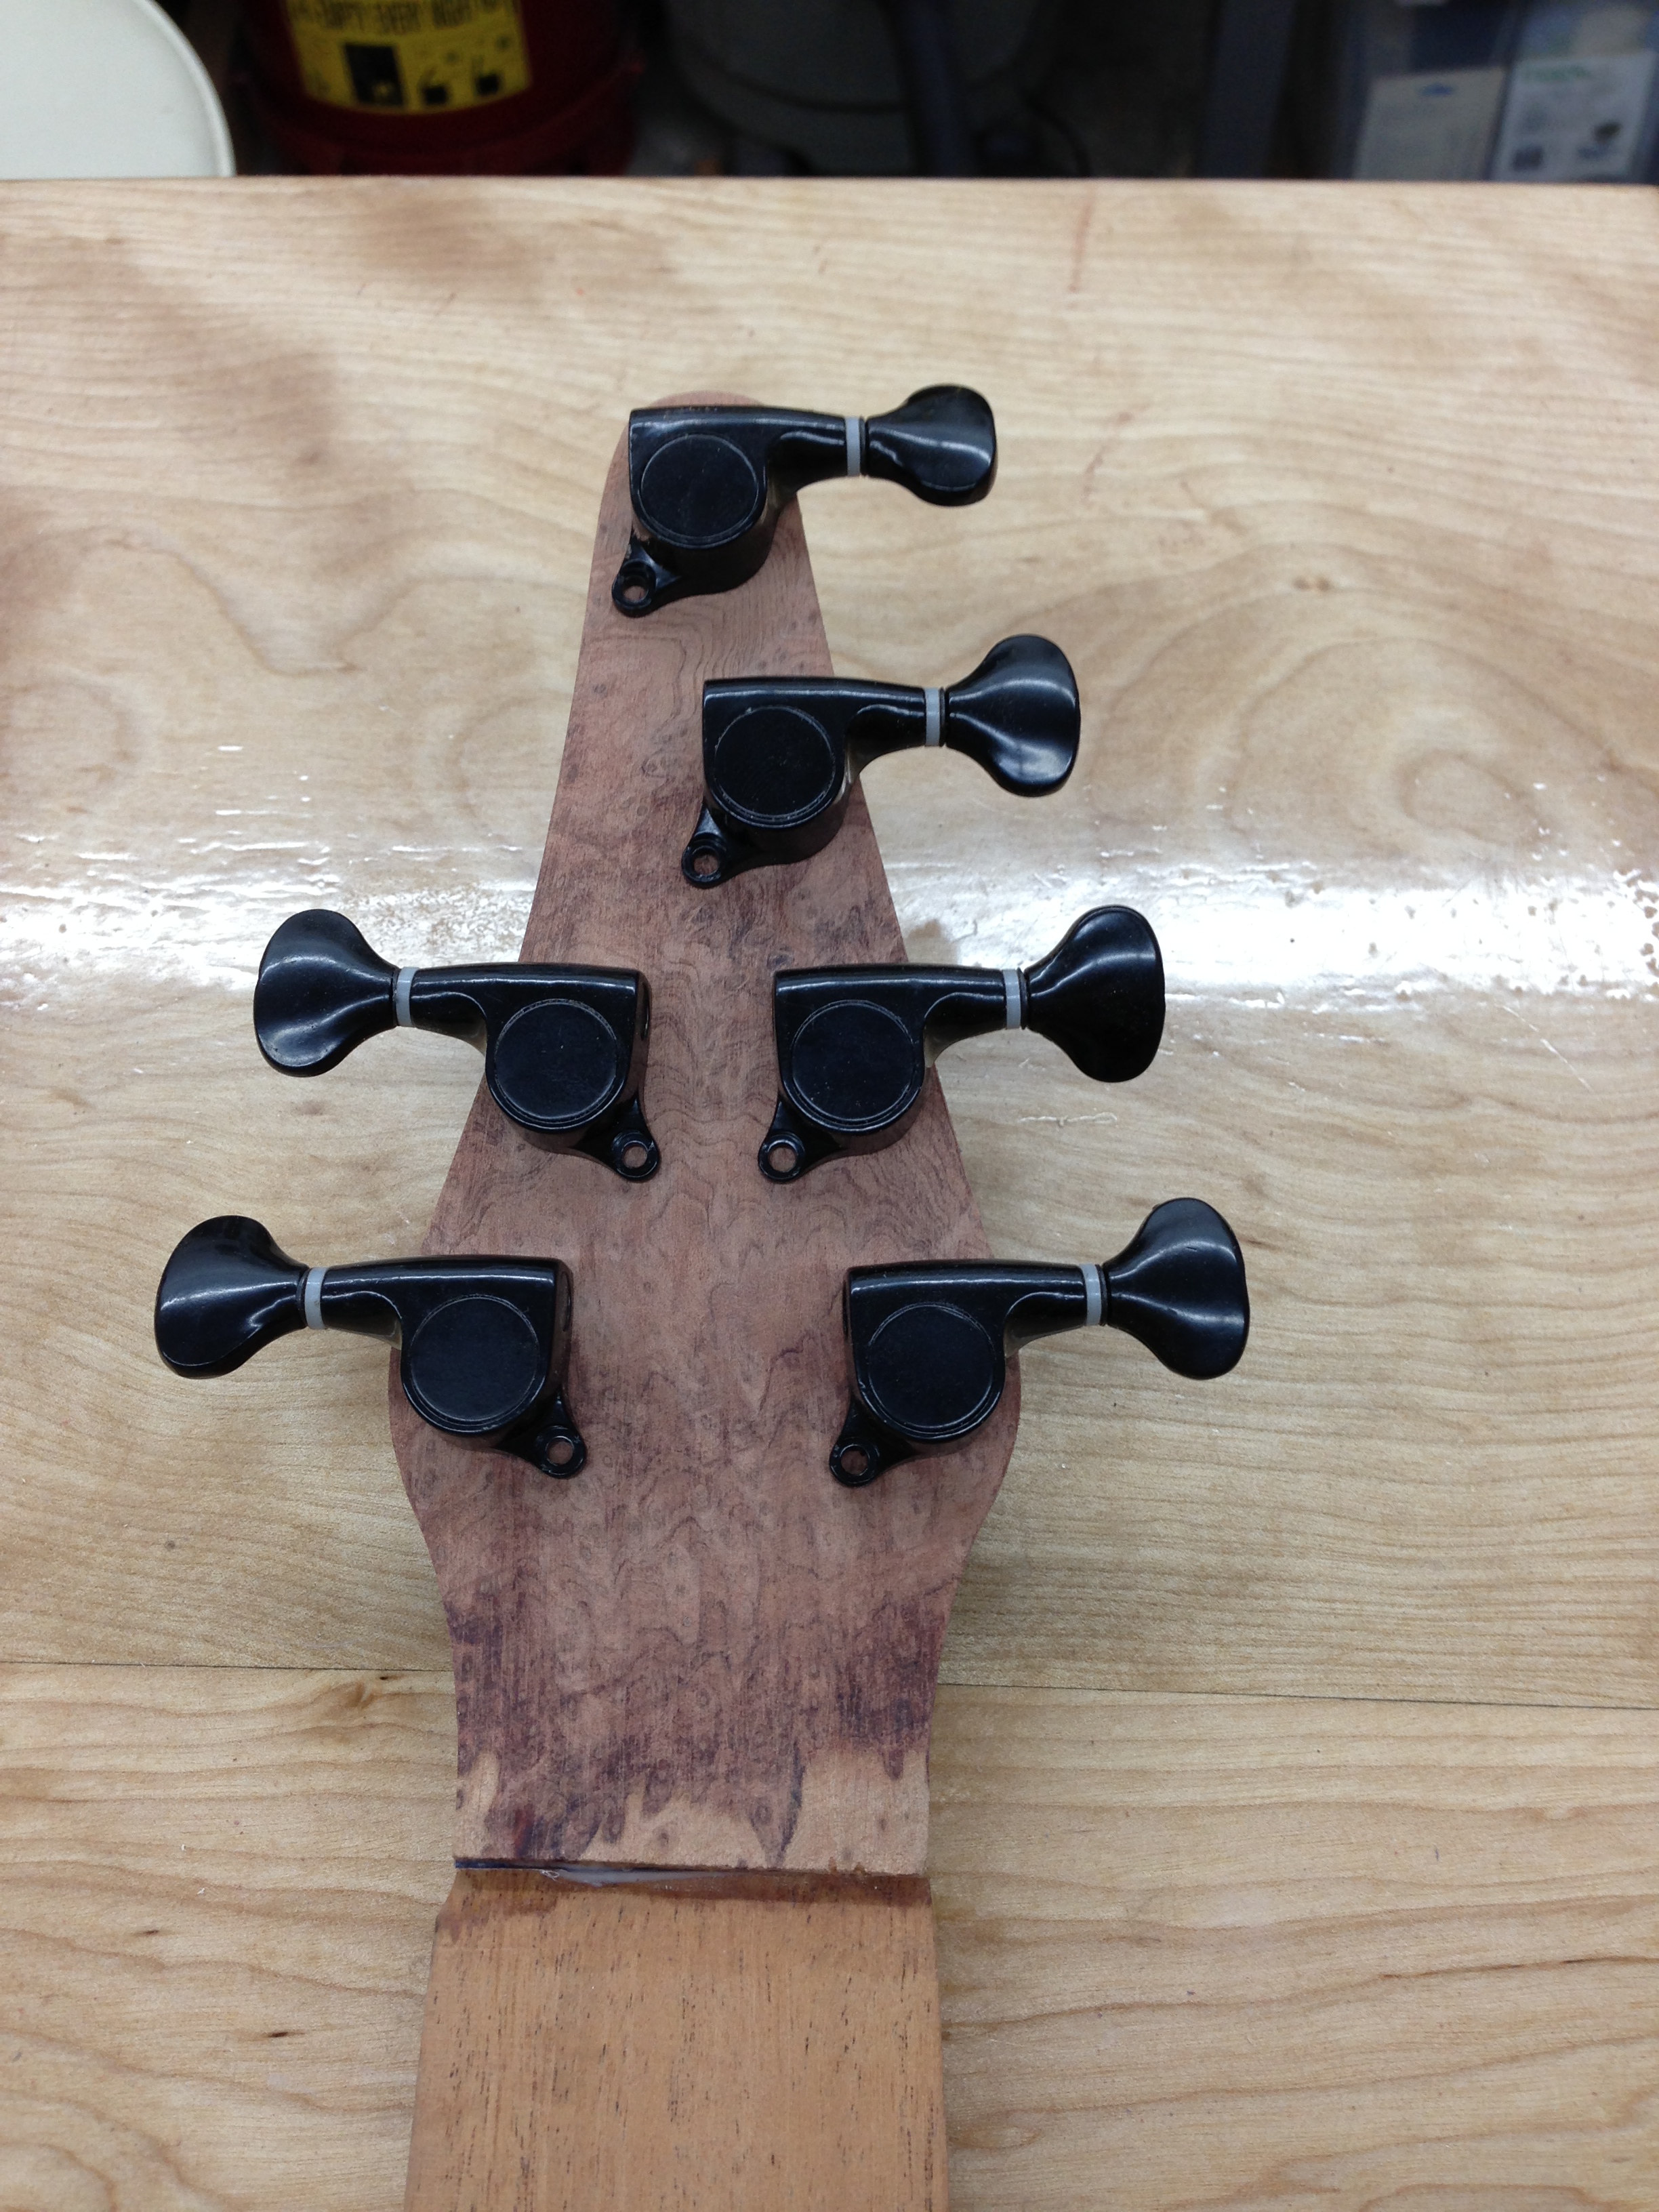 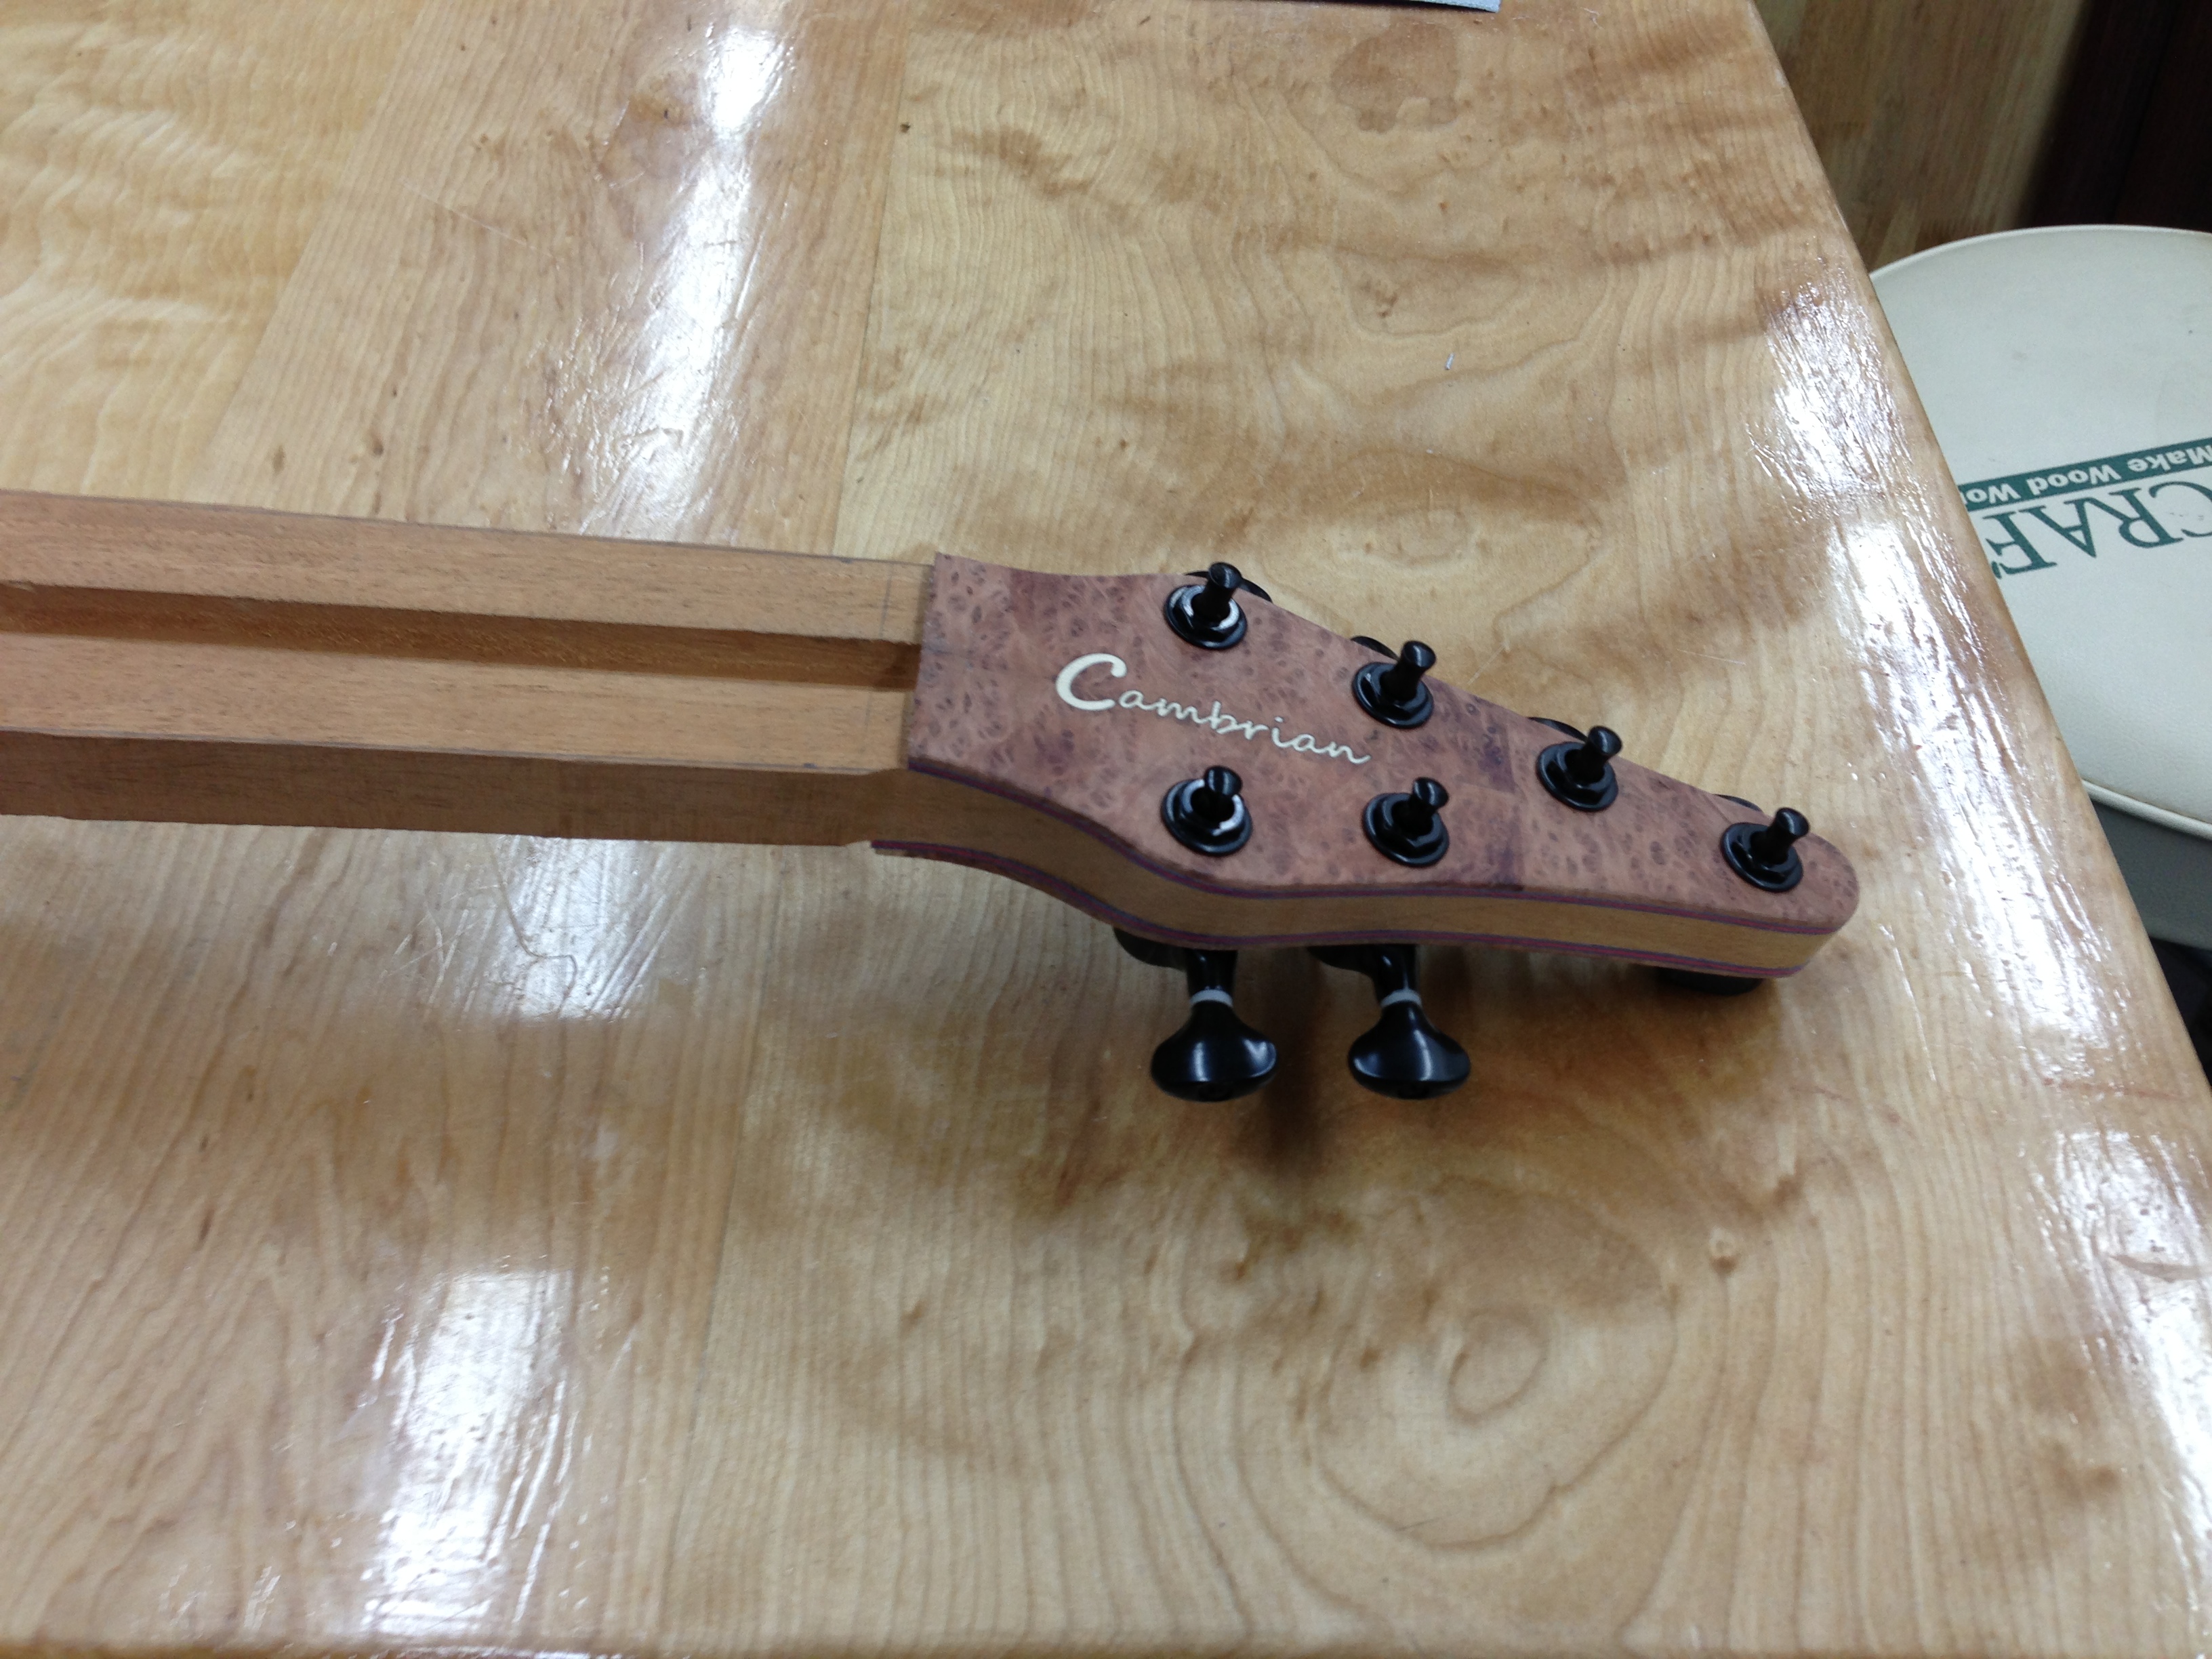 Next it's on to the fretboard. I dug out a fairly nice looking piece of ebony that I got from the LMI $5 per lb. sale a few years back. It has some grey/brown streaking, but it looks fine. It weighs just under 1lb, so $5 on the budget for that: 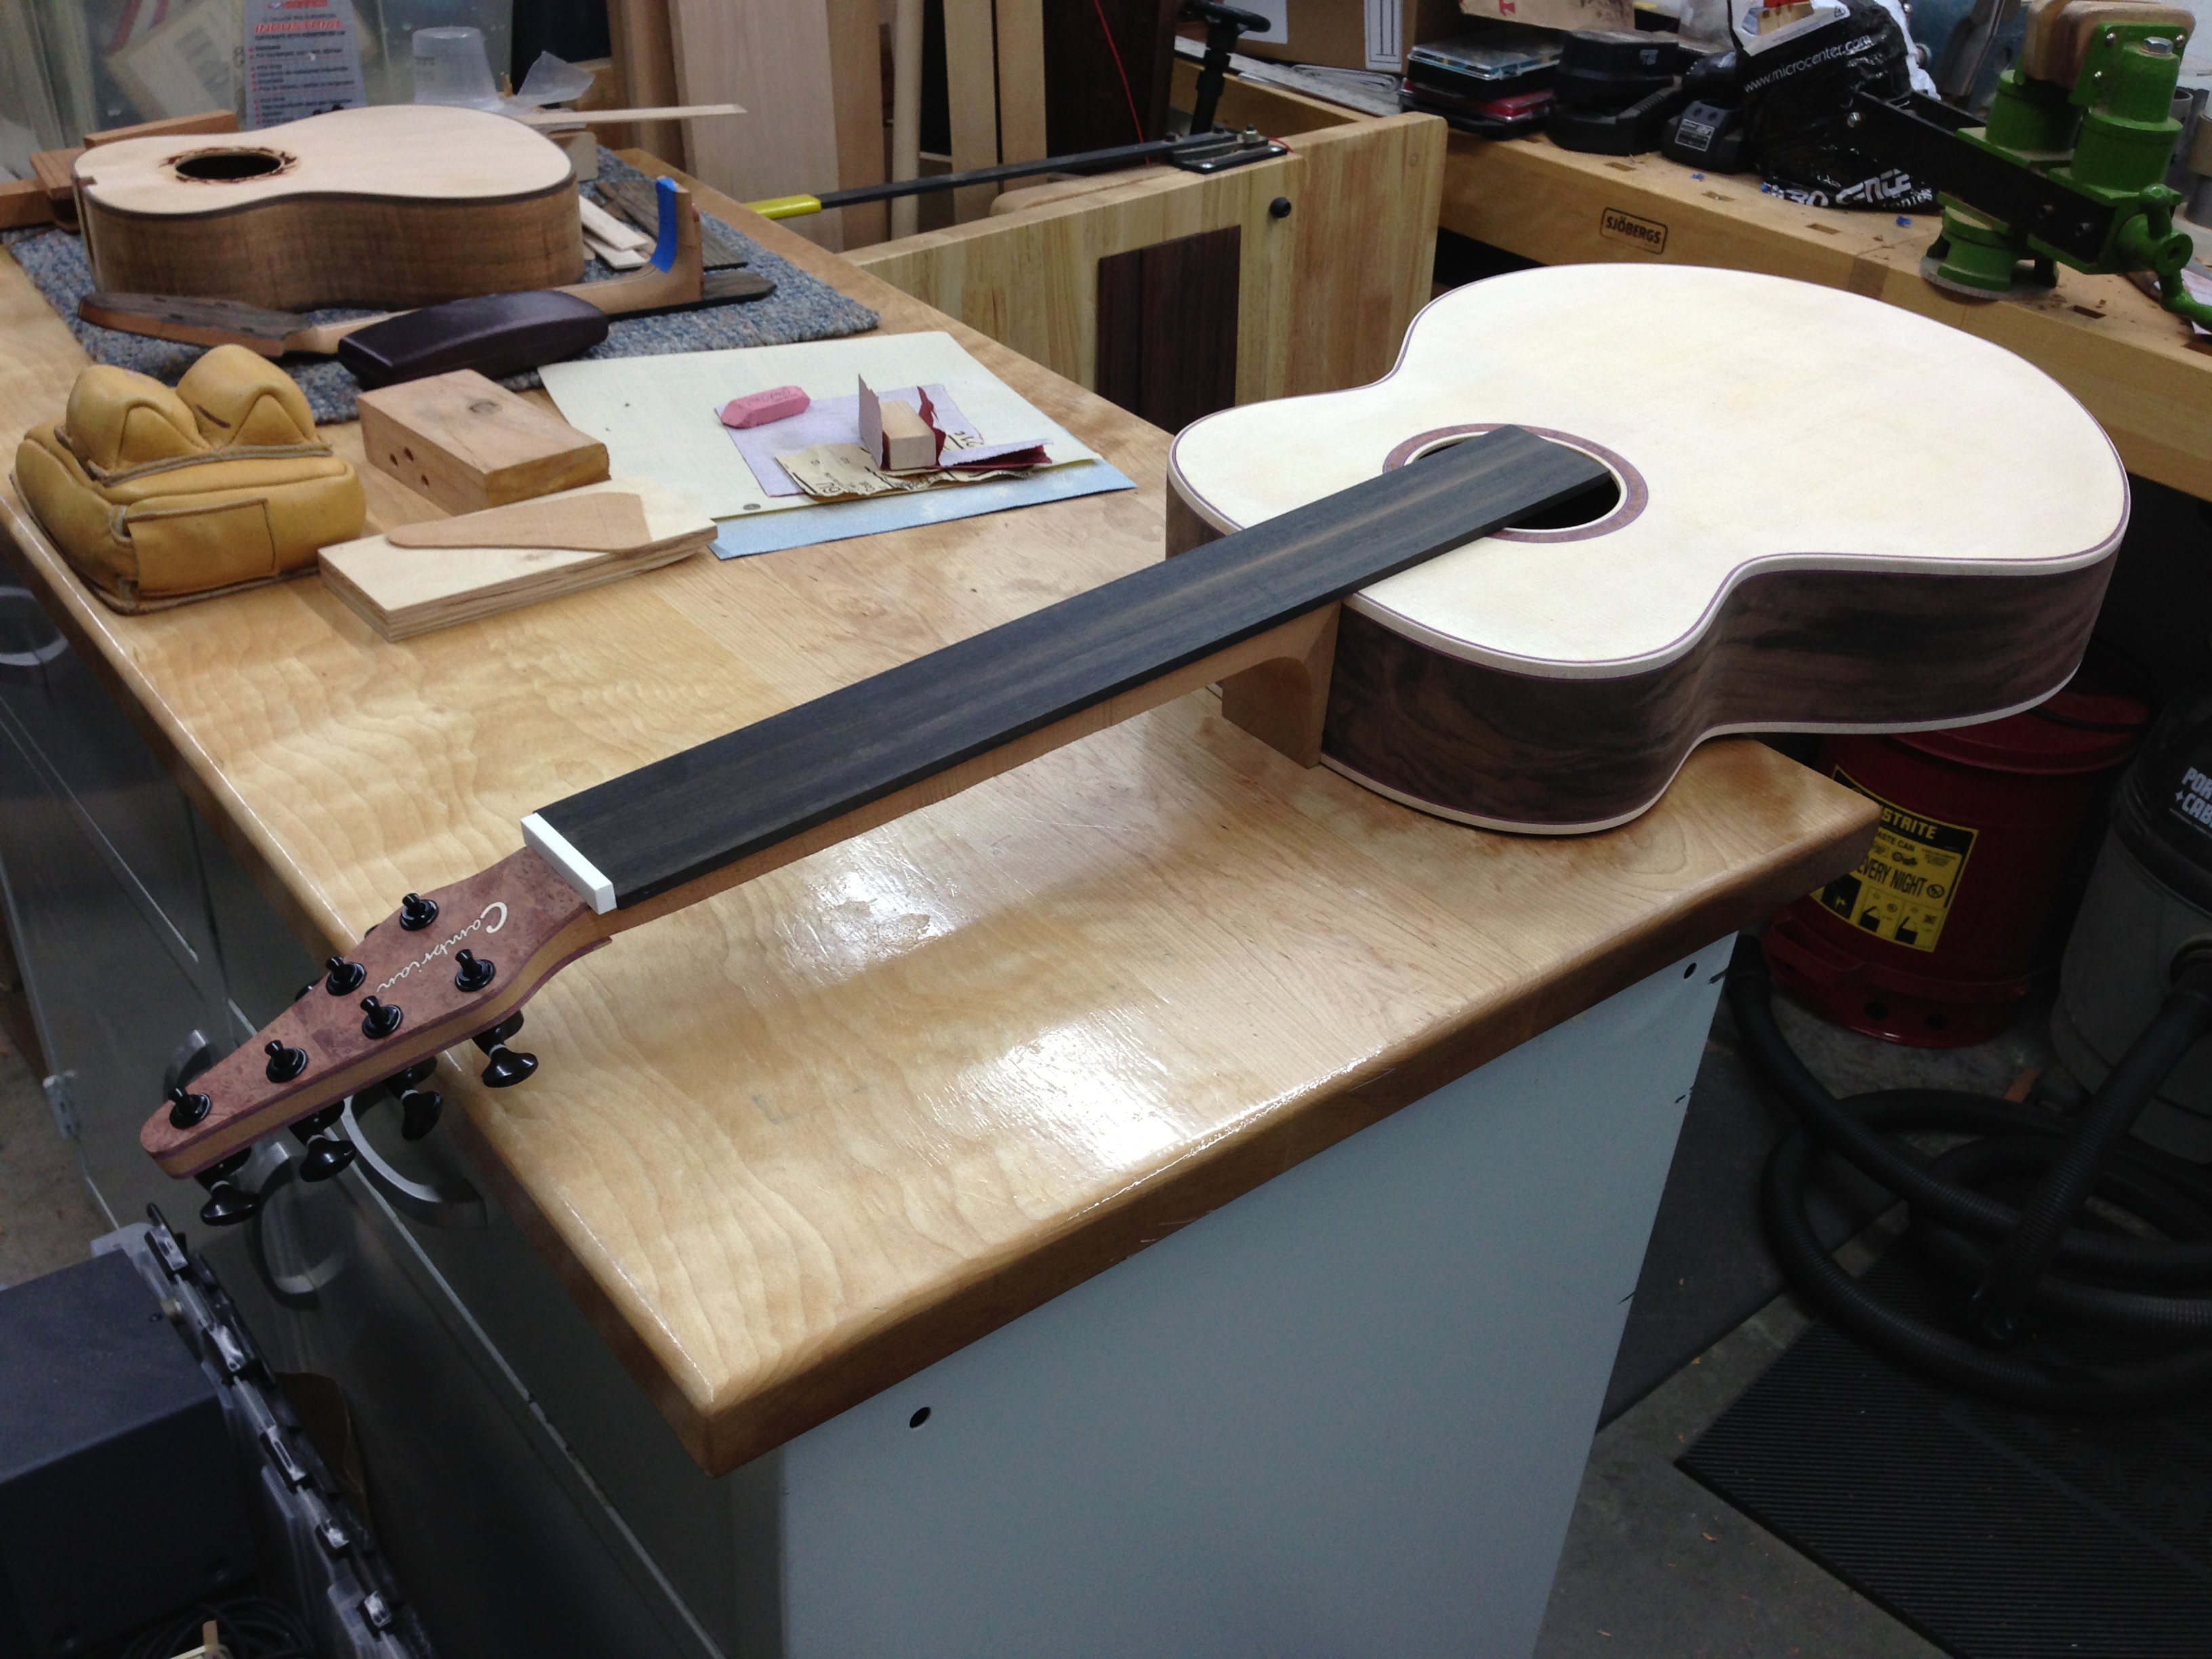 And there, my poppets, is where I am up to. I'm toying with the idea of making my first CNC fretboard using this build as the guinea pig....we'll see..... Cheers, Dave F. |
|
| Author: | Tony_in_NYC [ Tue Oct 02, 2012 5:10 am ] |
| Post subject: | Dave's Daft Experimental ESJ-2 Build |
Looking gooood! Posted from my Toaster oven using Tapatalk |
|
| Author: | SteveSmith [ Tue Oct 02, 2012 6:03 am ] |
| Post subject: | Re: Dave's Daft Experimental ESJ-2 Build |
Veddy nice indeed. |
|
| Author: | Dave Fifield [ Fri Oct 05, 2012 2:48 am ] |
| Post subject: | Re: Dave's Daft Experimental ESJ-2 Build |
Thanks Tony & Steve So tonight, I messed around with Rhino and came up with a fretboard design for this guitar. I'm a complete rookie at CAD/CAM, so it takes me about 100 times longer to do things that others do in mere minutes! After a couple of hours, I ended up with the basic shape, with a nice compound radius surface on it that should be a cinch to mill. The radius at the top of the board is 16" and the radius at the bottom is 20". This is about what I have used in the past and seems to be well accepted among players. Here's a quick screen capture of it....not very interesting, sorry, but I'm kind of proud of it considering how much work I put into it!!  I also worked on the fret position and fret slot size math and came up with a nice spreadsheet to do all the calculations for me. It should be fairly easy to import the numbers into Rhino so I can output a cut file for the tiny 0.023" slot cutting bit to do its magic, but that will have to wait until tomorrow night. Cheers for now, Dave F. |
|
| Author: | Tony_in_NYC [ Fri Oct 05, 2012 7:54 am ] |
| Post subject: | Re: Dave's Daft Experimental ESJ-2 Build |
So you have no problem programming a fricken laser beam, but stick you in front of a CNC and you are all sixes and sevens? 
|
|
| Author: | Dave Fifield [ Sat Oct 06, 2012 6:21 pm ] |
| Post subject: | Re: Dave's Daft Experimental ESJ-2 Build |
 I gots me some nice curvy fret slots on it now:  Off to the Shopbot! Cheers, Dave F. |
|
| Page 3 of 5 | All times are UTC - 5 hours |
| Powered by phpBB® Forum Software © phpBB Group http://www.phpbb.com/ |
|