Official Luthiers Forum!

Owned and operated by Lance Kragenbrink
It is currently Tue Apr 23, 2024 8:36 am


All times are UTC - 5 hours


Post new topic Reply to topic  [ 11 posts ] 
Author Message
PostPosted: Tue Mar 31, 2015 2:26 pm 
Offline
Walnut
Walnut

Joined: Tue Mar 31, 2015 12:01 pm
Posts: 4
First name: Chris
Last Name: Leger
City: Milford
State: NH
Zip/Postal Code: 03055
Country: USA
Focus: Repair
Status: Amateur
Hi, first post here.

I have a two-year-old J-185-TV. About two weeks ago, it suffered a crack in the top, from under the bridge to the bottom of the guitar. The crack is about an inch or so to the right of the center seam. I'd post a photo, but I've been humidifying the guitar and the crack would never show up in a photo at this point.

The crack was maybe .010" wide when the guitar was at its dryest... it's closed-up pretty tight now. I plan to let it humidify for a few more days at least. I'll probably tackle the gluing this week-end.

My questions are

1. I left the strings on when I started humidifying the guitar. Didn't occur to me to take them off. Now that the crack has closed, I'm reluctant to remove them, since the whole assembly seems pretty stable... the crack closed perfectly flat, and I don't think I'd even *want* to clamp the top, since everything looks so perfect. I realise that having the strings on there is going to make it harder to get lamps & mirrors & such into the guitar, but I do have one of those little 2" mirrors on a telescoping stalk that I'm able to get in there... I was thinking the flashlight on my iPhone would work pretty well for a lamp...

Anyway, any thoughts on this? Is there a compelling reason to remove the strings, despite what I've written above?

2. The crack crosses two braces... it occurred to me (and my reading here seems to confirm) that the top has probably delaminated from the braces for some unknown span near the cracks... so it seems I'd want to force as much glue into those areas as possible. I saw a trick from Dan Erlewine where he uses one of those clear suction cups to drive glue into the cracks. I have one of those cups and I figured that's what I'd do. Anyone have a better suggestion?

3. I have a bottle of Titebond... I thought I might thin it slightly since, as I said, this crack has closed-up rather tightly.

My plan is to set-up with my lamp and mirror, use the suction cup to force glue through the crack until it oozes through on the inside. I've never done anything like this before. Please stop me if I'm very far off!

4. Lastly, the finish is quite intact, and at this point, with the crack closed, the crack is invisible in terms of any interruption in the finish. I imagine I'll always see the little hairline (that I can see now) in the spruce where the crack is/was. Any tips re: cleaning up the glue & finish? Do I simply clean the top with a damp cloth before the glue dries? What about on the inside? Would you just leave little glue beads where the glue oozes through?

I should add that one of my main concerns right now is whether I'll even be able to drive any glue through this crack. Feel free to provide reassurances!

Thanks for your time & attention! Appreciate any advice.


Top
 Profile  
 
PostPosted: Wed Apr 01, 2015 10:06 am 
Offline
Contributing Member
Contributing Member
User avatar

Joined: Mon Jul 27, 2009 7:52 am
Posts: 4524
First name: Big
Last Name: Jim
State: Deep in the heart of Bluegrass
Country: usa
Focus: Build
Status: Amateur
I hope someone else chimes in , because i could be wrong in my thoughts . Logic tells me that during the humidifying process , while its closing i would be wicking the ca in so that when it tightened it would already be there . However I have never tried that . idunno 
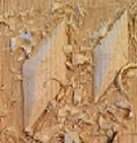
so I could be way off base . I do have one that needs exactly the same work as yours . May have to test my theory

_________________
The Shallower the depth of the stream , The Louder the Babble !
The Taking Of Offense Is the Life Course Of The Stupid One !
Wanna Leave a Better Planet for our Kids? How about Working on BETTER KIDS for our Planet !
Forgiveness is the ability to accept an apology that you will probably NEVER GET
The truth will set you free , But FIRST, it will probably Piss you Off !
Creativity is allowing yourself to make Mistakes, Art is knowing which ones to Keep !
The Saddest thing anyone can do , is push a Loyal Person to the point that they Dont Care Anymore
Never met a STRONG person who had an EASY past !
http://wiksnwudwerks.blogspot.com/
http://www.facebook.com/groups/GatewayA ... rAssembly/


Top
 Profile  
 
PostPosted: Wed Apr 01, 2015 10:17 am 
Offline
Contributing Member
Contributing Member
User avatar

Joined: Wed Oct 08, 2008 11:36 am
Posts: 7256
Location: Southeast US
City: Lenoir City
State: TN
Zip/Postal Code: 37772
Country: US
Focus: Repair
Why leave the strings on? Seems like that just makes it that much harder to get in the box. I like to put cleats on the inside over the cracks after I glue them for support. That would be a PITA with the strings on.

_________________
Steve Smith
"Music is what feelings sound like"


Top
 Profile  
 
PostPosted: Wed Apr 01, 2015 11:24 am 
Offline
Walnut
Walnut

Joined: Tue Mar 31, 2015 12:01 pm
Posts: 4
First name: Chris
Last Name: Leger
City: Milford
State: NH
Zip/Postal Code: 03055
Country: USA
Focus: Repair
Status: Amateur
Thanks for the replies!

It's not that I want to leave the strings on... it's that I'm afraid to take them off. The top has closed-up so well, I fear that taking the strings off now might cause things to shift.

Re: cleats, I had thought about that, but there are two braces running under the crack, and I'm inclined to try to get away without cleats... my hope is to drive enough glue into any voids between the top and braces, and that that will be cleats enough.

Re: wudwerkr & CA glue, is this recommended? I tend to think of CA as hard & brittle... would it withstand the movement (sinking/rising) caused by humidity changes, etc? It also occurred to me that it might penetrate and discolor the spruce top?


Top
 Profile  
 
PostPosted: Wed Apr 01, 2015 2:01 pm 
Offline
Contributing Member
Contributing Member
User avatar

Joined: Wed Oct 08, 2008 11:36 am
Posts: 7256
Location: Southeast US
City: Lenoir City
State: TN
Zip/Postal Code: 37772
Country: US
Focus: Repair
I would be surprised if there was a problem when you took the strings off. Cleats go between the braces. Obviously the braces were not sufficient in the first place.

_________________
Steve Smith
"Music is what feelings sound like"


Top
 Profile  
 
PostPosted: Thu Apr 02, 2015 3:31 pm 
Offline
Old Growth Brazilian Rosewood
User avatar

Joined: Fri Nov 02, 2007 9:49 am
Posts: 13079
Location: Ann Arbor, Michigan
First name: Hesh
Last Name: Breakstone
City: Ann Arbor
State: Michigan
Country: United States
Status: Professional
Rehumidify the instrument until the crack is closed.

Strings should be off.

Once the crack is closed AND the instrument has been rehumidified long enough, usually 3 days at 75% in a bag with water and a sponge with your arm in the sound hole manipulate (pump up and down) the crack from the inside while rubbing in Titebond original from the top with the other hand. Lately I've been watering down the Titebond to a thinned consistancy to "size the joint" and then once I can see little beads of wetness on the inside with a mirror and light I continue to pump the crack from the inside and then rub in full strength Titebond. I'm believing that the thinned Titebond helps the thick stuff wick in.

Clamping should be done with a flat flexible caul, I like plexi so I can see though it. You can use clamps but rare earth magnets are easier to use and can provide 40 pounds per square inch of clamping pressure. Put down waxed paper over the crack so as to not glue the caul to your guitar......

You want the crack to line up level and closed before glueing and be sure that how ever you clamp it, what ever you use, that it's level.

Once glued shut you can clean up excess Titebond with hot water taking care to not drench the repaired crack....

Regardless of the braces spanning the crack cleats should be used and I make mine 3/4" long and 1/2" high, .060ish thick and all edges of the diamond shape with the grain running across the crack now should be beveled. At least a couple cleats, 3 - 4 would be better and position them in between braces and other things such as the bridge plate and tail block. Cleats can be glued with Titebond original too.

Wait a day, string her up, enjoy!

_________________
Ann Arbor Guitars


Last edited by Hesh on Thu Apr 02, 2015 6:22 pm, edited 1 time in total.


These users thanked the author Hesh for the post (total 2): Glenn_Aycock (Sun May 10, 2015 9:26 pm) • Chris Leger (Thu Apr 02, 2015 4:58 pm)
Top
 Profile  
 
PostPosted: Thu Apr 02, 2015 5:08 pm 
Offline
Walnut
Walnut

Joined: Tue Mar 31, 2015 12:01 pm
Posts: 4
First name: Chris
Last Name: Leger
City: Milford
State: NH
Zip/Postal Code: 03055
Country: USA
Focus: Repair
Status: Amateur
Thanks Hesh... i like your idea of thinned glue followed by unthinned.

I don't want to be the guy who asks for advice and then ignores everyone's advice...

Re: cleats, on the one hand, all my reading suggests that the glued joint should be stronger than the wood was originally.

On the other hand, assuming uniform humidity (or lack thereof) throughout the top in the moments prior to the crack occurring, the spot where it cracked must have been the weakest part of the top, possibly owing to planed-out pulp along that bit of grain... I suppose it may remain relatively weak there.

So I'm still of two minds about it. Not least of all because I don't happen to have any spruce or similar lying around from which to fashion cleats.

Background on all of this is that I'm kicking myself for letting this happen in the first place. This is the first "expensive" acoustic I've ever owned. I've had cheap ones down through the decades and never had a top crack on me, but those guitars likely had thicker or even laminated tops. When I bought it, they gave me an oasis humidifier and I was quite diligent about keeping it filled, but I was playing the guitar quite a lot in the days leading up to the crack. It was probably out of the case for 8 hours a day in the three or four very dry New Hampshire winter days prior.

I bought a hygrometer in the aftermath. Alas, too late.


Top
 Profile  
 
PostPosted: Thu Apr 02, 2015 6:34 pm 
Offline
Old Growth Brazilian Rosewood
User avatar

Joined: Fri Nov 02, 2007 9:49 am
Posts: 13079
Location: Ann Arbor, Michigan
First name: Hesh
Last Name: Breakstone
City: Ann Arbor
State: Michigan
Country: United States
Status: Professional
Hi Chris:

A couple of things. First please cut yourself some slack. In the last 90 days we have repaired likely 100+ cracked guitars... and it was because of our terrible winter. You guys also had record snow IIRC so these were extreme conditions.

Also regarding the idea, which is correct by the way most of the time, that a well glued joint is stronger than the surrounding wood. That's true most of the time but with guitar construction there are a number of factors that bend and even ignore woodworking rules such as cross gain glueing, etc. We also use very thin plates as well. And.... wood is like humans, imperfect and two pieces from the very same tree may be different one with defects one without.

Cleats are a good idea for these cracks and lots of our clients come in every spring with new cracks and the ones that we cleated and glued last year held fine making somewhere else the new weak link in the equation... and that's where this years cracks are, new places...

If you want to PM me your mailing address tomorrow I'll make you up some nice spruce cleats already sized and beveled and drop them in the mail to you tomorrow. You probably could also do a rub joint with the cleats and that would be fine and easier too. We guarantee our work so we always go the extra mile or 10... but I think that a rub joint for cleats would be fine.

By the way at my house I run 3 humidifiers and am schlepping water every morning and every night. I feel like the guy in that old famous Saturday Night Live who skipped from room to room emptying the silver drool buckets.... :D Anyway my point is that it's not easy to keep our fine acoustic instruments well humidified lately and here in Michigan we broke many records in just the past two winters for cold, snow, how long the winter lasted..... etc.

By the way my hat's also off to ya for wanting to fix this yourself and also wanting to do it right - good going!

_________________
Ann Arbor Guitars


These users thanked the author Hesh for the post (total 3): Johny (Mon May 11, 2015 10:26 am) • Scottwerks (Sun May 10, 2015 7:56 pm) • Chris Leger (Thu Apr 02, 2015 7:28 pm)
Top
 Profile  
 
PostPosted: Thu Apr 02, 2015 6:37 pm 
Offline
Old Growth Brazilian Rosewood
User avatar

Joined: Fri Nov 02, 2007 9:49 am
Posts: 13079
Location: Ann Arbor, Michigan
First name: Hesh
Last Name: Breakstone
City: Ann Arbor
State: Michigan
Country: United States
Status: Professional
PS: Nearly forgot - most digital hygrometers are WAY off and that too could be the issue. The only real way to know what your RH is is to do wet-bulb testing which can be done with two lab thermometers. This will tell you the amount of drift and how far off your hygrometer is. With my cheap digitals I test with the WB method and then write on them with a Sharpie the error rate. They say things like "add 8%" or such. I have an expensive mechanical hygrometer that I calibrate twice a year and that seems to be very accurate if occasionally calibrated.

_________________
Ann Arbor Guitars


These users thanked the author Hesh for the post: Chris Leger (Thu Apr 02, 2015 7:28 pm)
Top
 Profile  
 
PostPosted: Thu Apr 02, 2015 7:34 pm 
Offline
Walnut
Walnut

Joined: Tue Mar 31, 2015 12:01 pm
Posts: 4
First name: Chris
Last Name: Leger
City: Milford
State: NH
Zip/Postal Code: 03055
Country: USA
Focus: Repair
Status: Amateur
Thanks once again, Hesh.

I'm convinced. I'm going to cleat it. Just ordered a stack of magnets from Amazon.

Re: doing it myself, I'm about the fussiest guy I know when it comes to this sort of thing. There are some skilled guys around here that I could bring it to, but if there were anything wrong when it came back, I'd feel worse than if I screwed it up myself. And I'm not going to screw it up. So thanks again for your help and advice.

Re: the hygrometers, yes, in characteristic OCD fashion, I read all about german hair hygrometers, etc... I decided to just grab a digital one. My plan is just to reference against a relatively humid day this summer, and that will be my error. As it is now, the hygrometer swings from an arid 25% or so ambient, to about 47% when left in the case for a day with two humidifiers in there. One is the regular Oasis blue one I got originally, and I've since added one of those 2X brown ones, plus I've been keeping a little bowl of water under the headstock.


Top
 Profile  
 
PostPosted: Sun May 10, 2015 8:03 pm 
Offline
Walnut
Walnut
User avatar

Joined: Thu Apr 30, 2015 8:52 pm
Posts: 1
First name: Scott
Last Name: Wolthuis
City: Weatherford
State: Tx
Zip/Postal Code: 76087
Country: USA
Focus: Repair
Status: Amateur
Hello,

I'm courtious to know which method you used to get the glue where you wanted it? I have a similar issue but at the seam from the bottom to an inch above the bridge, tight crack also. I had planned to... with a paint brush paint the crack with warm water - wipe and immeaditly put down a bead of glue - then pump the top from the inside, but the suction cup sounded like a good back up plan.

I'm not sure what glue was used on a 2012 D45 and how that effects my glue options but i'm hoping to use white glue...

I hope it is okay to tack this onto your post!

Thanks
Scott


Top
 Profile  
 
Display posts from previous:  Sort by  
Post new topic Reply to topic  [ 11 posts ] 

All times are UTC - 5 hours


Who is online

Users browsing this forum: No registered users and 28 guests


You cannot post new topics in this forum
You cannot reply to topics in this forum
You cannot edit your posts in this forum
You cannot delete your posts in this forum
You cannot post attachments in this forum

Jump to:  
Powered by phpBB® Forum Software © phpBB Group
phpBB customization services by 2by2host.com