Official Luthiers Forum!Owned and operated by Lance Kragenbrink |
| It is currently Sat Jun 13, 2026 7:24 am |
|
All times are UTC - 5 hours |
 
|
Page 3 of 3 |
[ 71 posts ] | Go to page Previous 1, 2, 3 |
|
| Author | Message | ||||||
|---|---|---|---|---|---|---|---|
| Colin North |
|
||||||
Joined: Fri Jul 10, 2009 4:44 am Posts: 5655 First name: colin Last Name: north Country: Scotland. Focus: Build Status: Semi-pro |
|
||||||
| Top | |||||||
| Joe Beaver |
|
||||||
Joined: Thu Feb 09, 2006 2:35 pm Posts: 2951 Location: United States First name: Joe Last Name: Beaver City: Lake Forest State: California Focus: Build |
|
||||||
| Top | |||||||
| hanstrocity |
|
|||||
Joined: Tue Jul 06, 2010 10:58 pm Posts: 129 Location: Winfield, KS, USA First name: Hans Last Name: Judd City: Winfield State: KS Country: USA Focus: Build Status: Amateur |
|
|||||
| Top | ||||||
| Casey Cochran |
|
||||||
Joined: Thu Oct 07, 2010 5:28 pm Posts: 687 First name: Casey Last Name: Cochran City: Gainesville State: GA Zip/Postal Code: 30501 Country: USA Focus: Build |
|
||||||
| Top | |||||||
| Don Williams |
|
|||||
Joined: Mon Dec 27, 2004 11:25 pm Posts: 7207 Location: United States |
|
|||||
| Top | ||||||
| John Killin |
|
||||||
Joined: Tue Mar 18, 2008 8:43 am Posts: 776 Location: Florida First name: John Last Name: Killin Focus: Build Status: Amateur |
|
||||||
| Top | |||||||
| SteveSmith |
|
||||||
Joined: Wed Oct 08, 2008 11:36 am Posts: 7556 Location: Southeast US City: Lenoir City State: TN Zip/Postal Code: 37772 Country: US Focus: Repair |
|
||||||
| Top | |||||||
| Rob Flindall |
|
||||||
Joined: Mon Jun 18, 2012 10:04 pm Posts: 184 First name: Robert Last Name: Flindall City: Peterborough State: Ontario Country: Canada Focus: Build Status: Amateur |
|
||||||
| Top | |||||||
| Joe Beaver |
|
||||||
Joined: Thu Feb 09, 2006 2:35 pm Posts: 2951 Location: United States First name: Joe Last Name: Beaver City: Lake Forest State: California Focus: Build |
|
||||||
| Top | |||||||
| Robert Renick |
|
||||||
Joined: Tue Dec 15, 2009 1:46 pm Posts: 667 First name: Robert Last Name: Renick City: Mount Shasta State: ca Zip/Postal Code: 96067 Country: us Focus: Build Status: Amateur |
|
||||||
| Top | |||||||
| SteveSmith |
|
||||||
Joined: Wed Oct 08, 2008 11:36 am Posts: 7556 Location: Southeast US City: Lenoir City State: TN Zip/Postal Code: 37772 Country: US Focus: Repair |
|
||||||
| Top | |||||||
| cphanna |
|
|||||
Joined: Sat Apr 19, 2008 10:08 pm Posts: 1958 Location: Missouri First name: Patrick Last Name: Hanna State: Missouri Country: USA |
|
|||||
| Top | ||||||
| SKBarbour |
|
|||||
Joined: Fri Mar 04, 2011 3:02 pm Posts: 195 Location: Glen Burnie Md. First name: steve Last Name: barbour Country: U.S. Focus: Build Status: Amateur |
|
|||||
| Top | ||||||
| klooker |
|
||||||
Joined: Tue Aug 17, 2010 3:31 pm Posts: 1682 First name: Kevin Last Name: Looker City: Worthington State: OH Zip/Postal Code: 43085 Country: USA Focus: Build Status: Amateur |
|
||||||
| Top | |||||||
| Casey Cochran |
|
||||||
Joined: Thu Oct 07, 2010 5:28 pm Posts: 687 First name: Casey Last Name: Cochran City: Gainesville State: GA Zip/Postal Code: 30501 Country: USA Focus: Build |
|
||||||
| Top | |||||||
| James Orr |
|
||||||
Joined: Wed Feb 15, 2006 7:37 am Posts: 4840 |
|
||||||
| Top | |||||||
| Pat Foster |
|
||||||
Joined: Sat May 17, 2008 1:11 pm Posts: 2390 Location: Spokane, Washington First name: Pat Last Name: Foster Country: USA Focus: Build |
|
||||||
| Top | |||||||
| Rob Flindall |
|
||||||
Joined: Mon Jun 18, 2012 10:04 pm Posts: 184 First name: Robert Last Name: Flindall City: Peterborough State: Ontario Country: Canada Focus: Build Status: Amateur |
|
||||||
| Top | |||||||
| klooker |
|
||||||
Joined: Tue Aug 17, 2010 3:31 pm Posts: 1682 First name: Kevin Last Name: Looker City: Worthington State: OH Zip/Postal Code: 43085 Country: USA Focus: Build Status: Amateur |
|
||||||
| Top | |||||||
|
|
Page 3 of 3 |
[ 71 posts ] | Go to page Previous 1, 2, 3 |
|
All times are UTC - 5 hours |
Who is online |
Users browsing this forum: No registered users and 67 guests |
| You cannot post new topics in this forum You cannot reply to topics in this forum You cannot edit your posts in this forum You cannot delete your posts in this forum You cannot post attachments in this forum |


![[uncle]](./images/smilies/surrenderflagqv6.gif "Uncle")


![[clap]](./images/smilies/smiley32.gif "adulations")

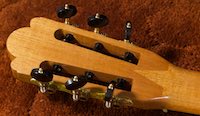
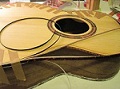
![[headinwall]](./images/smilies/headbangwalluf8.gif "Mad") The neck and sides turned out beautiful, just like glass. But I've now sanded the back twice and I still have scratches. It's driving me nuts! I have no idea what I'm doing differently on the sides and neck for them to turn out perfect, but the back I just can't get right, and have to keep resanding.
The neck and sides turned out beautiful, just like glass. But I've now sanded the back twice and I still have scratches. It's driving me nuts! I have no idea what I'm doing differently on the sides and neck for them to turn out perfect, but the back I just can't get right, and have to keep resanding. 


![[:Y:]](./images/smilies/smiley20.gif "Thumbs Up")