This poor old Gibson is in a sorry state of affairs. Two of the back braces are missing, of the other two one has fallen out and the other is loose. The bridge has not only come off but has split right through the peg holes. You don’t need to take a real close look to see I will not be the first or perhaps even the second or third person to re-glue this bridge. There are also a few cracks that in the top that will need cleated. This is one of those jobs that have come in from another shop so I will be doing the structural repairs and sending it back to them for the final set up work and anything else.
There is a bit of good news in this little mess. The two pieces of the bridge fit back together very well and all the small missing splinters of wood were retrieved from the inside case and inside the instrument.
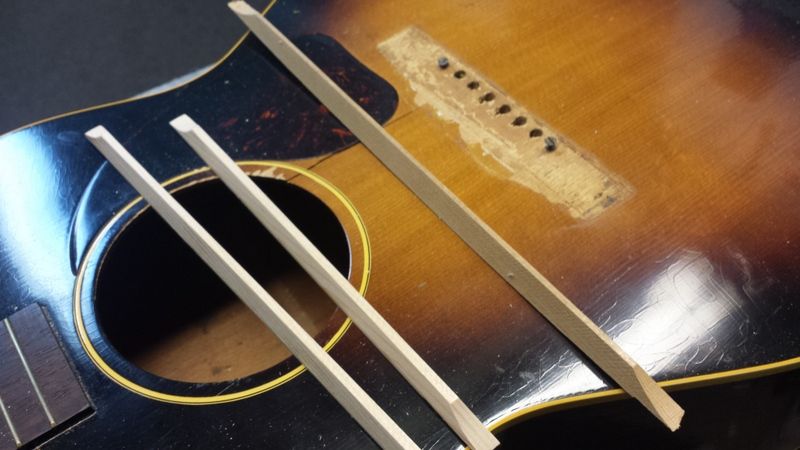
First order of business is to replace those missing braces and make sure the box is stabile and that nothing else is loose inside. So using one of the large bottom braces as a reference and a partial pattern I grab a billet of sitka and trace out the back radius. After planing the billet to the proper radius with my block plane I cut two braces from it. The top braces are narrower than the two bottom braces so I measured the width needed from the glue footprint of the missing braces. I used the same height and side bevel as the lower braces for my replacements. The braces were then cut to the required length as measured inside the box and the end reliefs cut in on a 2-1/2” sanding drum. With a bit of final fitting they are almost ready to glue in.
After I have them fitted just how I like I apply a bit of dye stain to them so they match the other braces and the aged interior of the box. Nothing says repair like fresh white wood peeking through an old soundhole….. Here is what they look like in place.
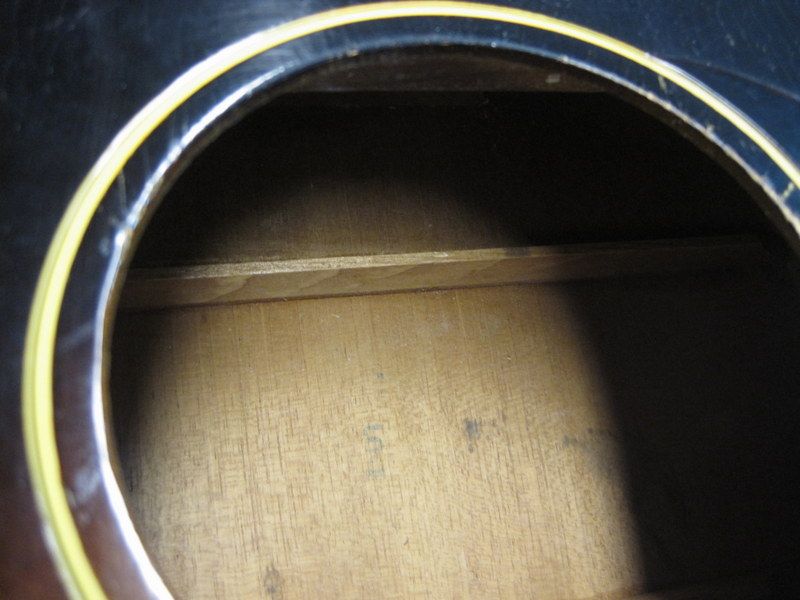
At this time I also put a few cleats on two cracks in the top. I opted not to try and glue the cracks themselves as they would have needed splinted to do the job and that was more investment then the owner wanted to make.
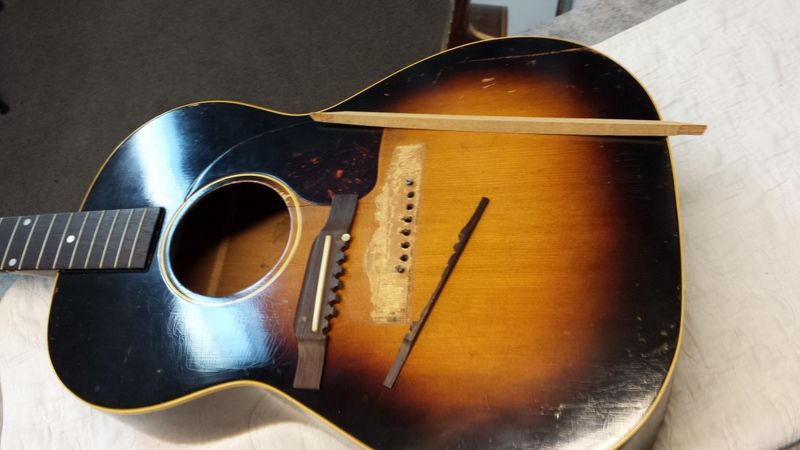
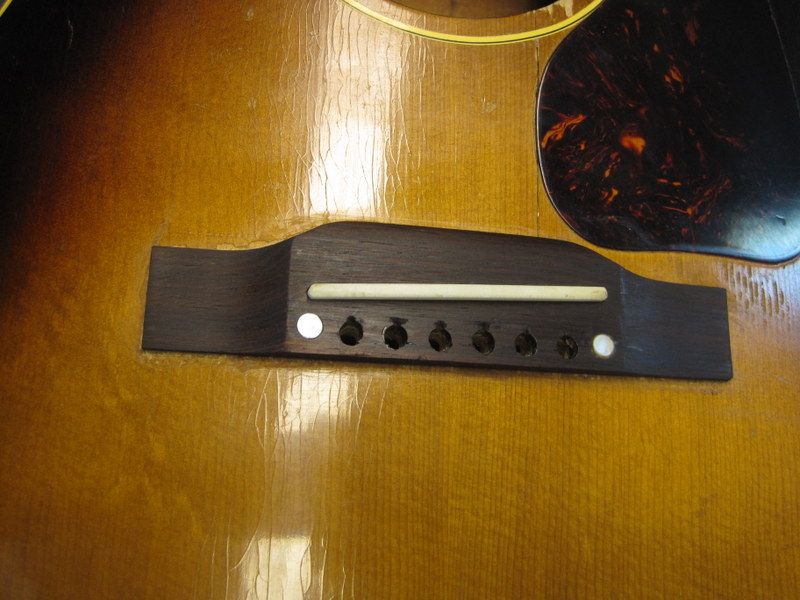
Now I can move onto the bridge. As I said I am not the first to repair this bridge, but I will be the first to actually address the root cause of this malady. The actual problem here is that the ball ends of at least 3 strings have pulled all the way through the bridge plate and the top. When they get to the bottom of the bridge bad things happen…..If you look at this pic you can see that the balls of the A, D & G strings have clearly pulled through. Looks as if the B and maybe even the high E string might have pulled through too. This may have been what caused the bridge to pop the first time and definitely what caused it to split right through the peg holes.
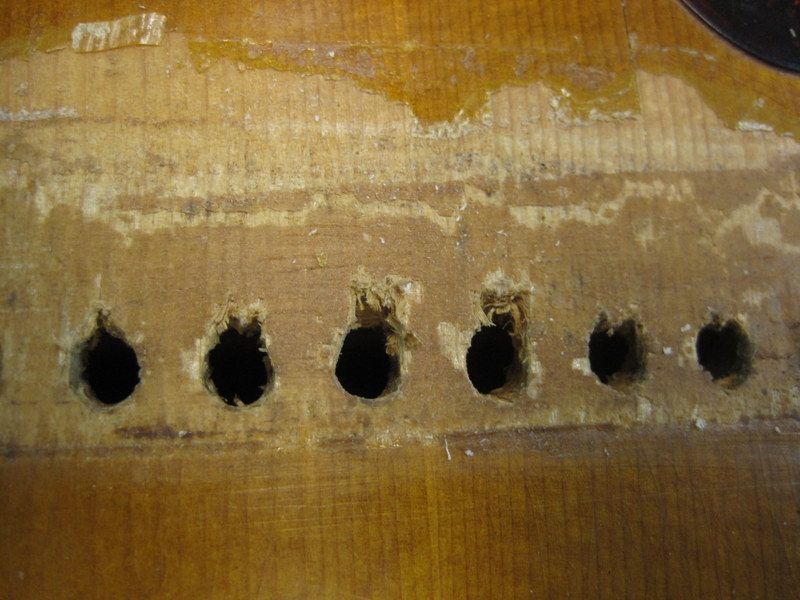
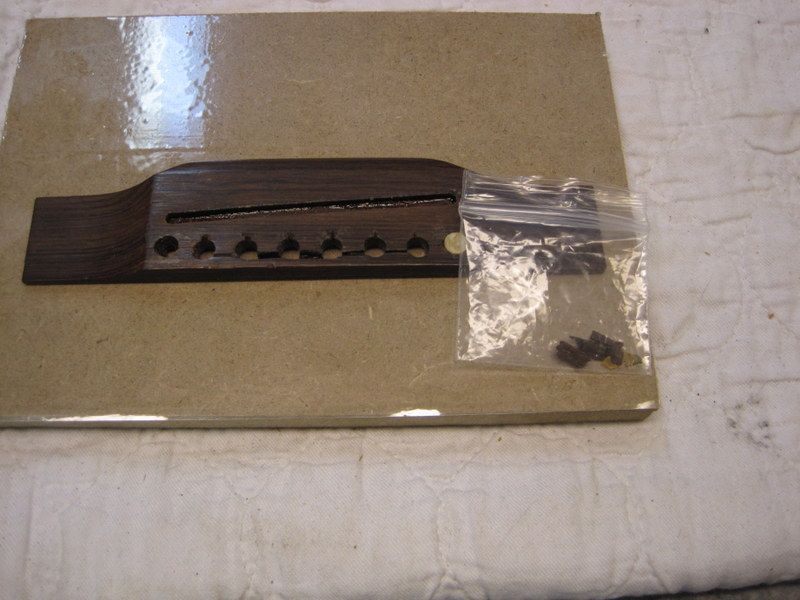
A look inside and we can see the bridge plate is really chewed up as well. This is in part because Gibson chose to use spruce for a bridgeplate. An excellent course of action would be to replace it with a plate made of tougher wood like maple or rosewood. But replacing a bridgeplate is no small undertaking and is complicated in this instance by the fact that this guitar is ladder braced instead of the more familiar X brace. This really limits access with knives and spatulas to remove the old plate. There are other options. In this case I will be using one of Stew Mac’s tool sets to repair the bridge plate and add some durability as well.
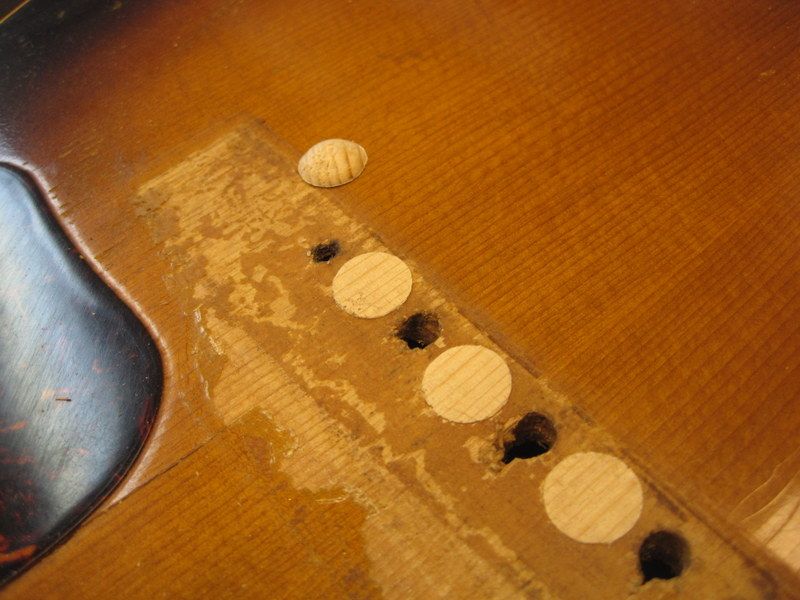
Both the top and the plate under it will need repaired. The tool has a set of cutters. One to cut out a small piece of wood around the damaged hole and another to make matching plugs. I want to start with making repairs to the top itself. Using the cutter part of the tool set I cut out the bad wood at the peg holes, doing every other hole to start. You cannot do them all at once as the plugs overlap slightly. The old spruce is brittle and stringy. I turn the cutter in and then back it out to clear the chips working my way in very slowly to minimize chipping and any chance of possibly splitting the top.
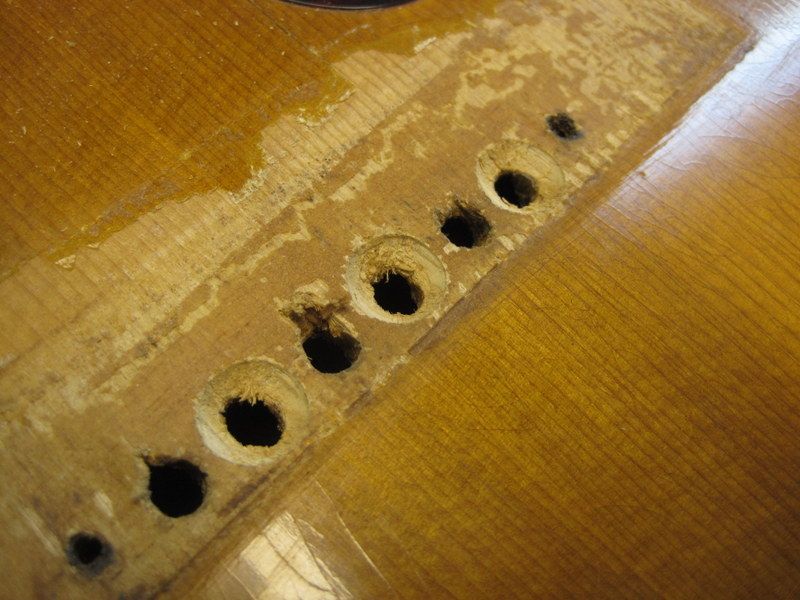
The plugs for the top are cut from a scrap of sitka spruce left over from a sound board. Here you can see the first 3 plugs glued in place and what a plug itself looks like. Now I can do the other three holes.
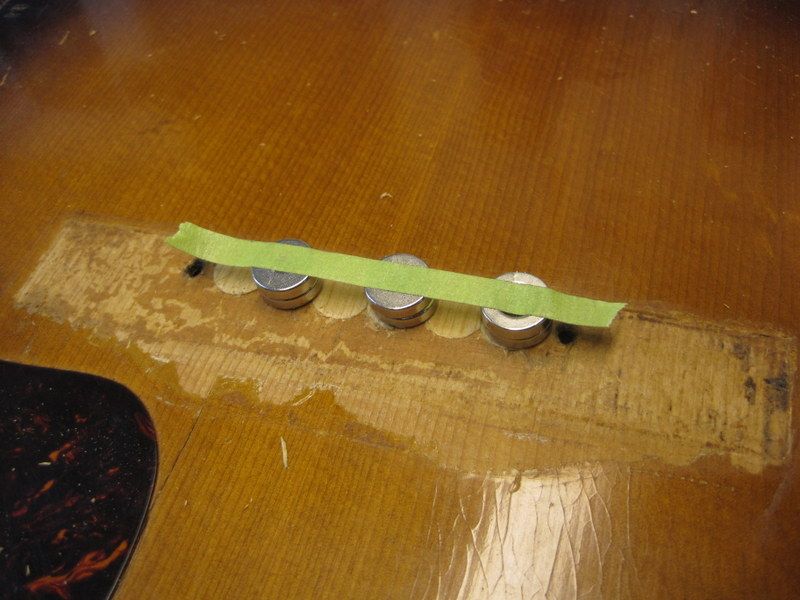
To clamp these little plugs in place while the glue sets I use double stacks of ½” high strength magnets. The polarities must be arranged properly and I need a strip of masking tape to keep them close enough together to sit directly on the plugs. Care needs exercised here when working with this many of these magnets in such close proximity. A wrong move and they can jump all over the place and cause some pretty serious dents.
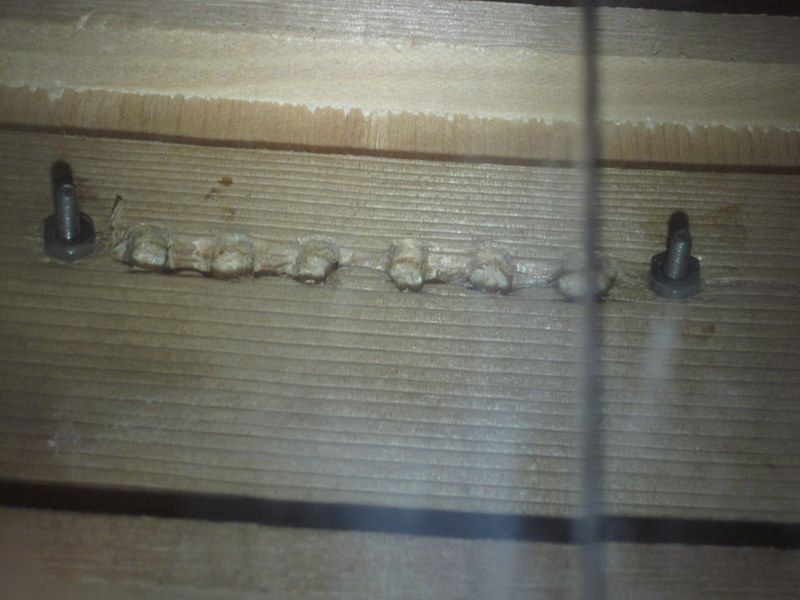
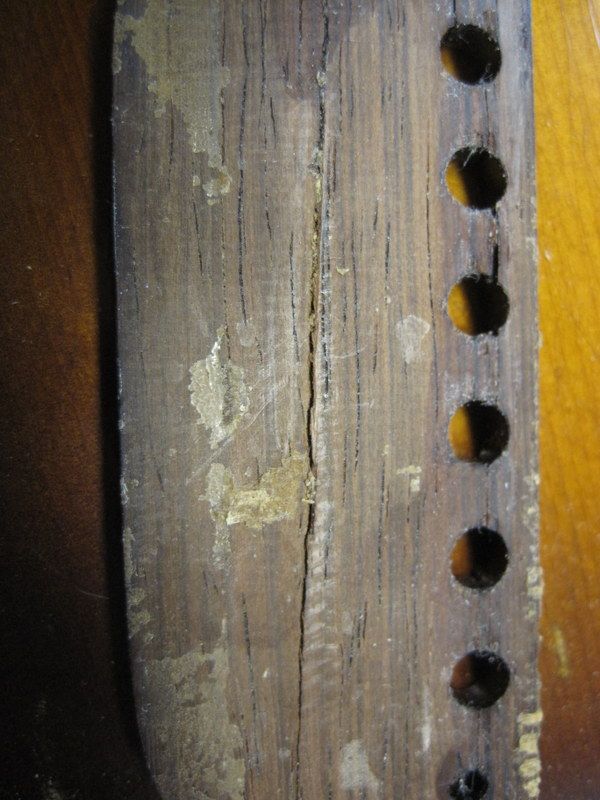
While waiting for the glue on the plugs to set up I am piecing back together the bridge. The large part fit quite well and after some playing around I got most of the chips I found in the case and instrument to fit back in rather good too. With a couple of clamps holding the little puzzle together I wicked in some thin CA to hold it back together. After that set I filled any small remaining voids with rosewood dust and some more CA . But the bridge still had another problem. As part of a previous repair a split that had formed under the saddle slot the last time the bridge popped was failing. I could quickly tell this repair was done with yellow glue. It appeared as if they simply filled the crack with it. It must have caused problems still after wards as then from the top someone had tried to wick in some hide glue. The saddle was actually slightly glued in the slot when I started. This is likely because the string balls were still pulling against the bottom of the bridge. Simply gluing the bridge back on did not fix that.
So I gently flexed the bridge at this crack a few times and loosened as much of the old glue as I could that way. I then used a variety of picks, blades and improvised tools heated up on my Bunsen burner to pick out and dislodge as much more of the old glue as I could. Then the gap was filled with a medium CA. After a bit of flexing the fracture and adding some more glue I was satisfied that the void was full. I clamped the bridge down onto a caul lined with wax paper to press it back flat while the CA dried. A bit of scraping and sanding after that and it looked pretty good for a jigsaw puzzle. I sanded the bottom of the bridge flat on my small surface plate and scraped all the old glue from the top. Now I could glue the bridge back onto the guitar and continue with repairing the bridge plate.
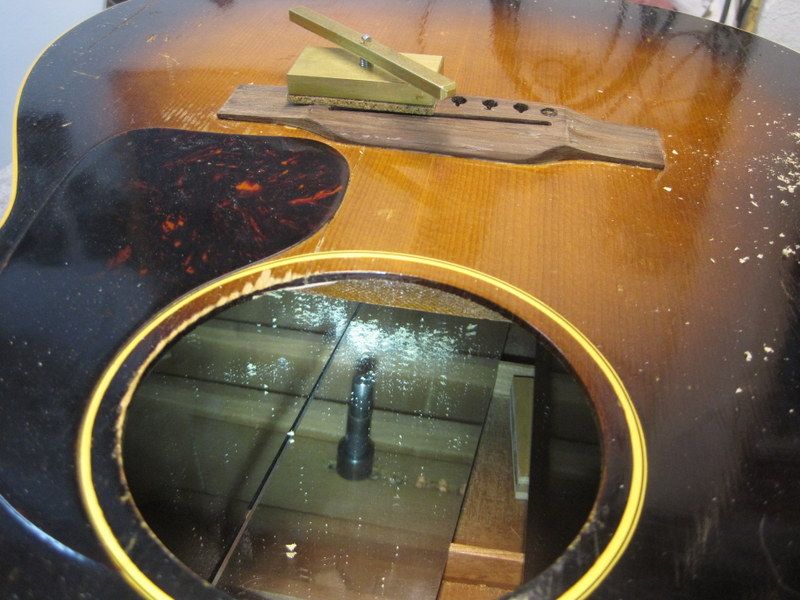
The repairs needed done in this order to be possible. That is because the tool indexes on the peg hole. After the top is repaired the holes are no longer there to use the tool from inside. By gluing the bridge back on I can now align pilot holes for the tool accurately and begin work on the bridge plate. The process is basically the same as what was done for the top, doing the work in two stages of three holes each. Here is a shot of the tool in use. Turning the handle outside the guitar turns the cutter inside and draws it into the wood. It is equipped with a depth stop. One thing I am doing different on the inside is I am using maple plugs instead of spruce. The maple will be much harder for the string balls to pull through and make this a long lasting quality repair.
After the bridge plate was plugged, pilot holes were again drilled through and the holes reamed to fit new standard size bridge pins. The pearl buttons were installed over the bridge bolts with some molten beeswax. A quick coat of lemon oil and here we have it, almost as if it never happened. So the next time you are going to re-glue a bridge, check and make sure that it is not the string balls pulling through that are causing an issue. All the glue in the world will not stop it from coming back off if that’s the case.
_________________
Brian
You never know what you are capable of until you actually try.
https://www.howardguitarsdelaware.com/