Good deal that the braces were not touched.
So before you do anything I'd swiss cheese out that ugly fill and get it somewhat able to work.
This is just a thought, but if you want to do fills I know for sure that putting a square edge end grain piece up against another square edge endgrain piece is not ideal, the joint wont be strong and it'll leave a really visible line. Scarf joints are much stronger and if you feather the edges out it'll be slightly easier to get it to blend into the remaining top, it will not be completely invisible though. Also I would want to add a tiny bit of strength to ensure that I don't break off my fills. I would not add a bunch of tiny little braces to reinforce the fills since they most likely would not add the strength you need and would be much more work.
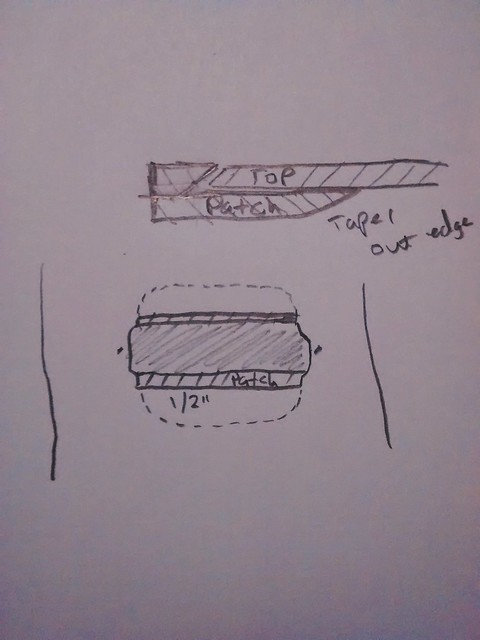
Here's a quick sketch. The grain lines are not what you should do for your patch but rather just to distinguish it from the rest of the drawing. I've exaggerated the length in the drawing so you can get an idea of how it would work.

The dotted lines represent how far under the top the taper would go, just a 1/2" under the edge (or as close as you can get to the top reinforcements) should be more than enough to strengthen the top. You could do this as one piece but I would do it as two pieces, cut the underside reinforcement first and then cut the scarf joint for the top. When you cut the scarf joint in the top make it a very slight angle (think 130 degrees). Once you have your fills glued in, plane it down flush and then proceed to cut it to the length you need to fill up the space in the top. Cut the length longer than you need so you can give yourself room for error.
I'm sure there's more than one way to do it but that method might work. I'm willing to be wrong however.


